
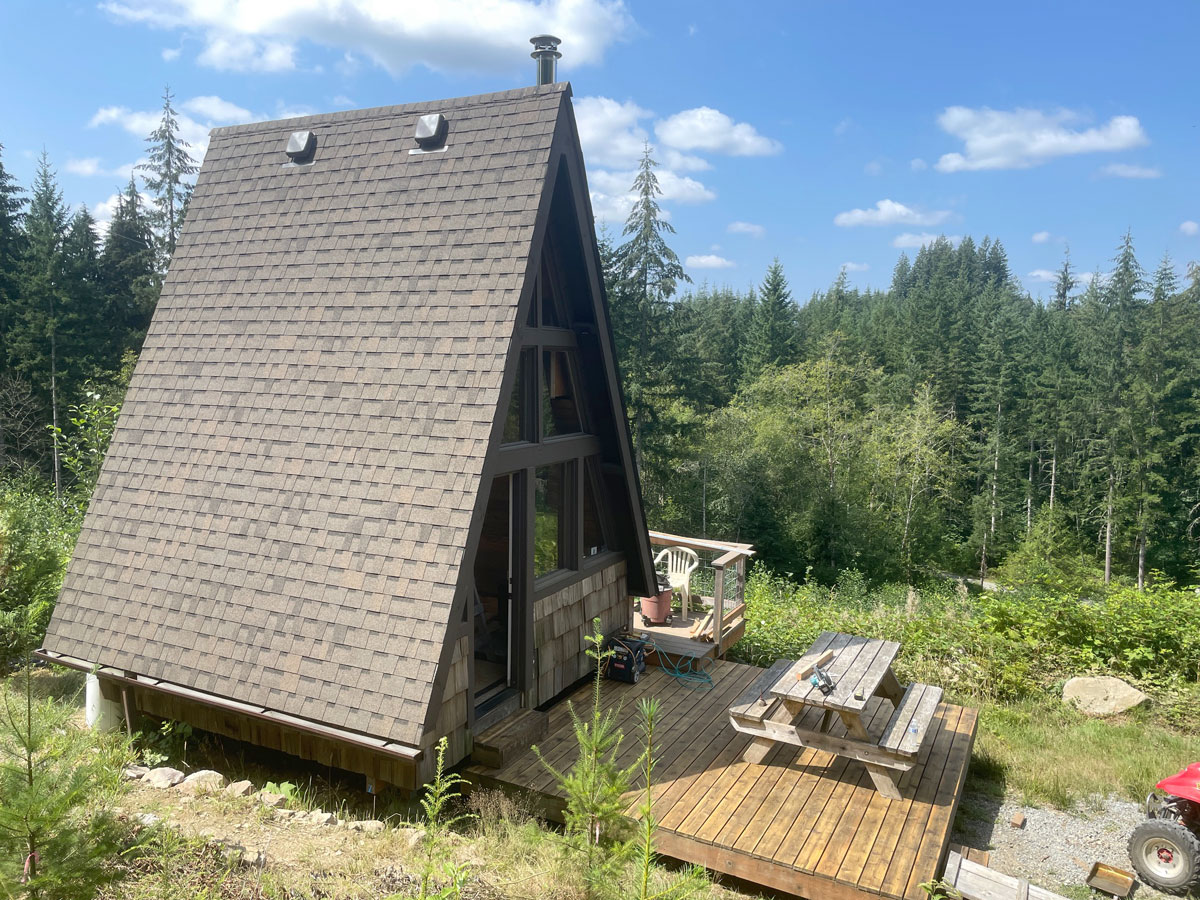
Summer 2024
Ready for initial testing! Browse the
User Manual
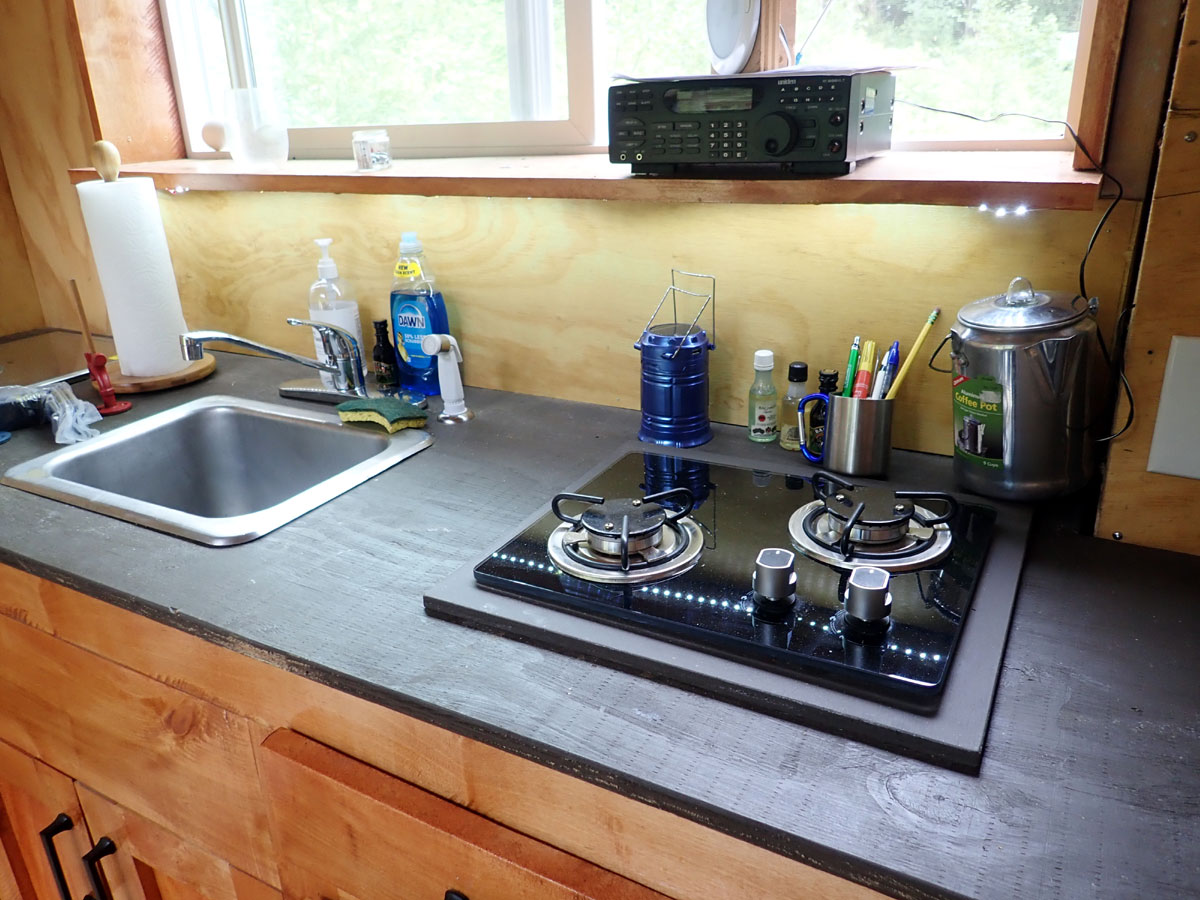
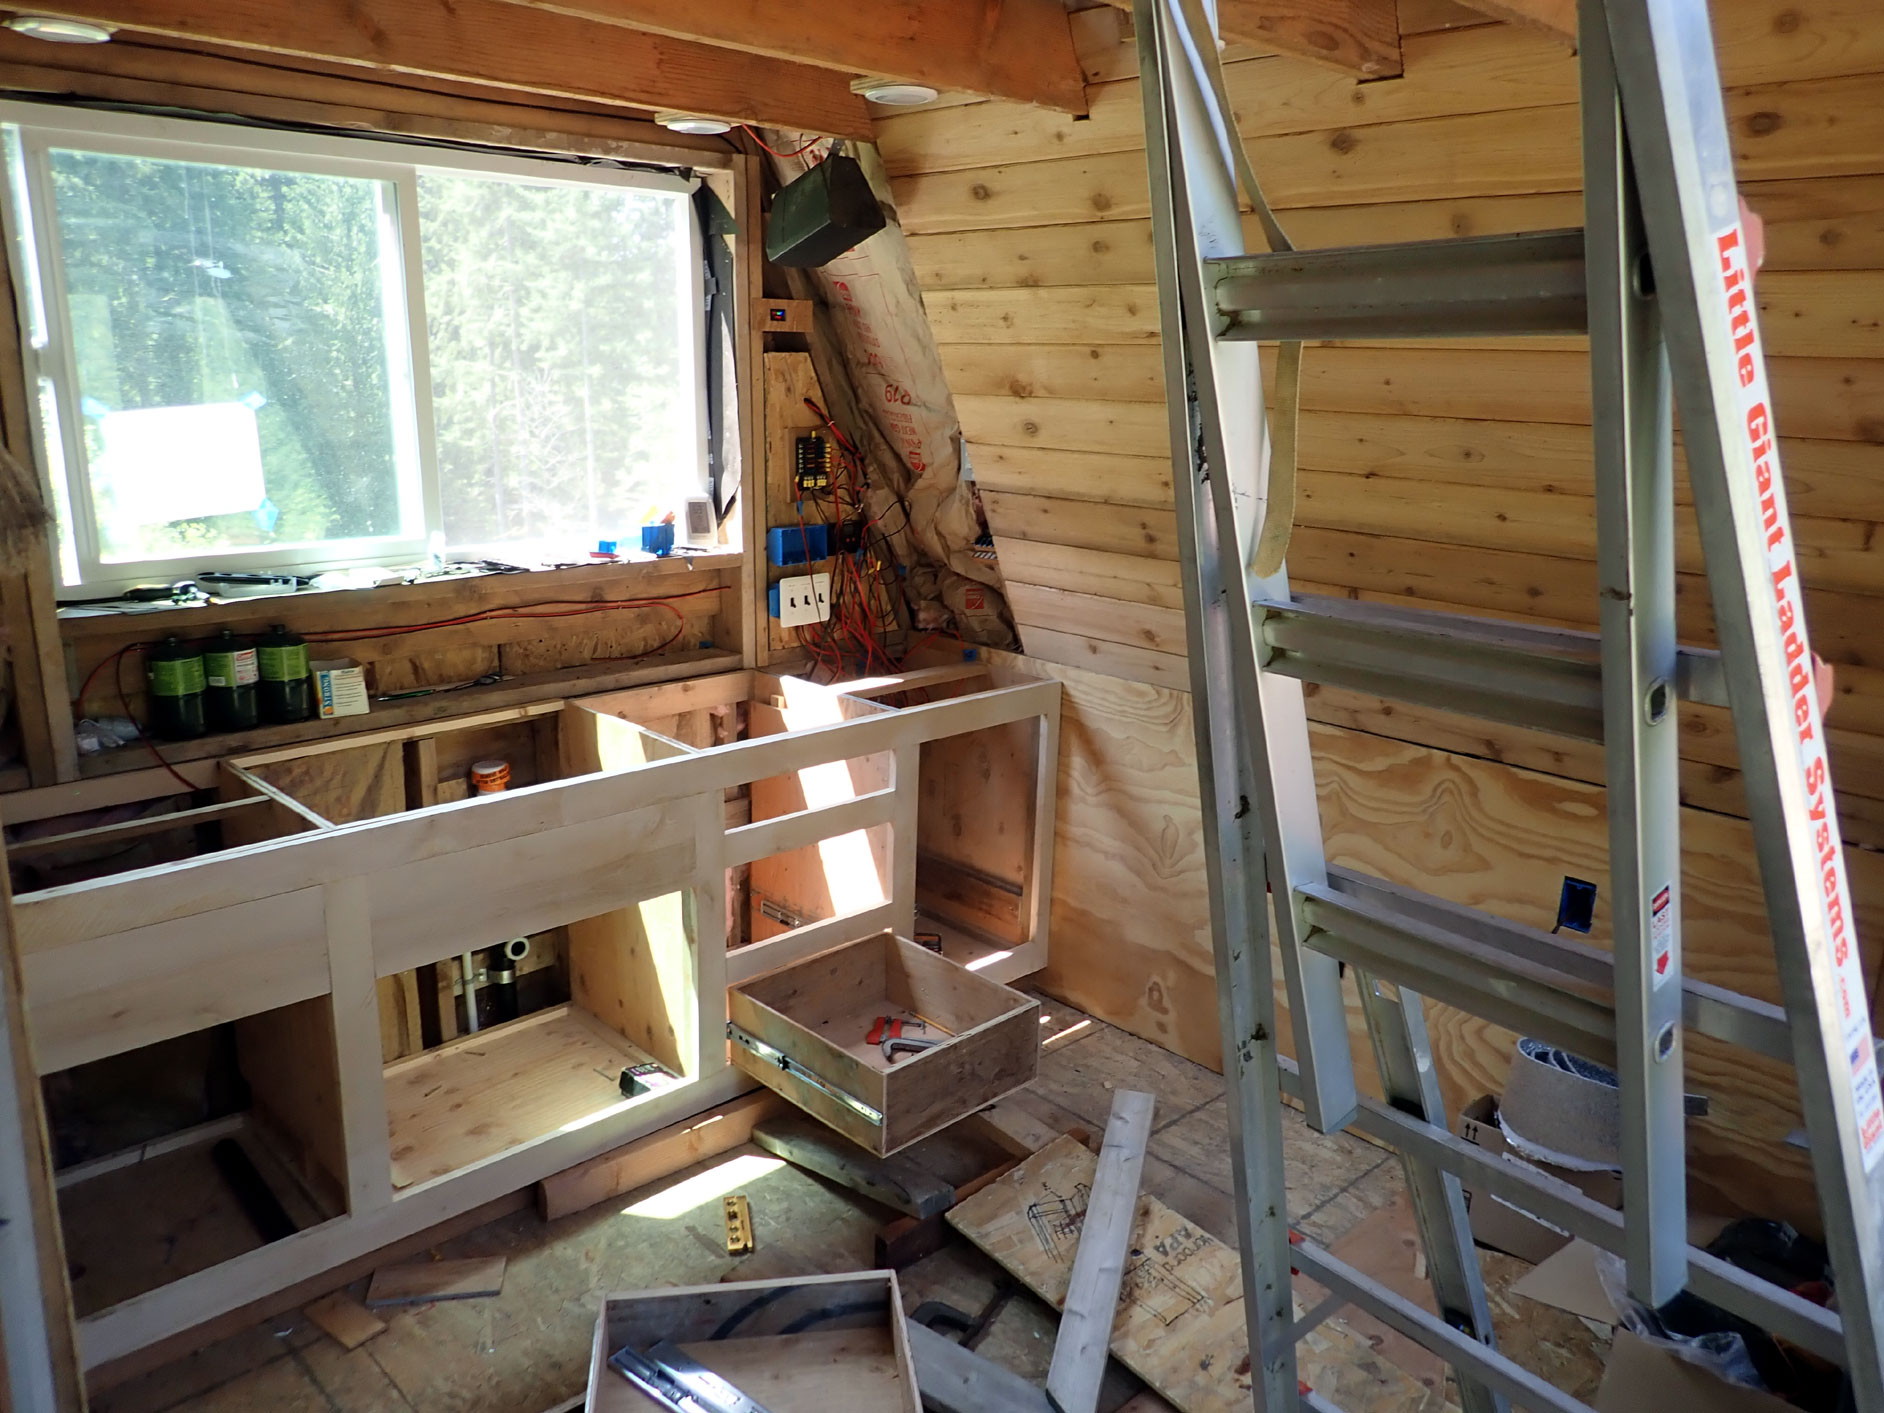
Kitchen counter is being populated with clutter!
L-R: Ice box, Sink, Stove
Note the under counter LED lights.

East wall shelf and blue accent, 12 Volt receptacle

West wall
Fold down table and DC plug above, shelf with blue accent, firewood box,
wood stove
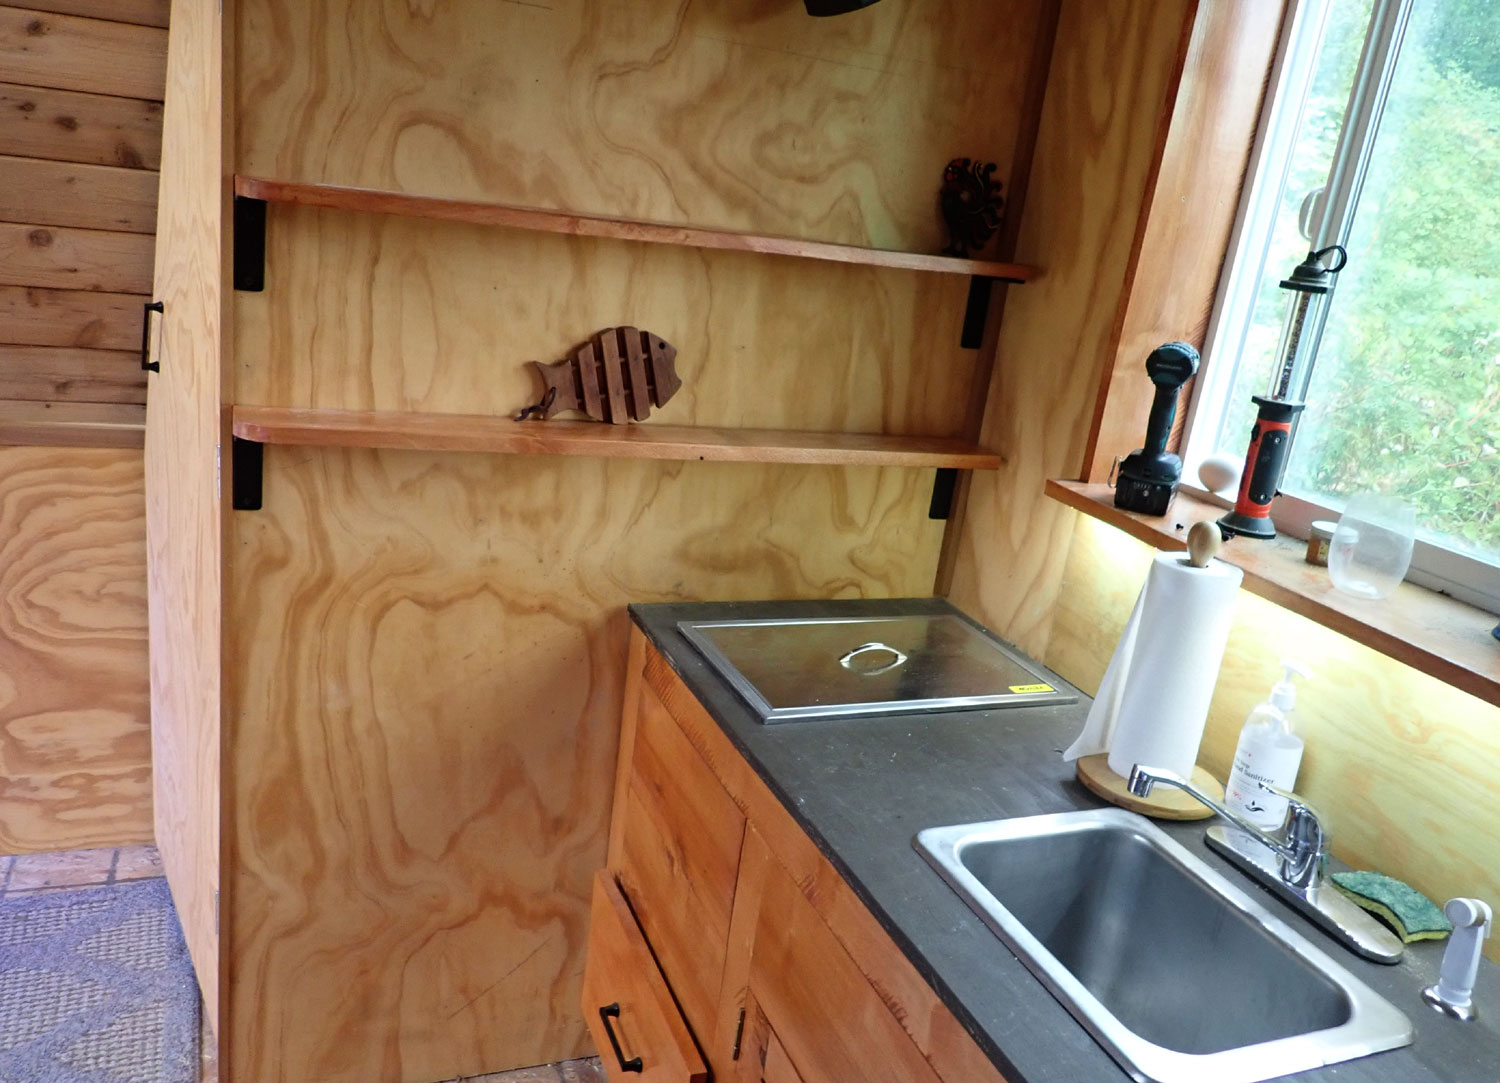
Kitchen counter, Left end with drop-in ice box

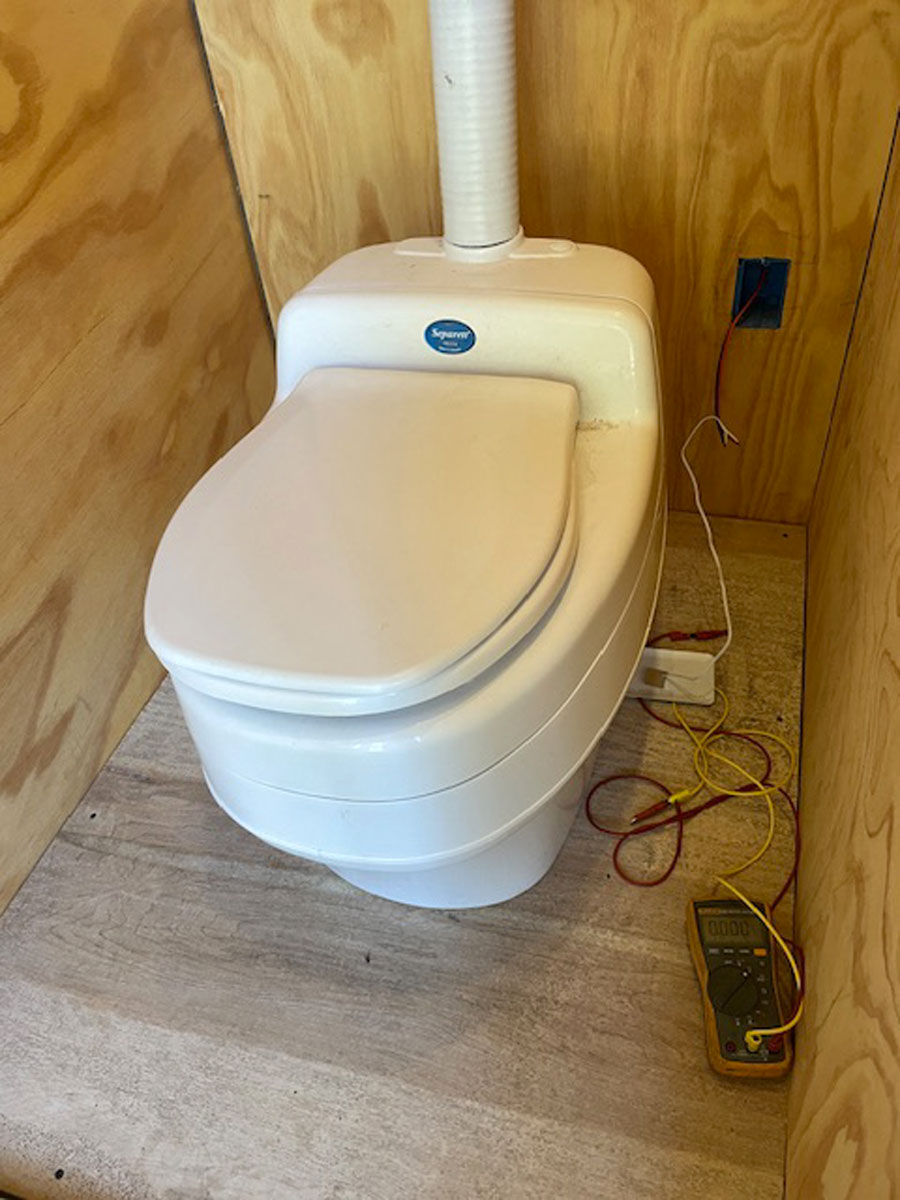
Separett Waterless Composting Toilet
Signs tell users to turn on the vent fan (under far kitchen cabint) and
be sure to observe the sit-down design.
LED lighting and fan complete this compact bathroom.
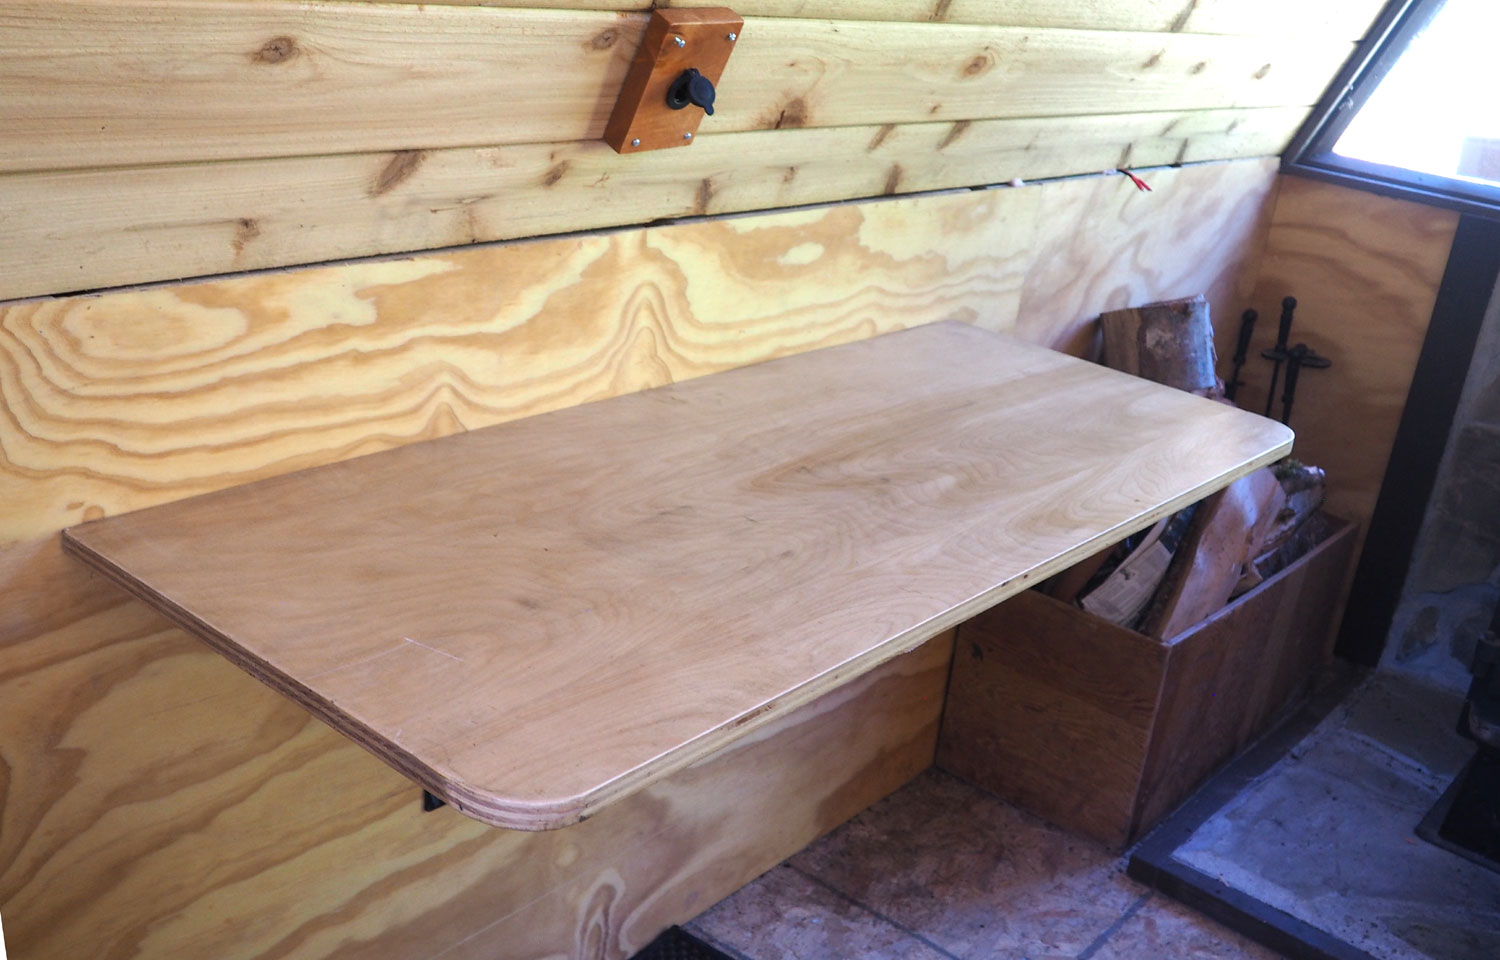
Fold-down table on West wall
12 Volt receptacle above
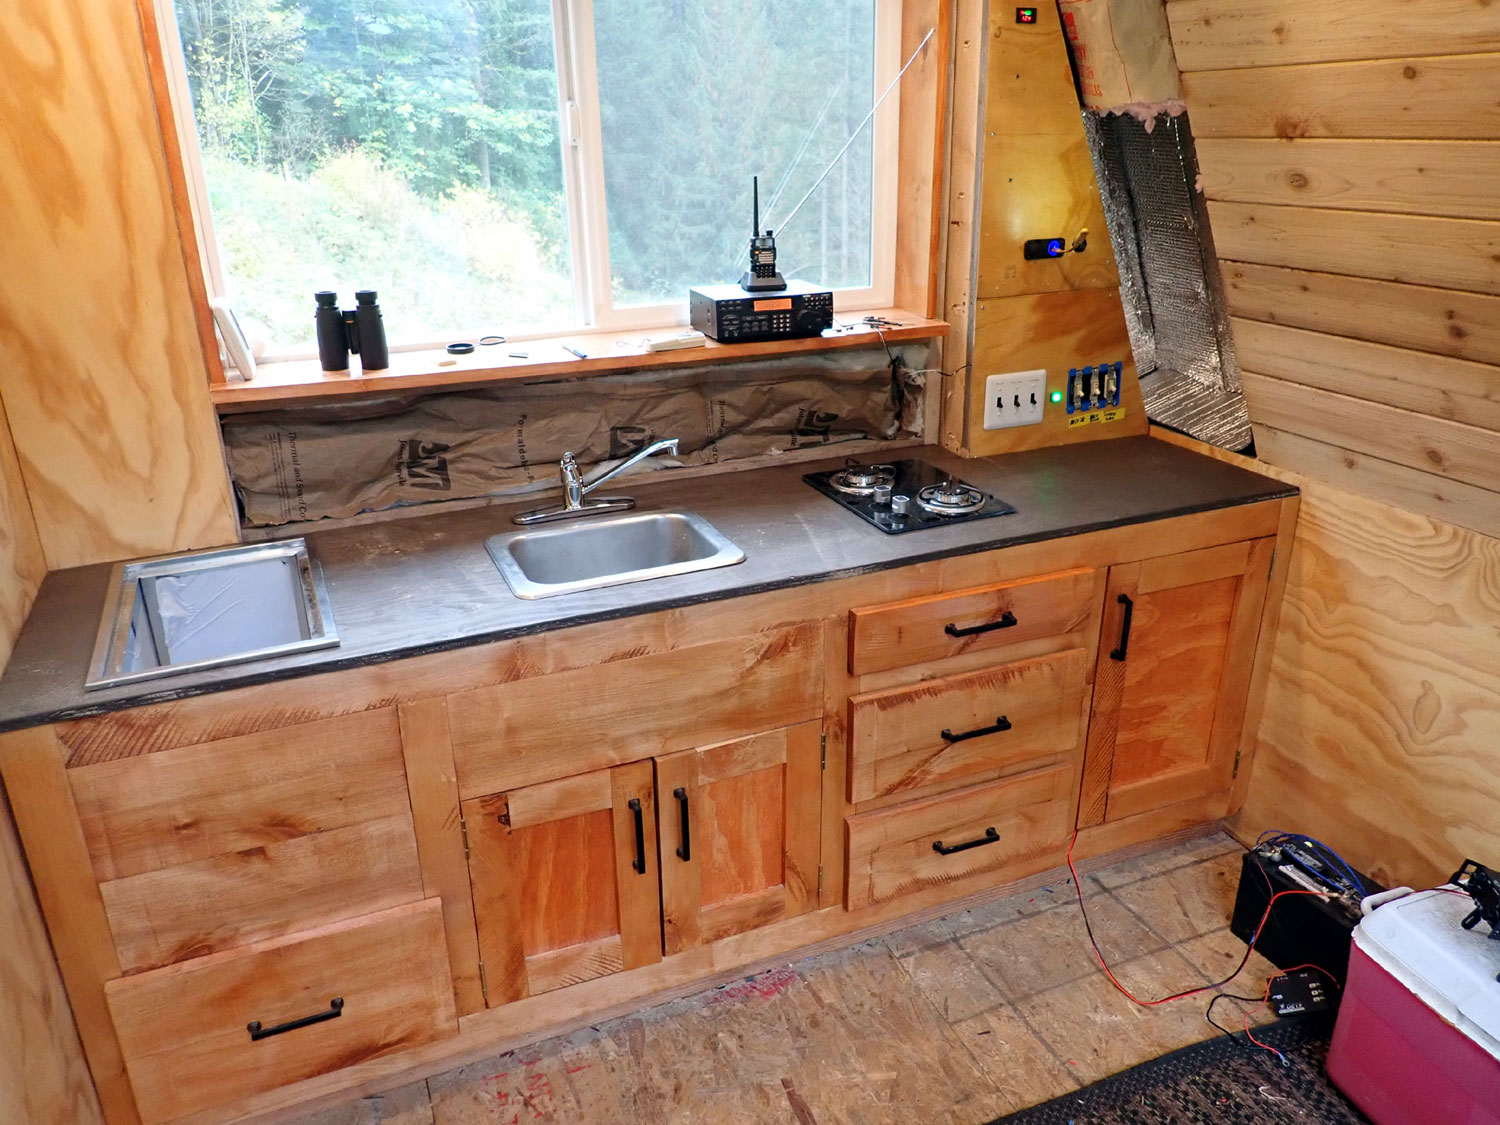
Kitchen Counter across the south
wall.
Valhalla Cherry stained and home-built cabinets.
Appliances installed

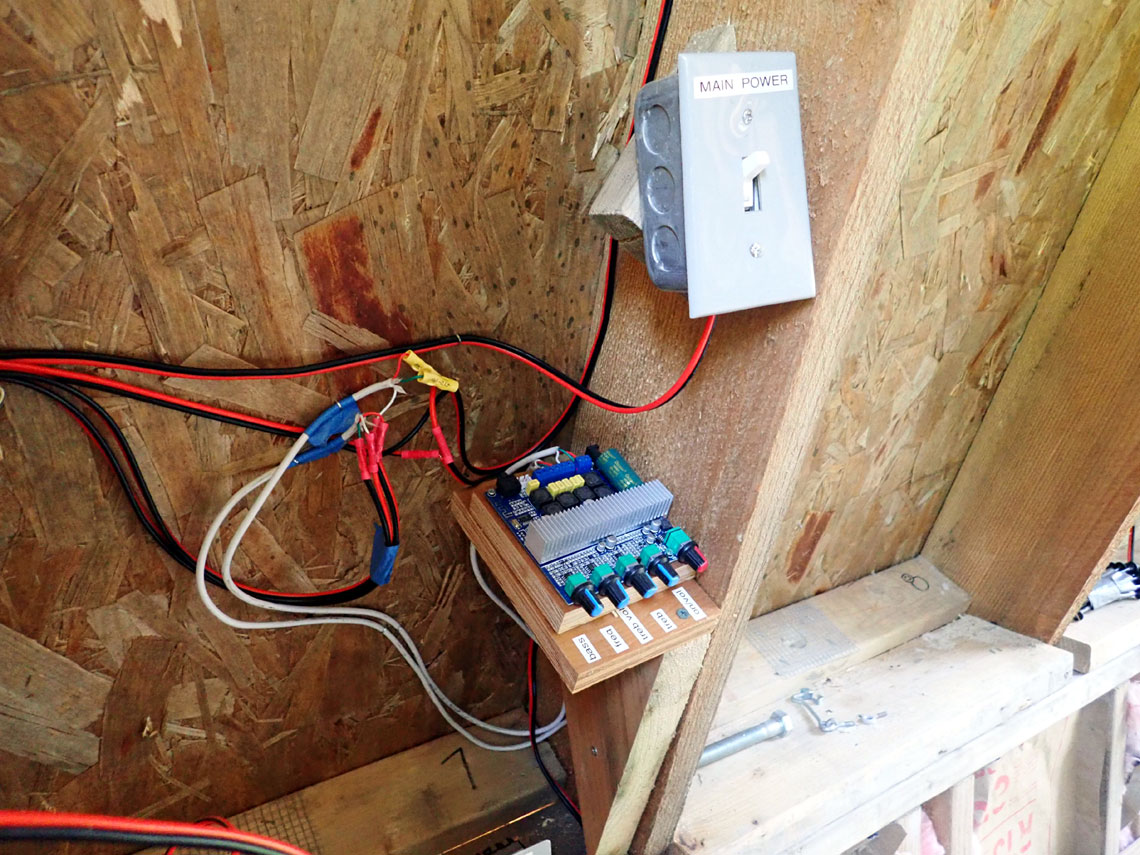
Electrical corner
Six switches for various lighting schemes. Green light indicates main
power is on.
USB outlet above, main power switch and and battery bank in cabinet
below.
Cubby in that back corner is still under consideration.
View photo of fuse block and
wiring behind the panel

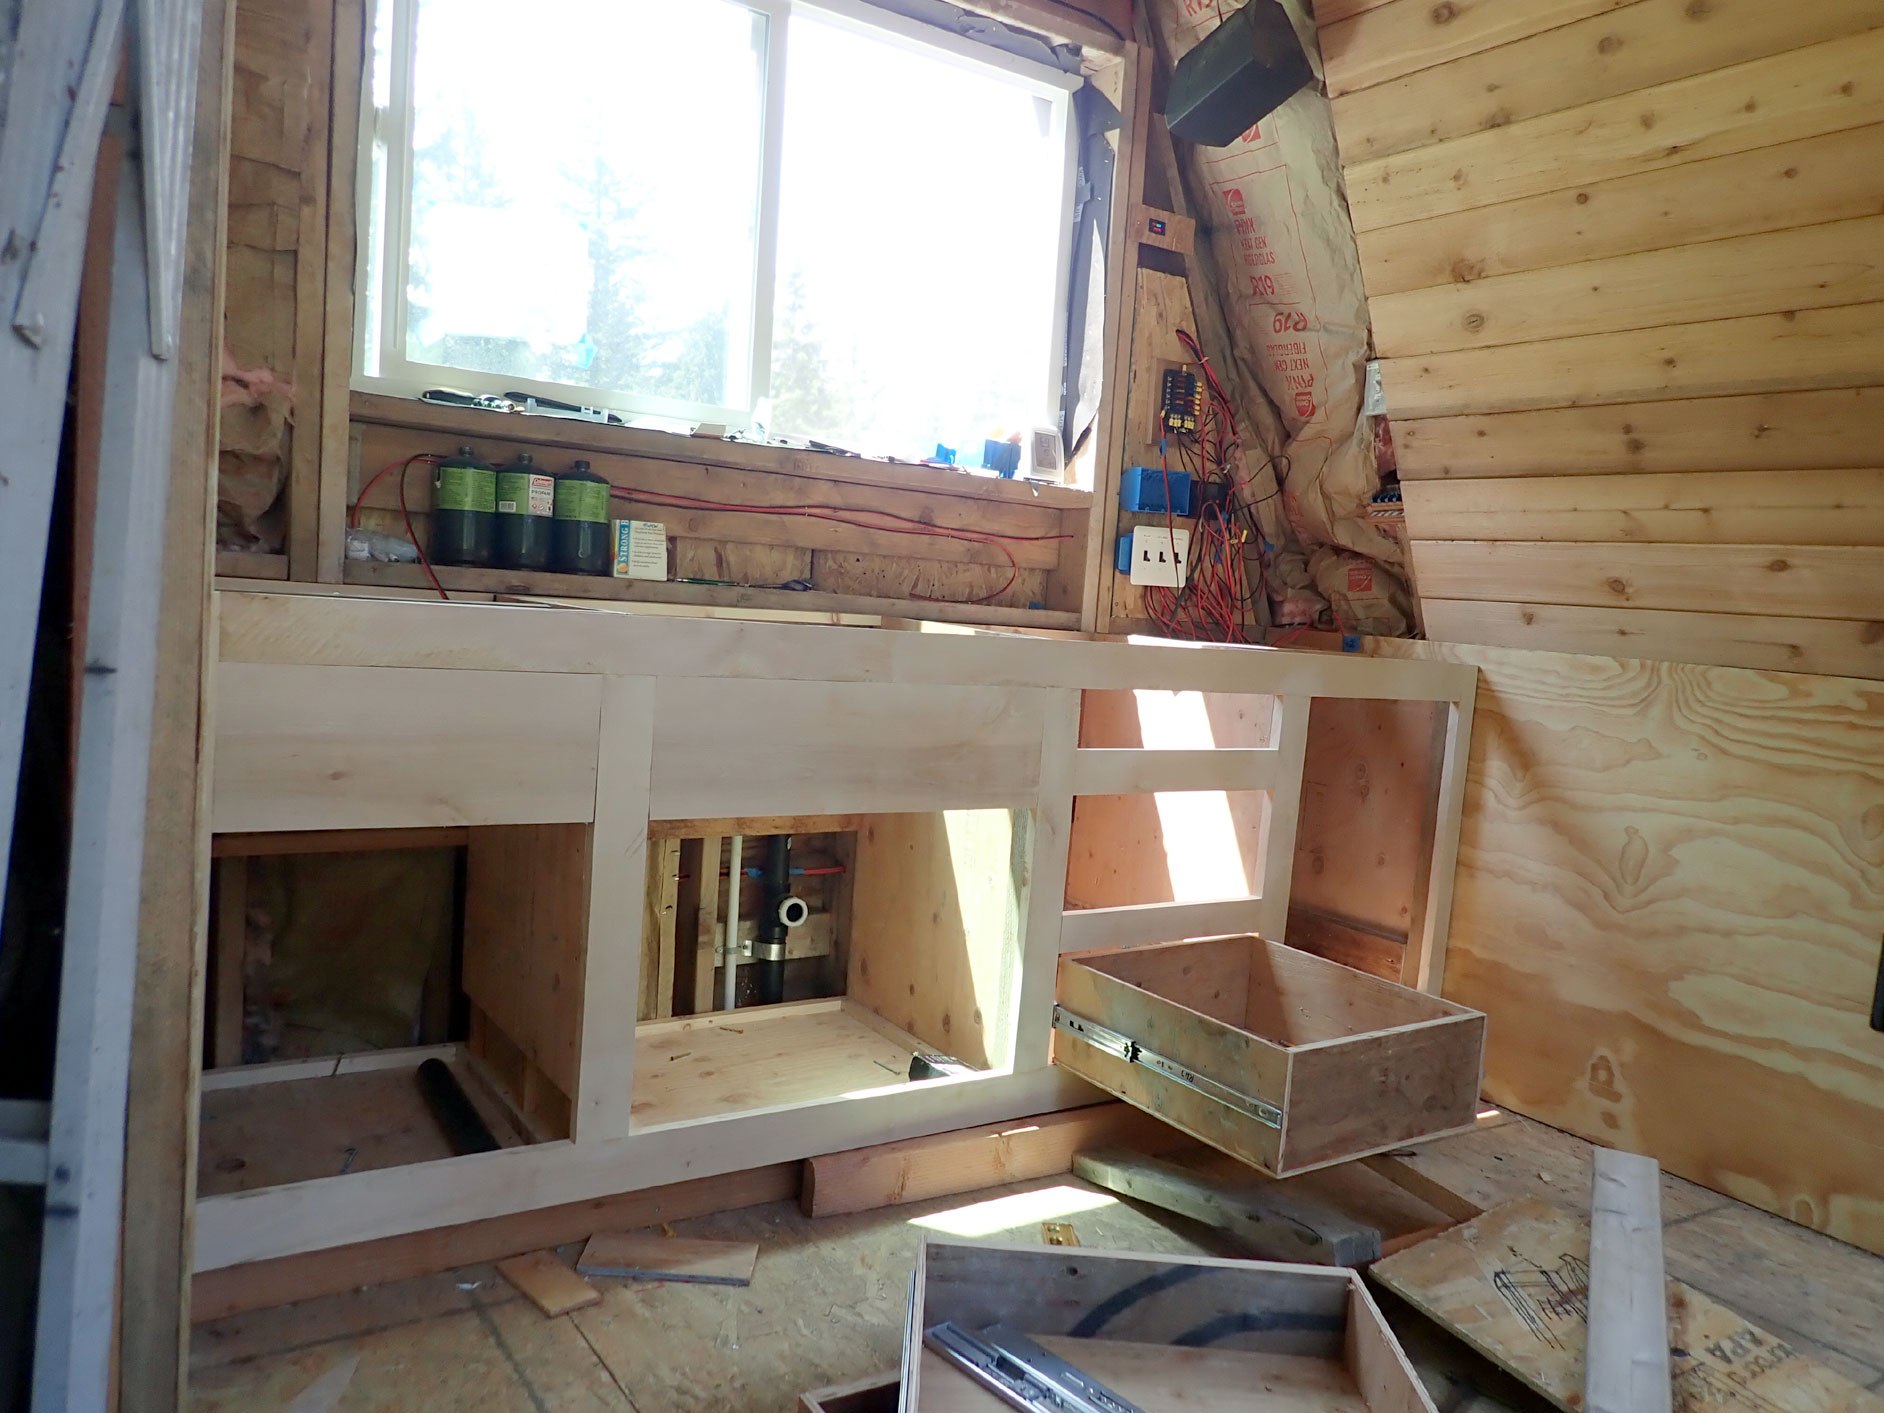
Roughing in in the composting toilet/bathroom
Kitchen cabinets installed and ready
for fit check of appliances.
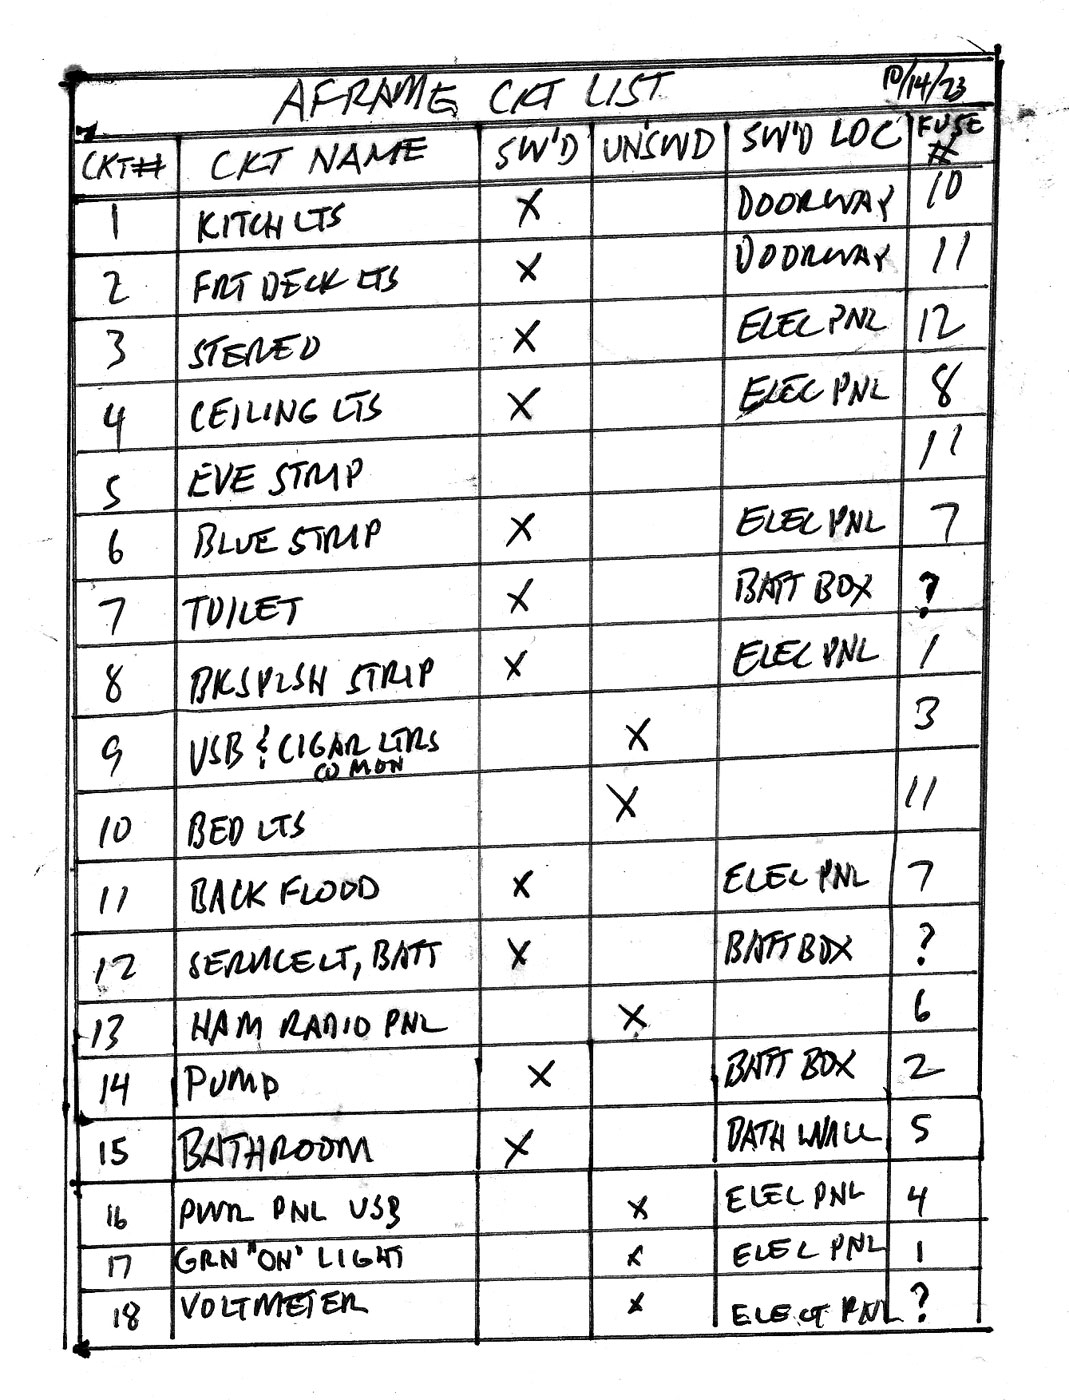
Electrical corner far right. We used nearly a whole 500' roll of wire. View a
circuits list.
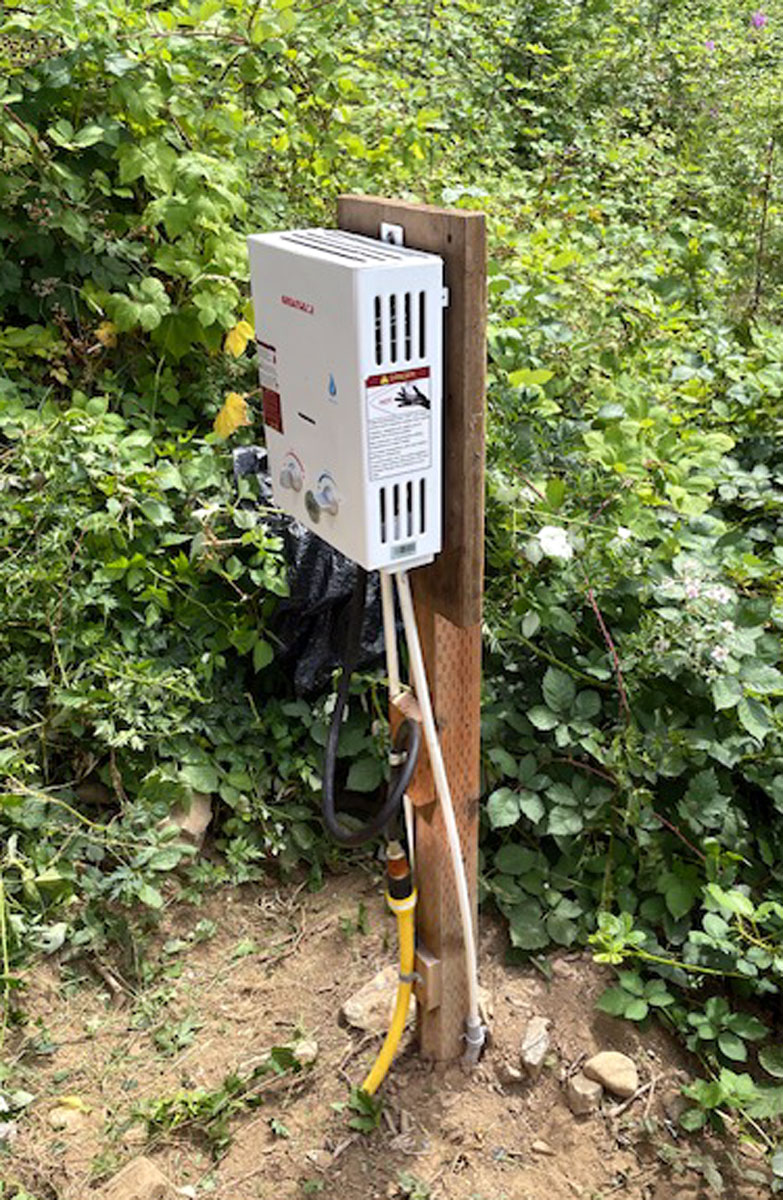
Tankless water heater mounted on a
post behind the building.
It will soon have a weatherproof box around it.
Initial mounting was on the back of
the building but it caught fire during testing and nearly enveloped
the entire back wall. see photo
of the burned unit.
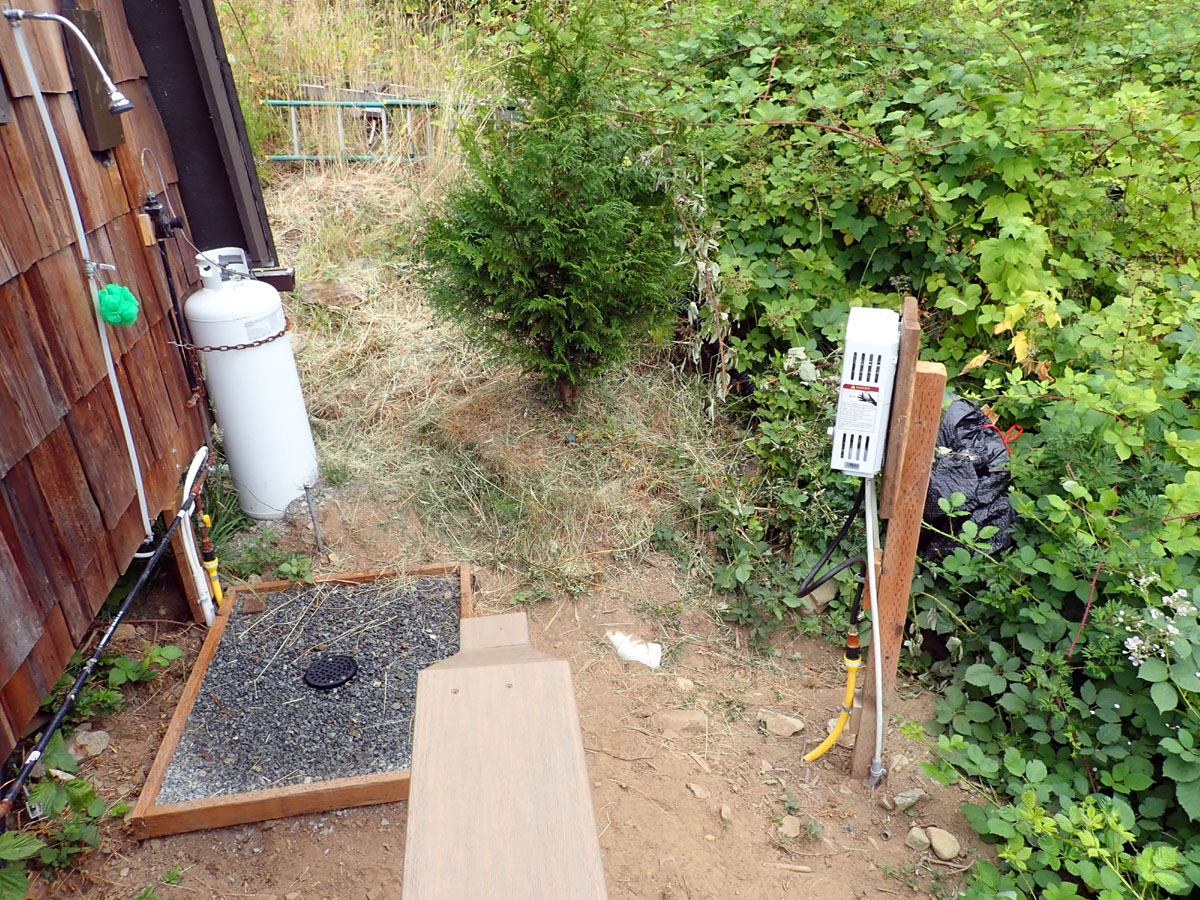
Shower stall with drain behind
building
We will build a box for it in the next few weeks.
Hot and cold pex water lines run inside separate sealed conduits six
feet to the building.
Propane gas line is the yellow pipe and us certified direct bury.
The Ebay seller quickly sent a replacement. Infiltration box has a drain
that connects to the grey water piping.
Final hookup of
Separett waterless composting
toilet.
A small fan dries the solid waste and exhausts through the pipe to the
outside.

Composting toilet with top open
Urine is directed out through the building's grey water system to a
rockpit.
Solid waste goes in a compostable bag in the black bucket which rotates 3 degrees every time
one sit on the seat. The bucket holds 30 days of wasteand is dried
by the fan.
This is a mandatory sit-down toilet for all users!
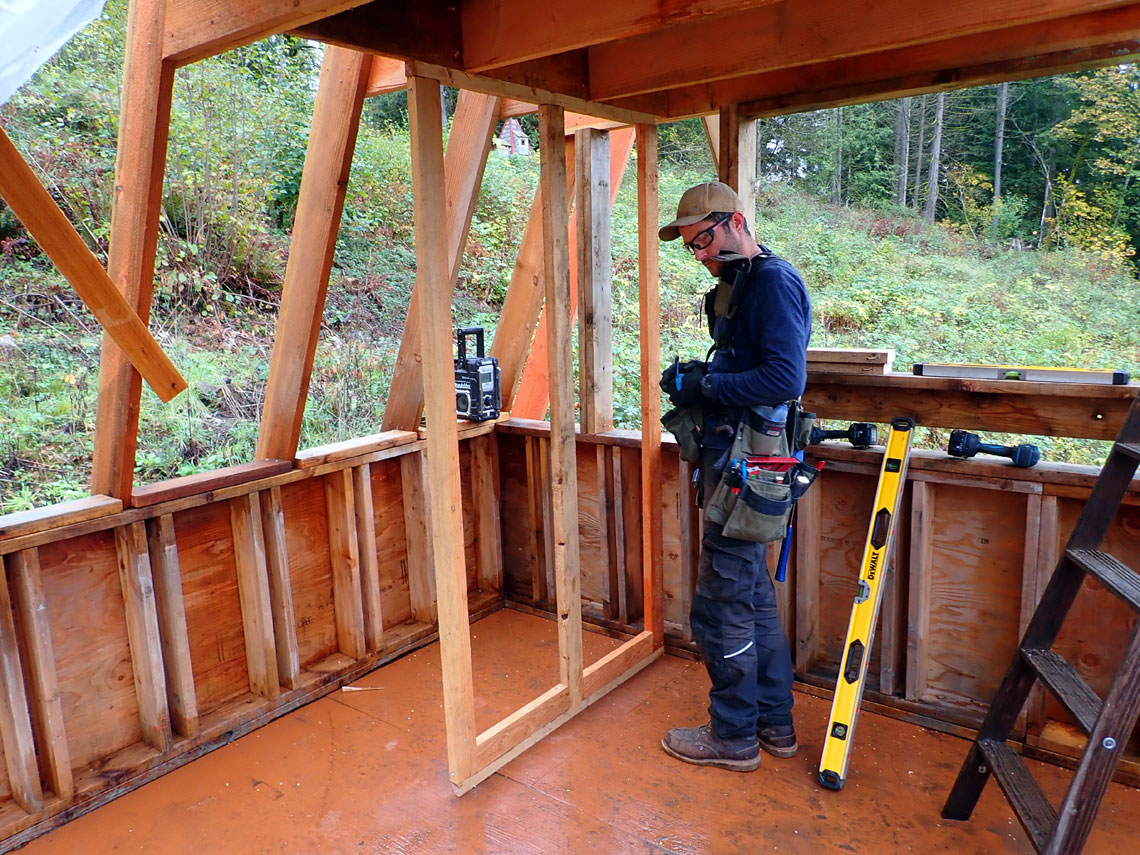
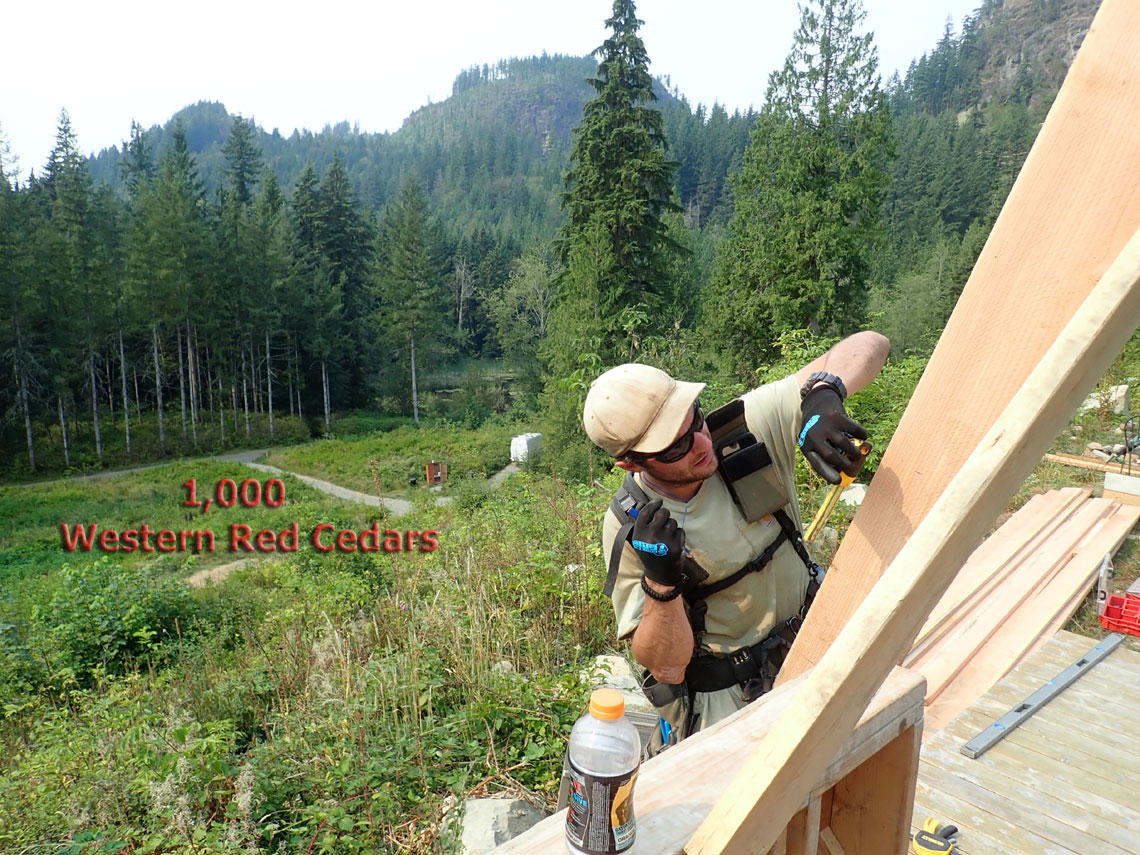
Taylor installing the loft east wall.
We used high quality 1/4 plywood with natural stain/sealer for all
interior walls
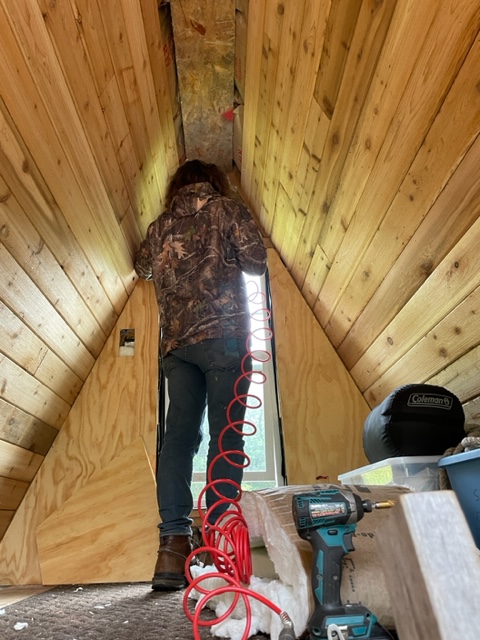
Trying out the
shortwave antenna installation
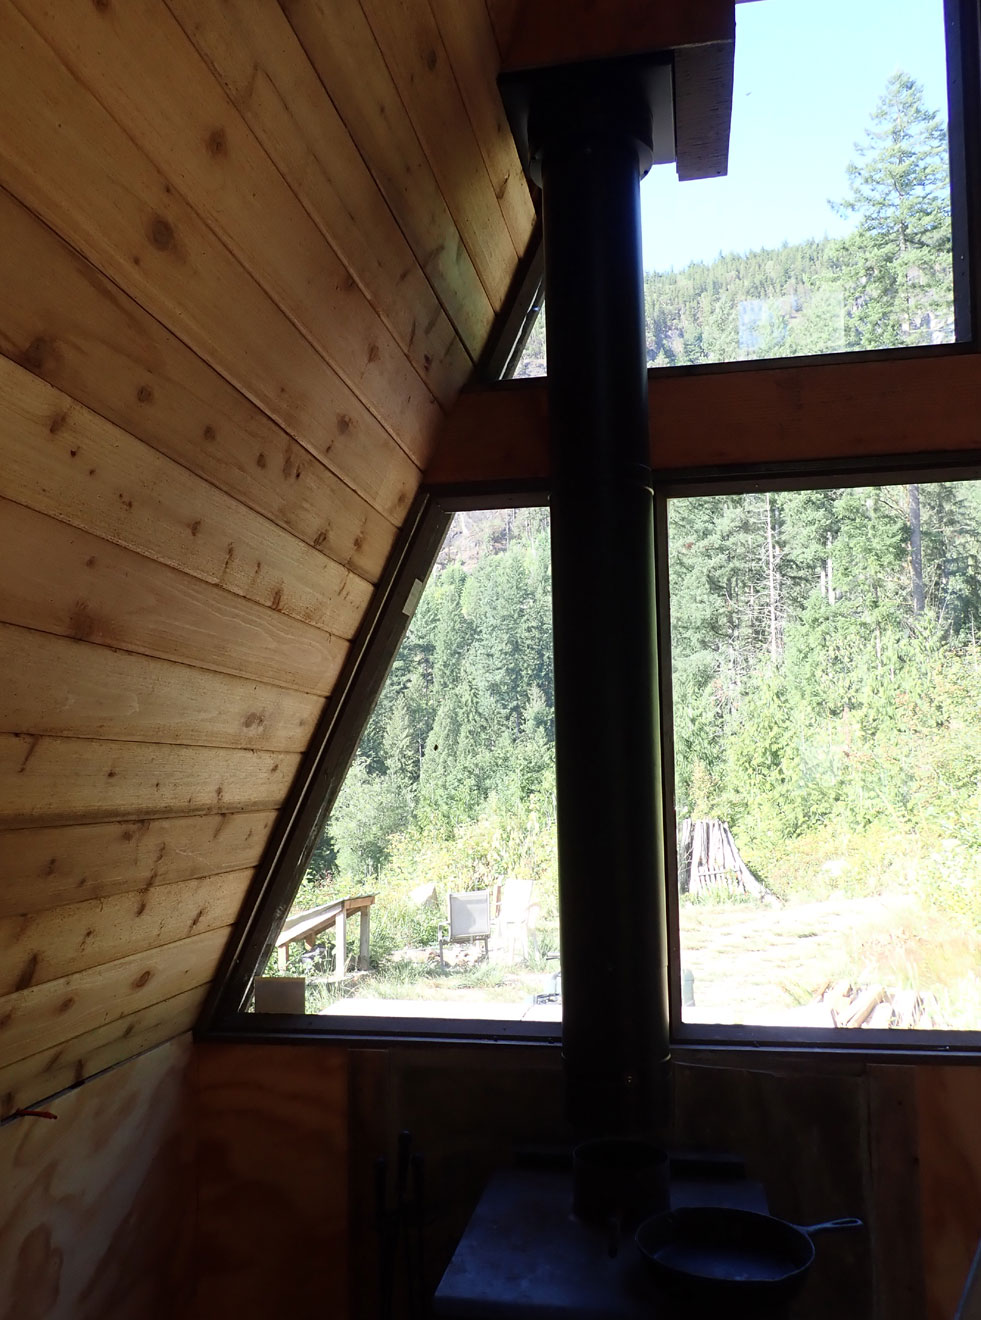
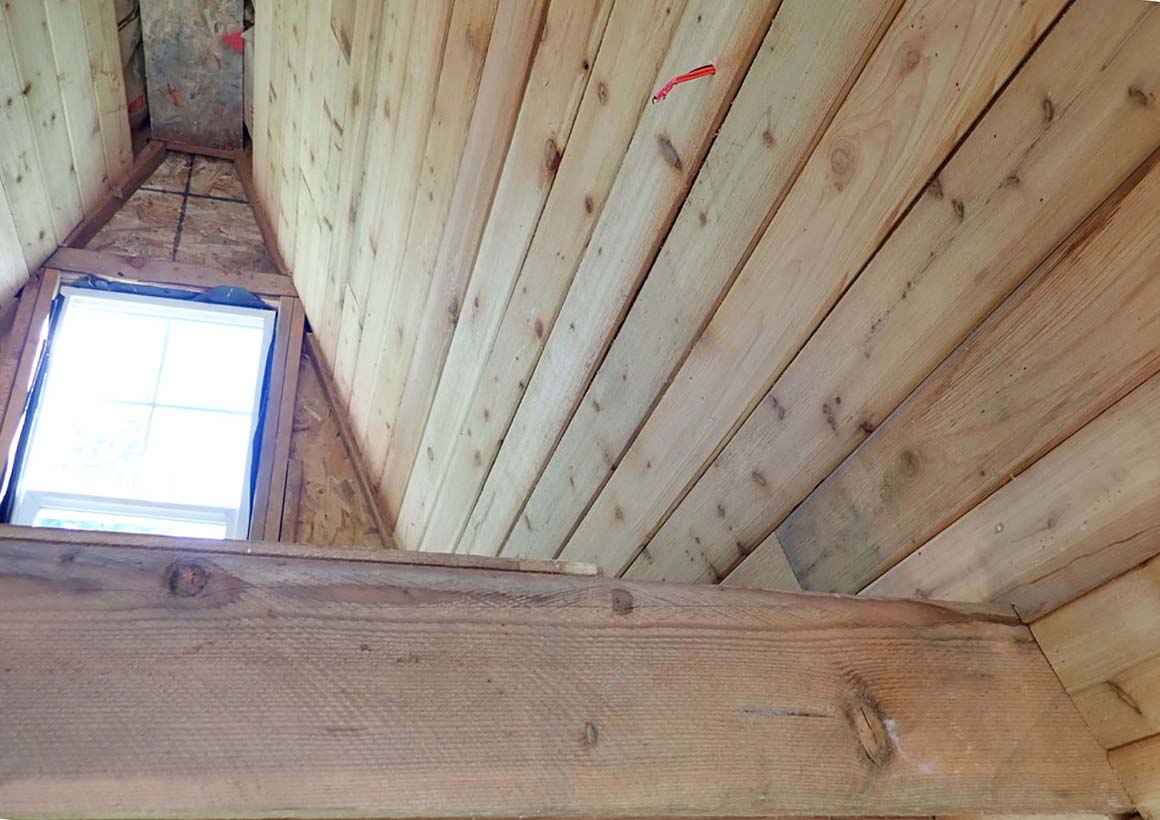
West interior cedar
ceiling finished
Wood stove in foreground, chimney pipe between windows
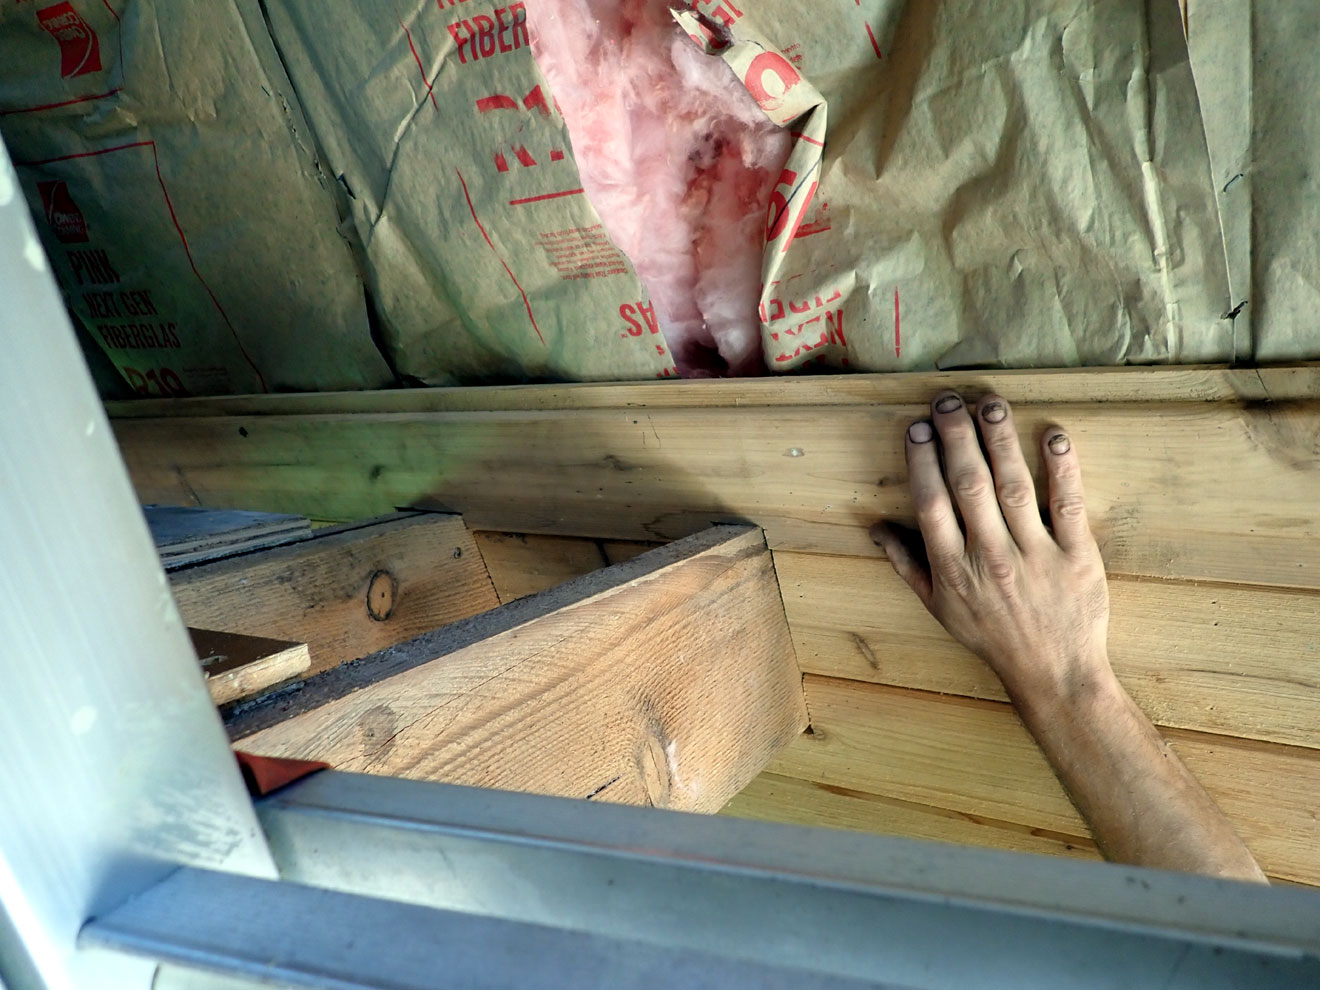
Fitting the cedar lapped boards around the 2x8 loft beams.
Cedar was excess leftover siding from the
prow house.
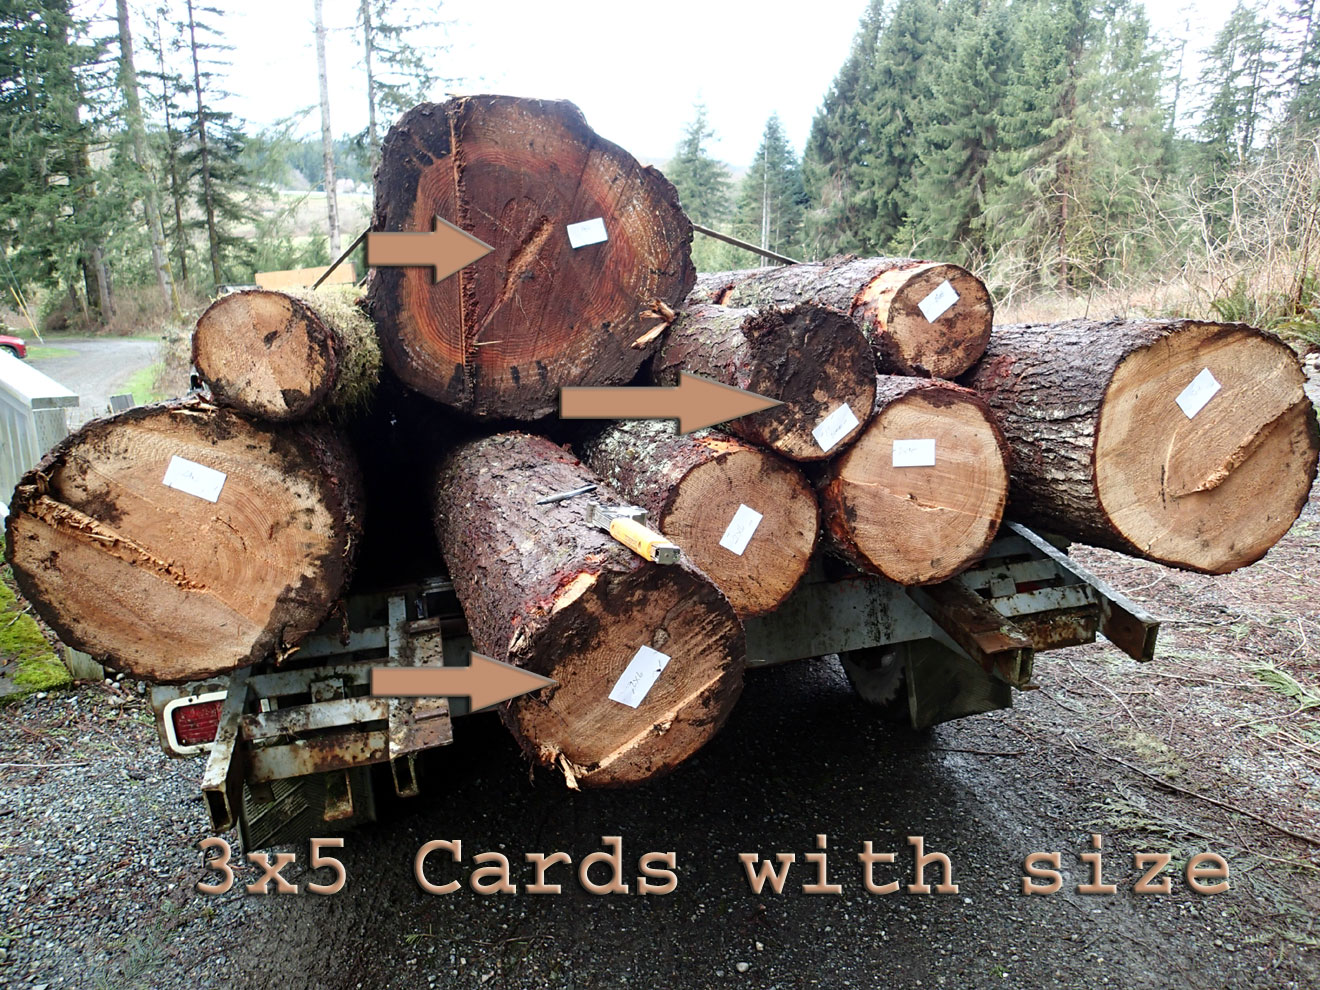
Beams are rough cut from trees on the property.
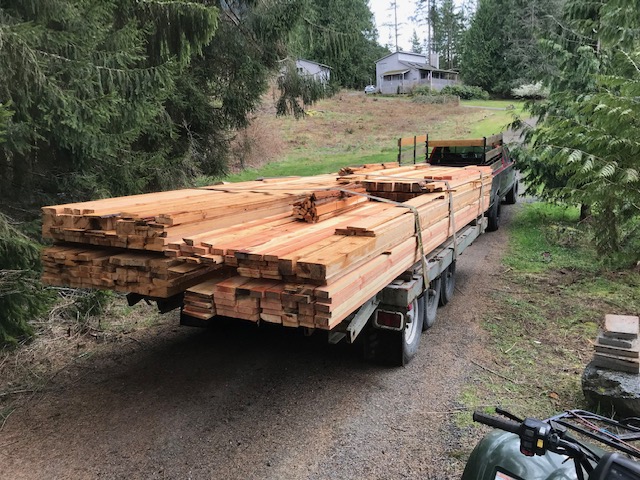
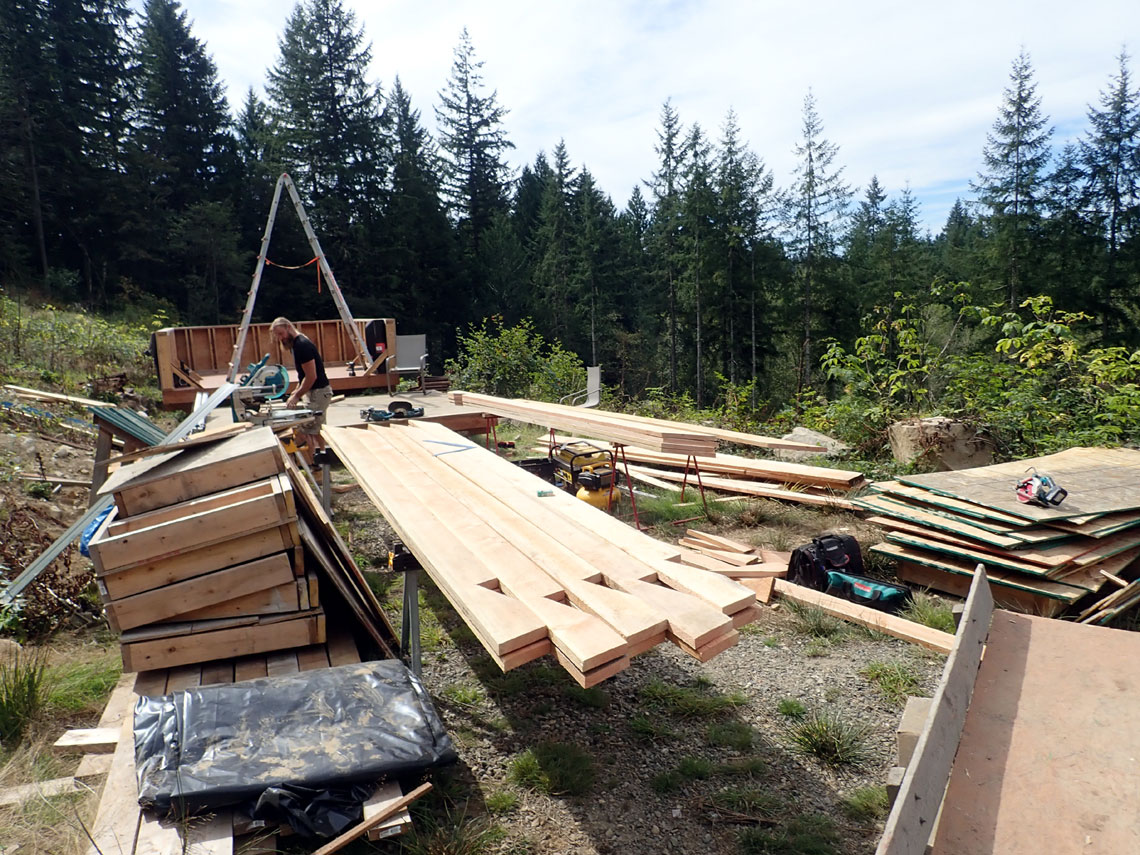
View photo of raw lumber arriving
from the sawmill down the road.
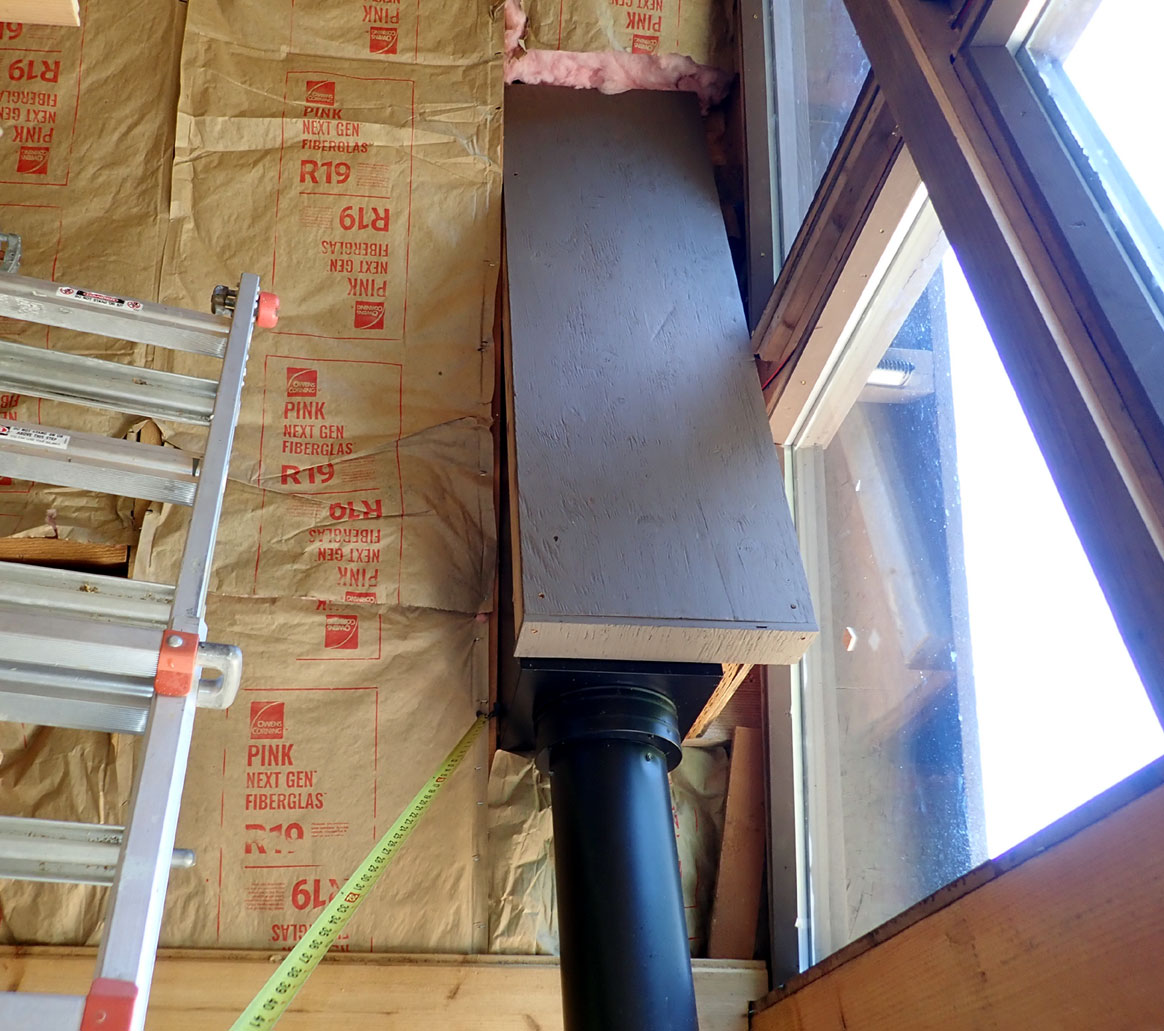
Fitting around the chimney box
West loft wall
Red wire top center is for an LED "up" light to "wash" the ceiling
at night
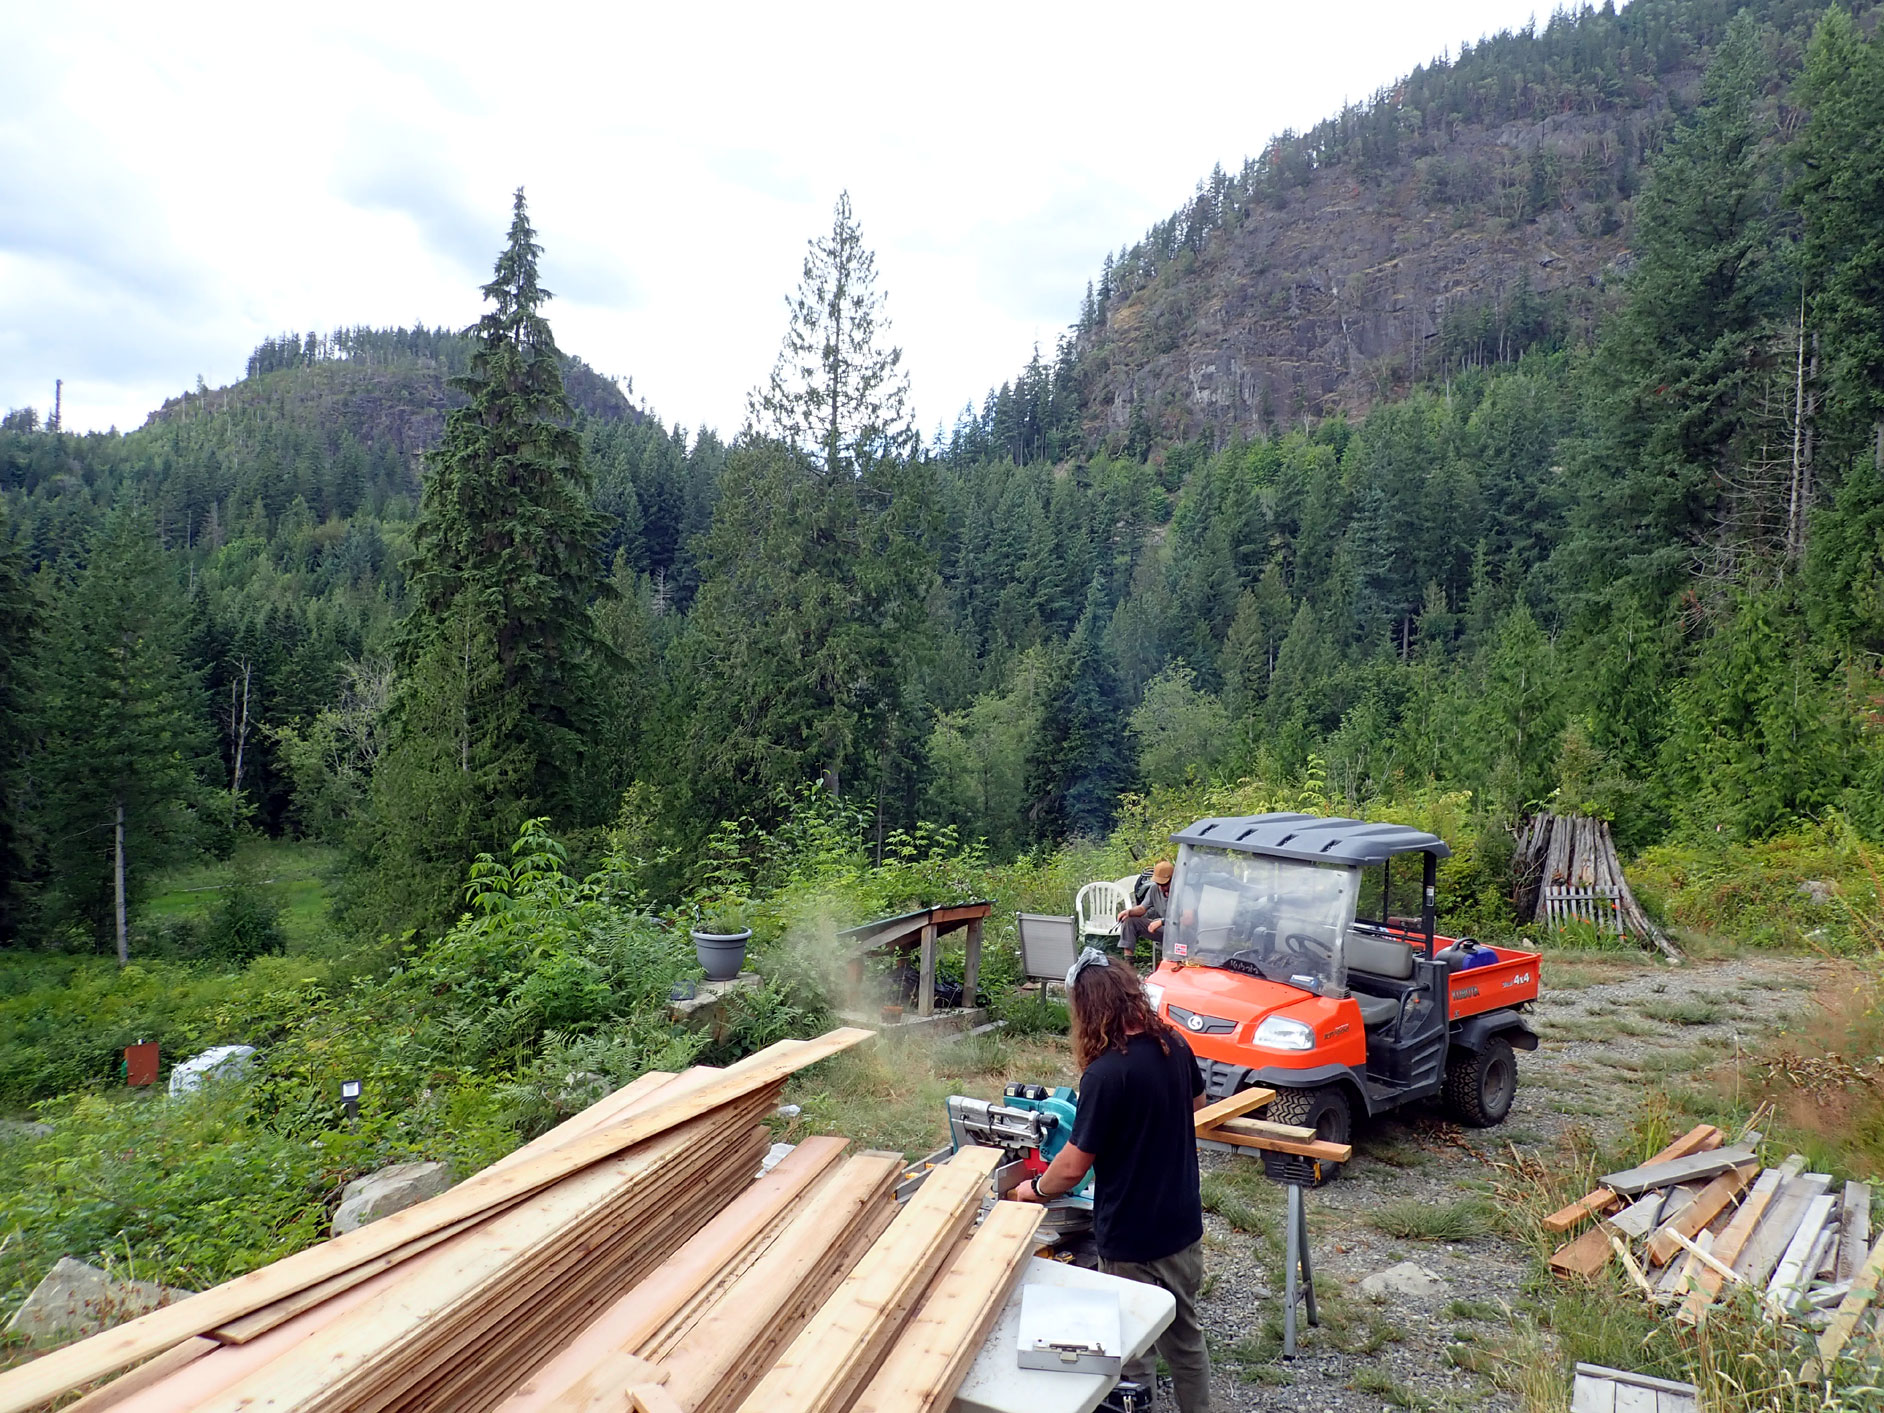
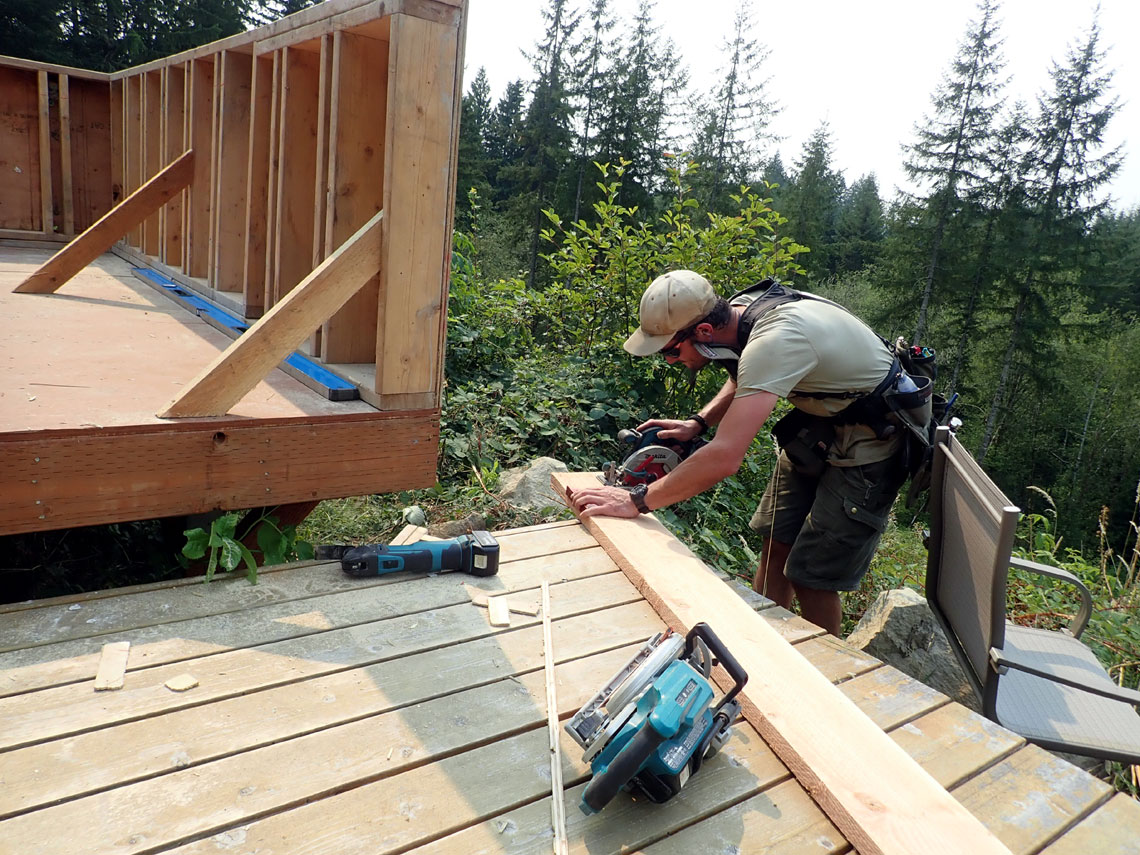
Here's Taylor
cutting some ceiling boards.
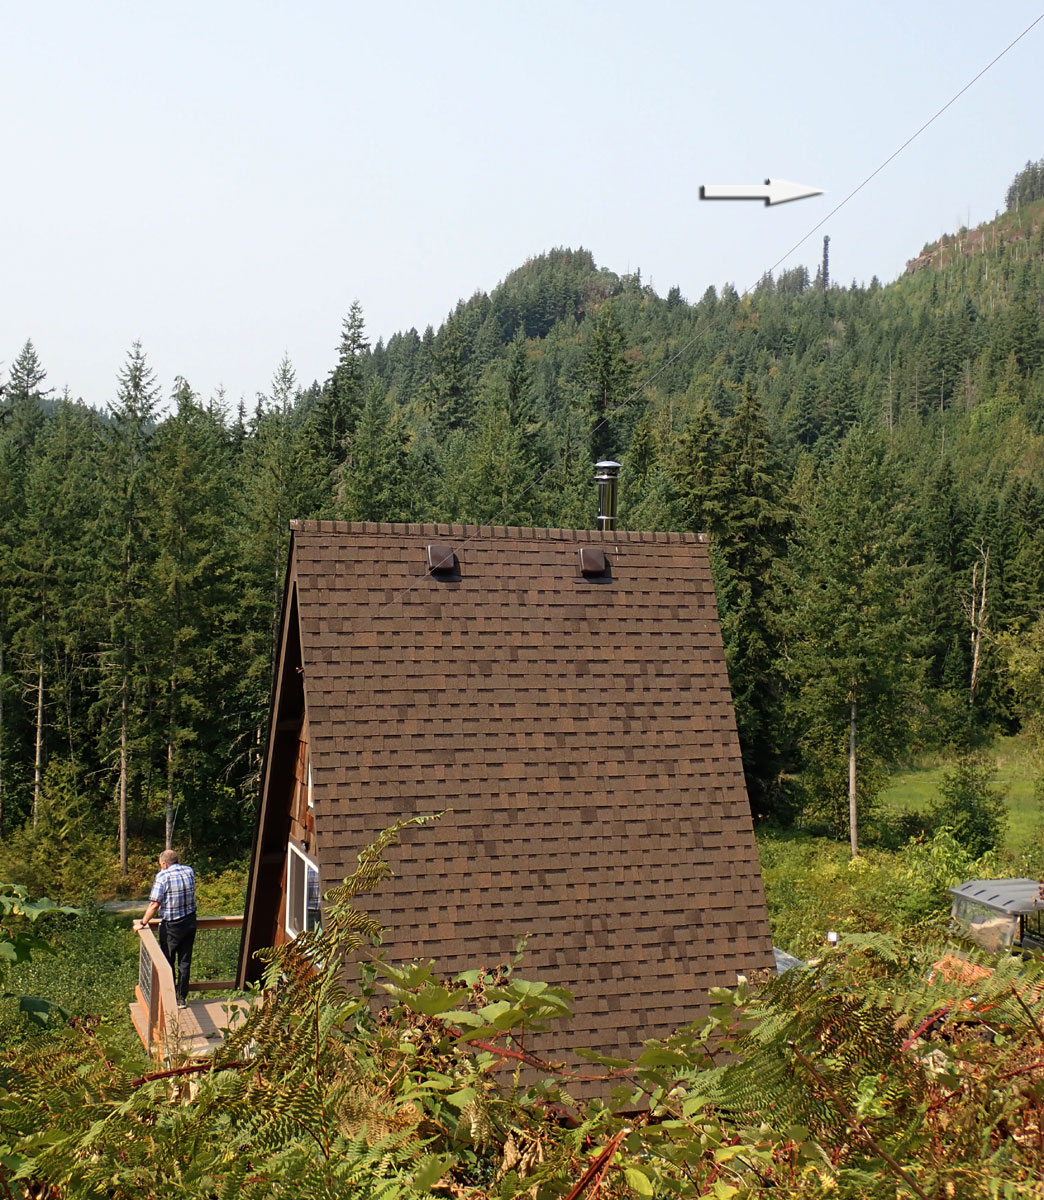
New ATT cell tower in
upper left provided nearly 50% of the materials for this project.
North wall with 12V
outlet and bathroom
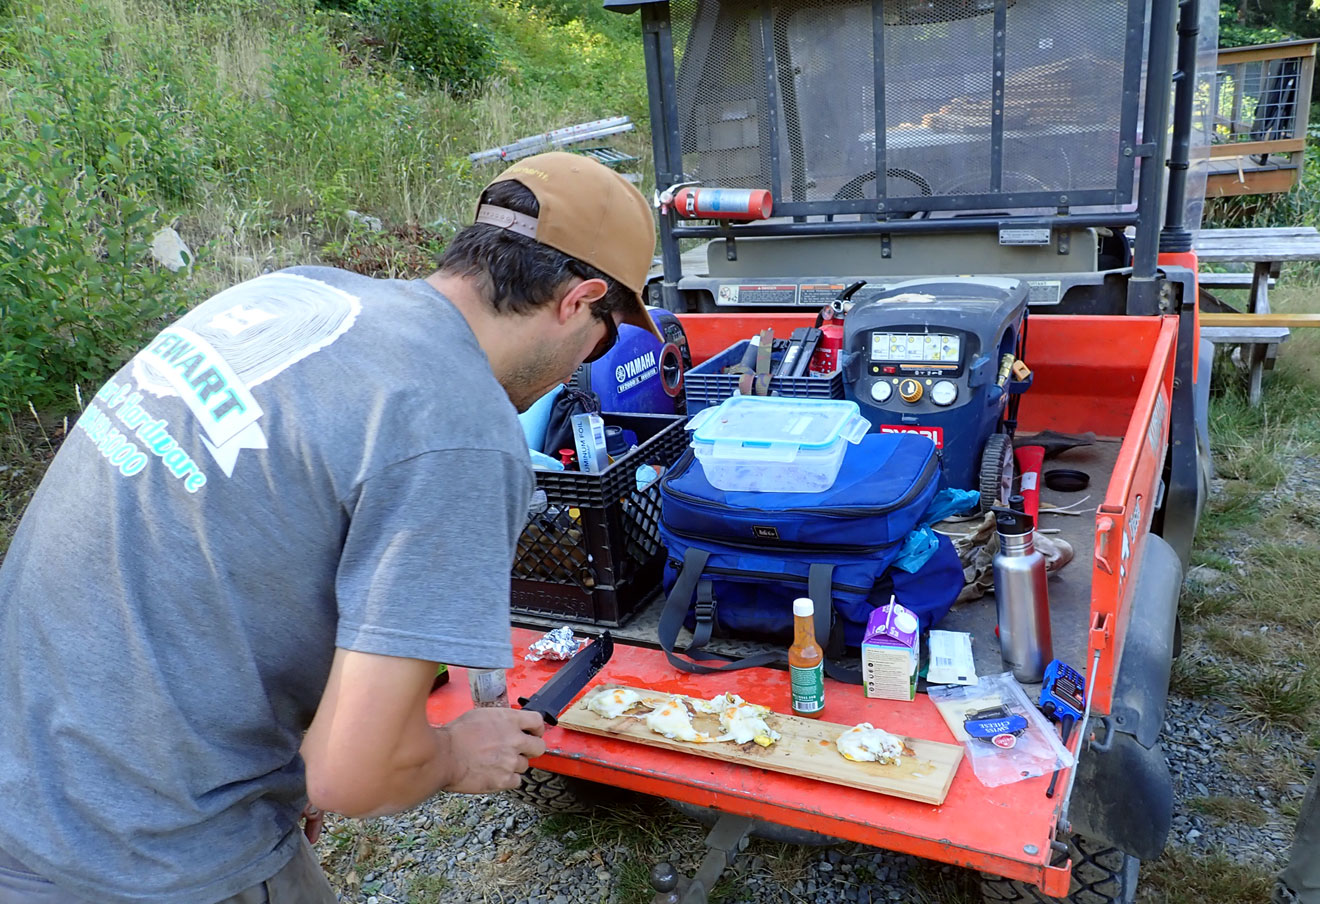
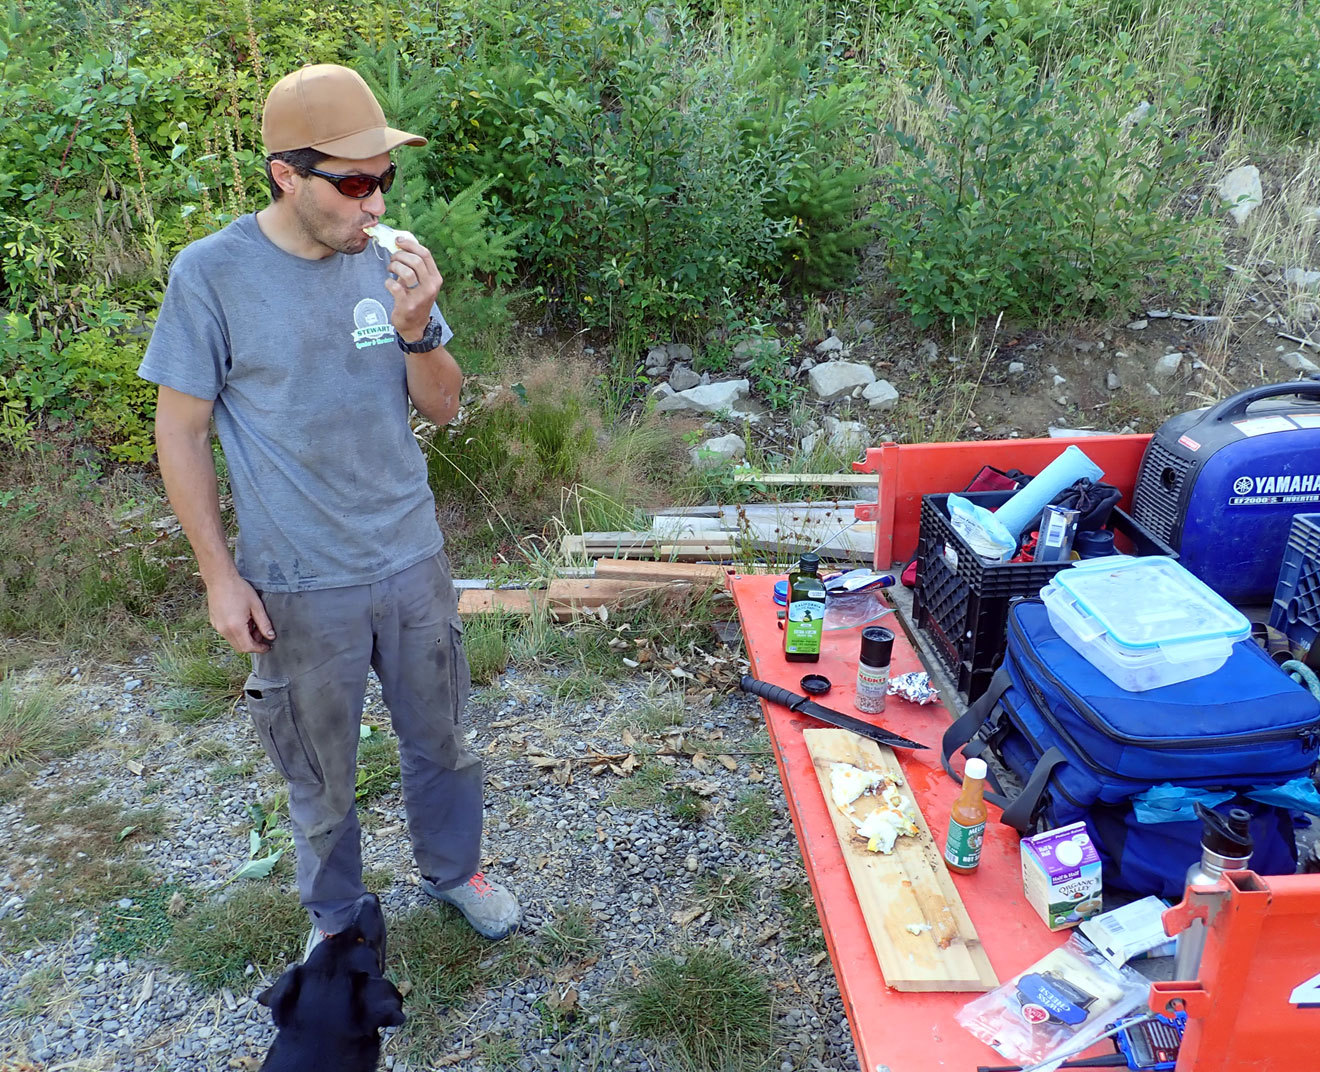
Tailgate Breakfast prepared on scrap
cedar plank provided protein for a morning's work.
...another shot of that
exceptional breakfast
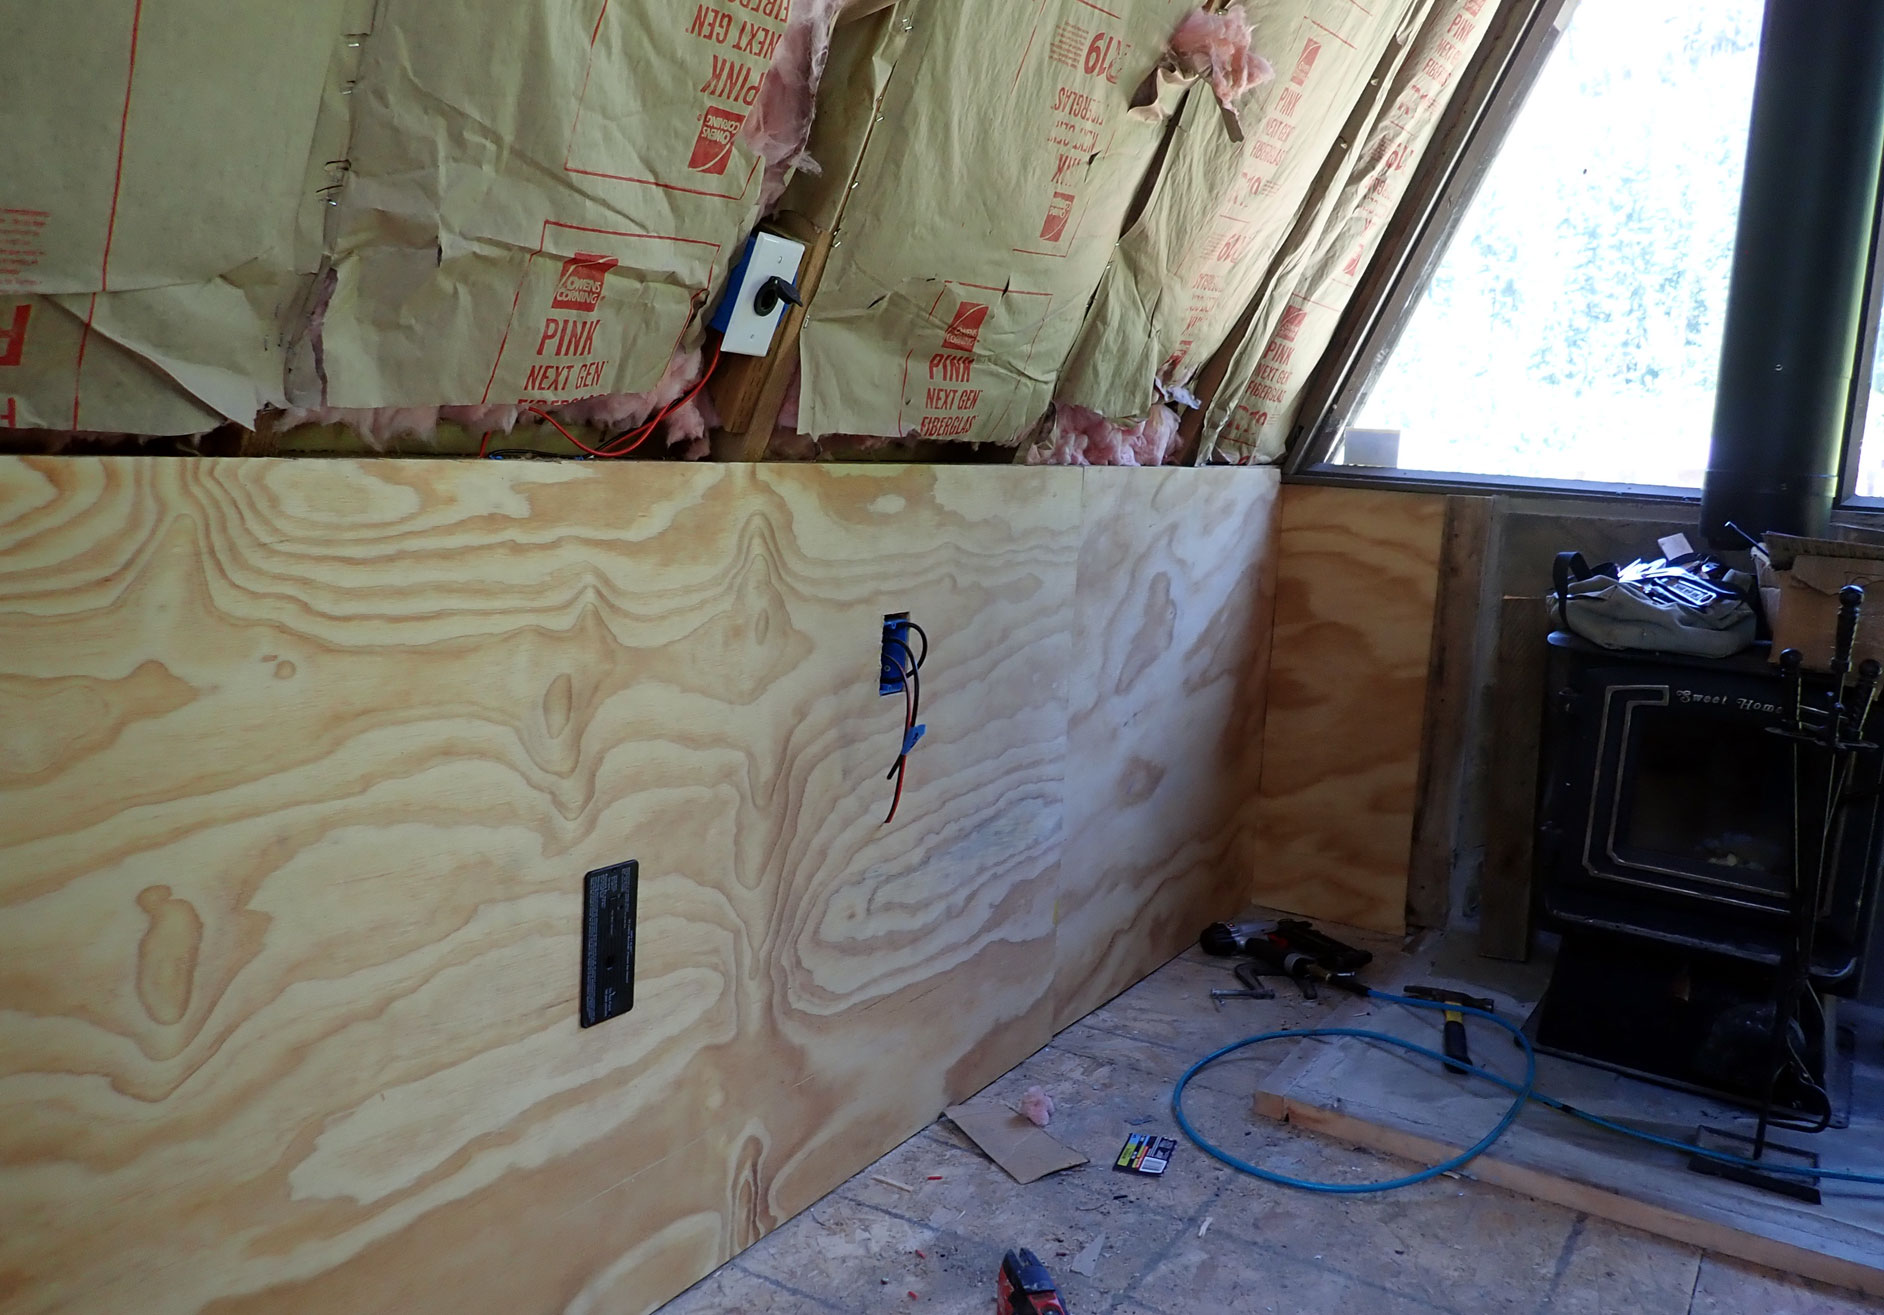
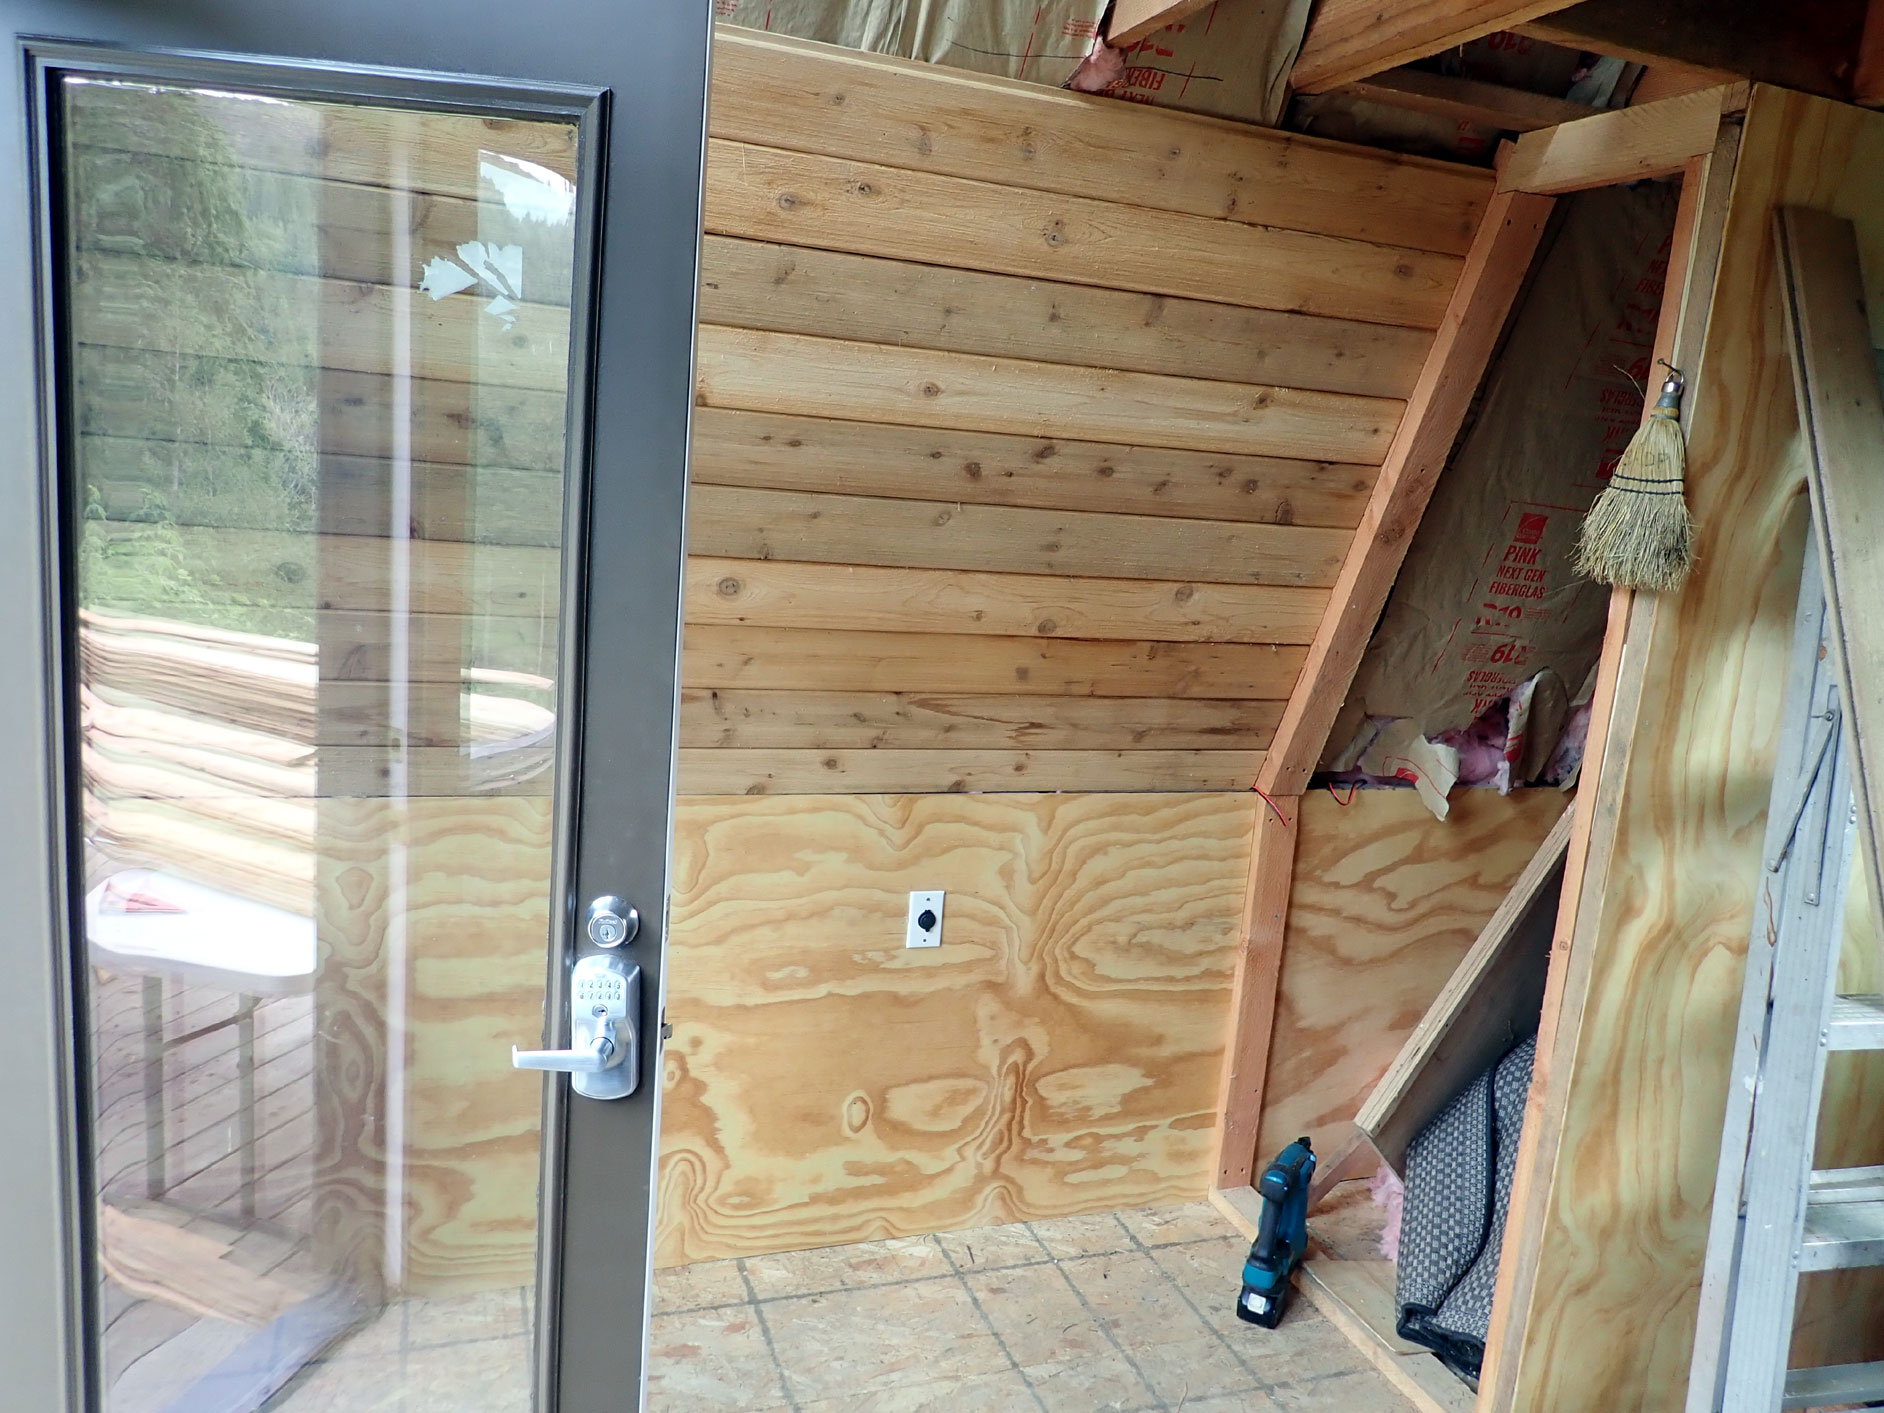
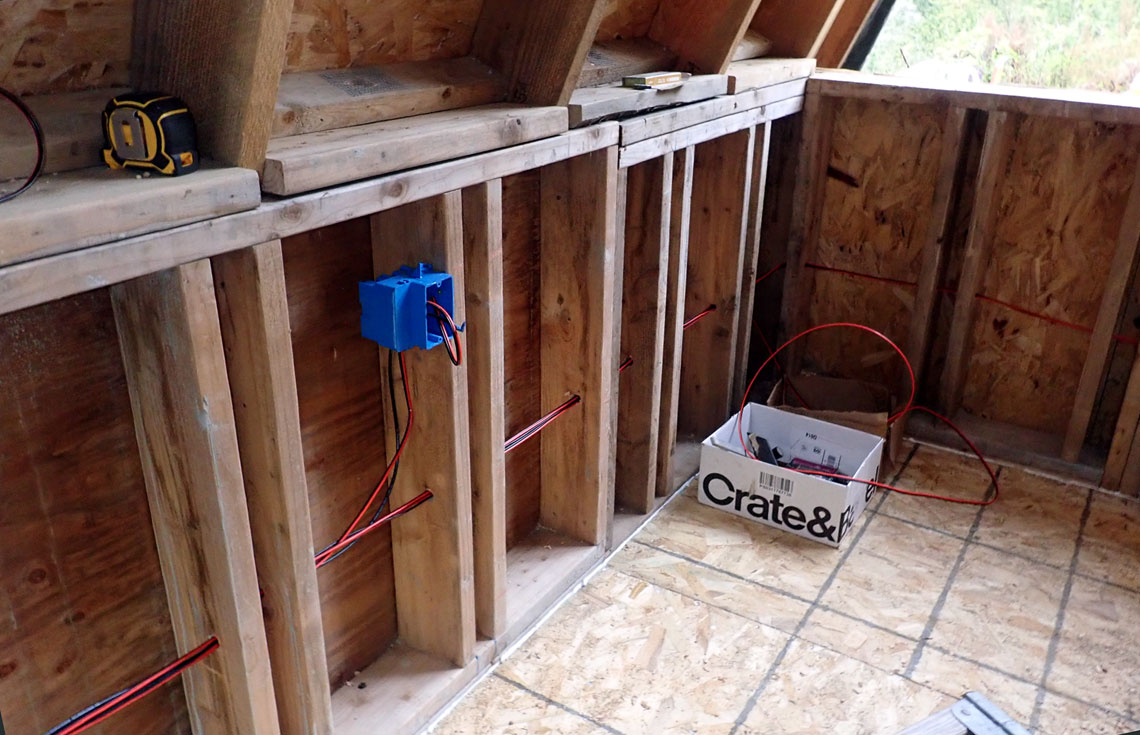
West wall plywood lower wall
installation
We chonse
1/4" plywood stained natural and sealed
That black box is the CO/LPG (carbon monoxide/propane gas)
monitor/alarm.
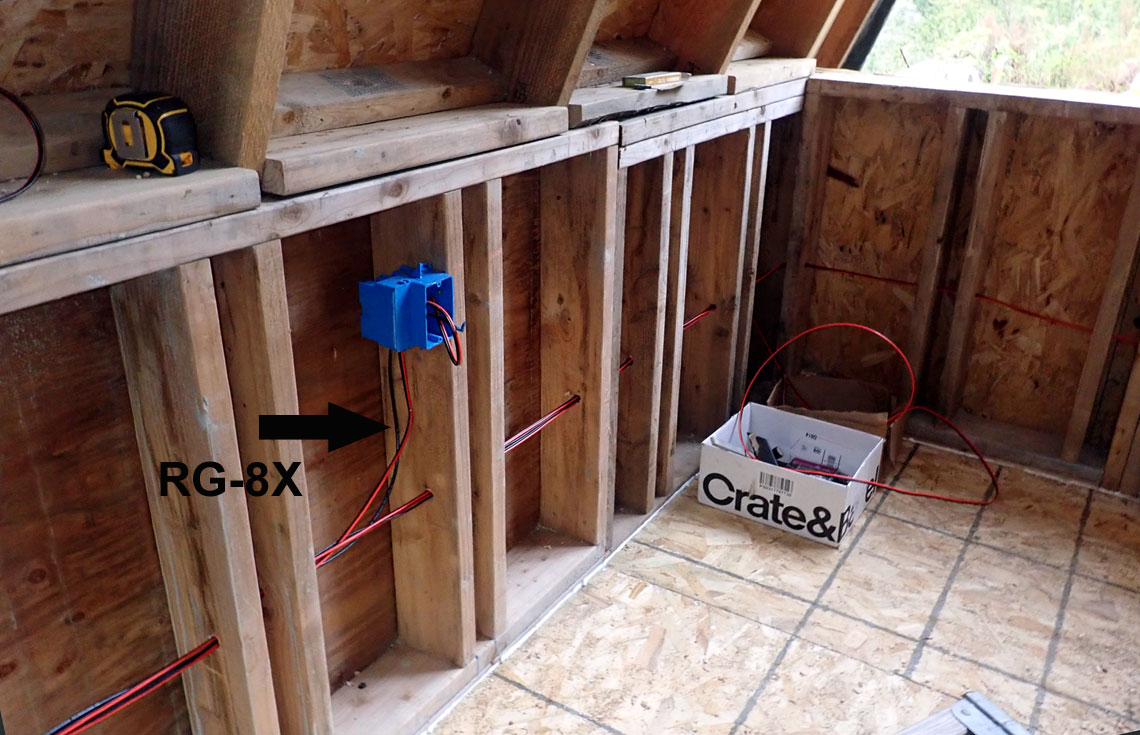
Box to the right is the ham radio
antenna connection
White plate above is a standard 12V cigar lighter connection.
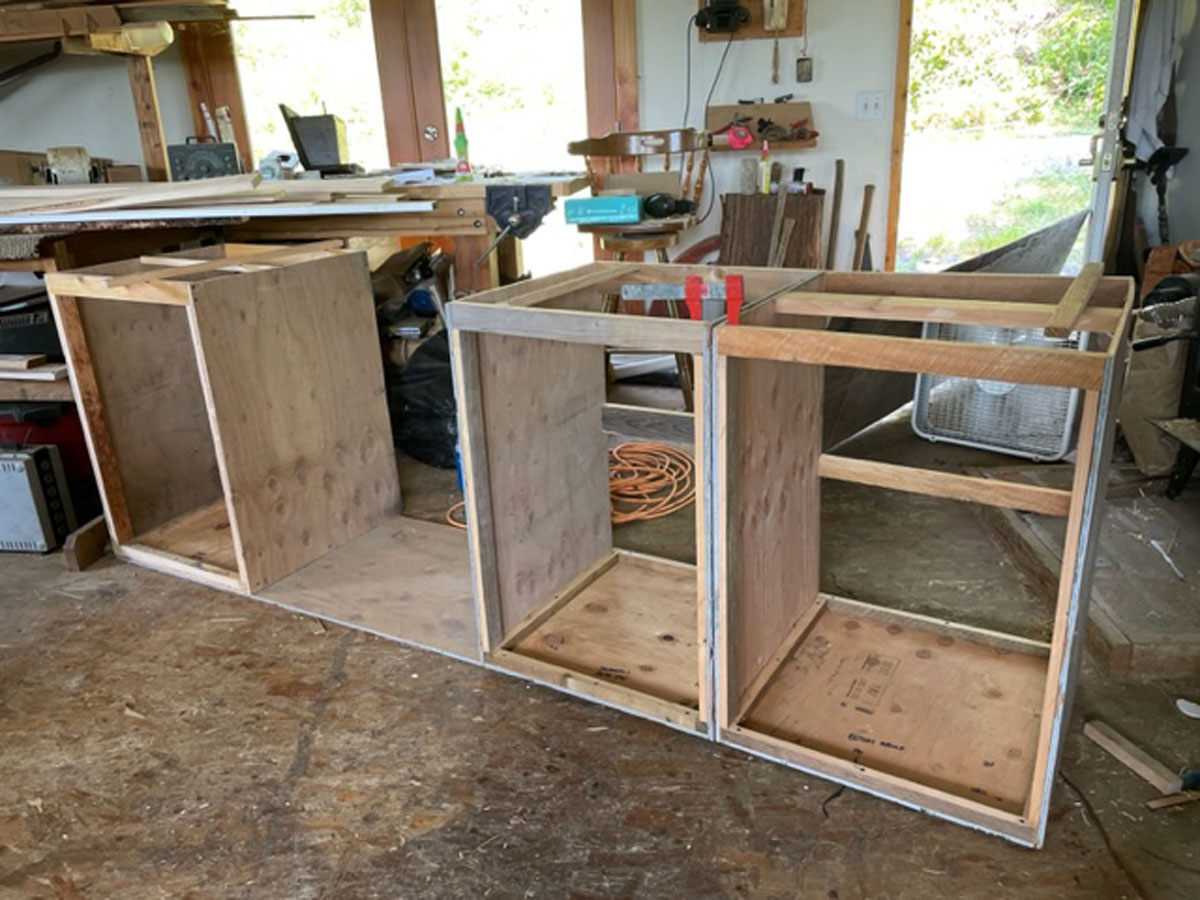
Installing the kitchen cabinet
modules and facing Summer 2023.
View the modules being fabbed
in the valhalla wood shop
Facing wood is Cherry from a large tree on the property milled at Paul
Von Steubbe's mill
We processed the rough cut boards in the
Valhalla woodshop
Installing the drawers
View a sketch we drew to work from
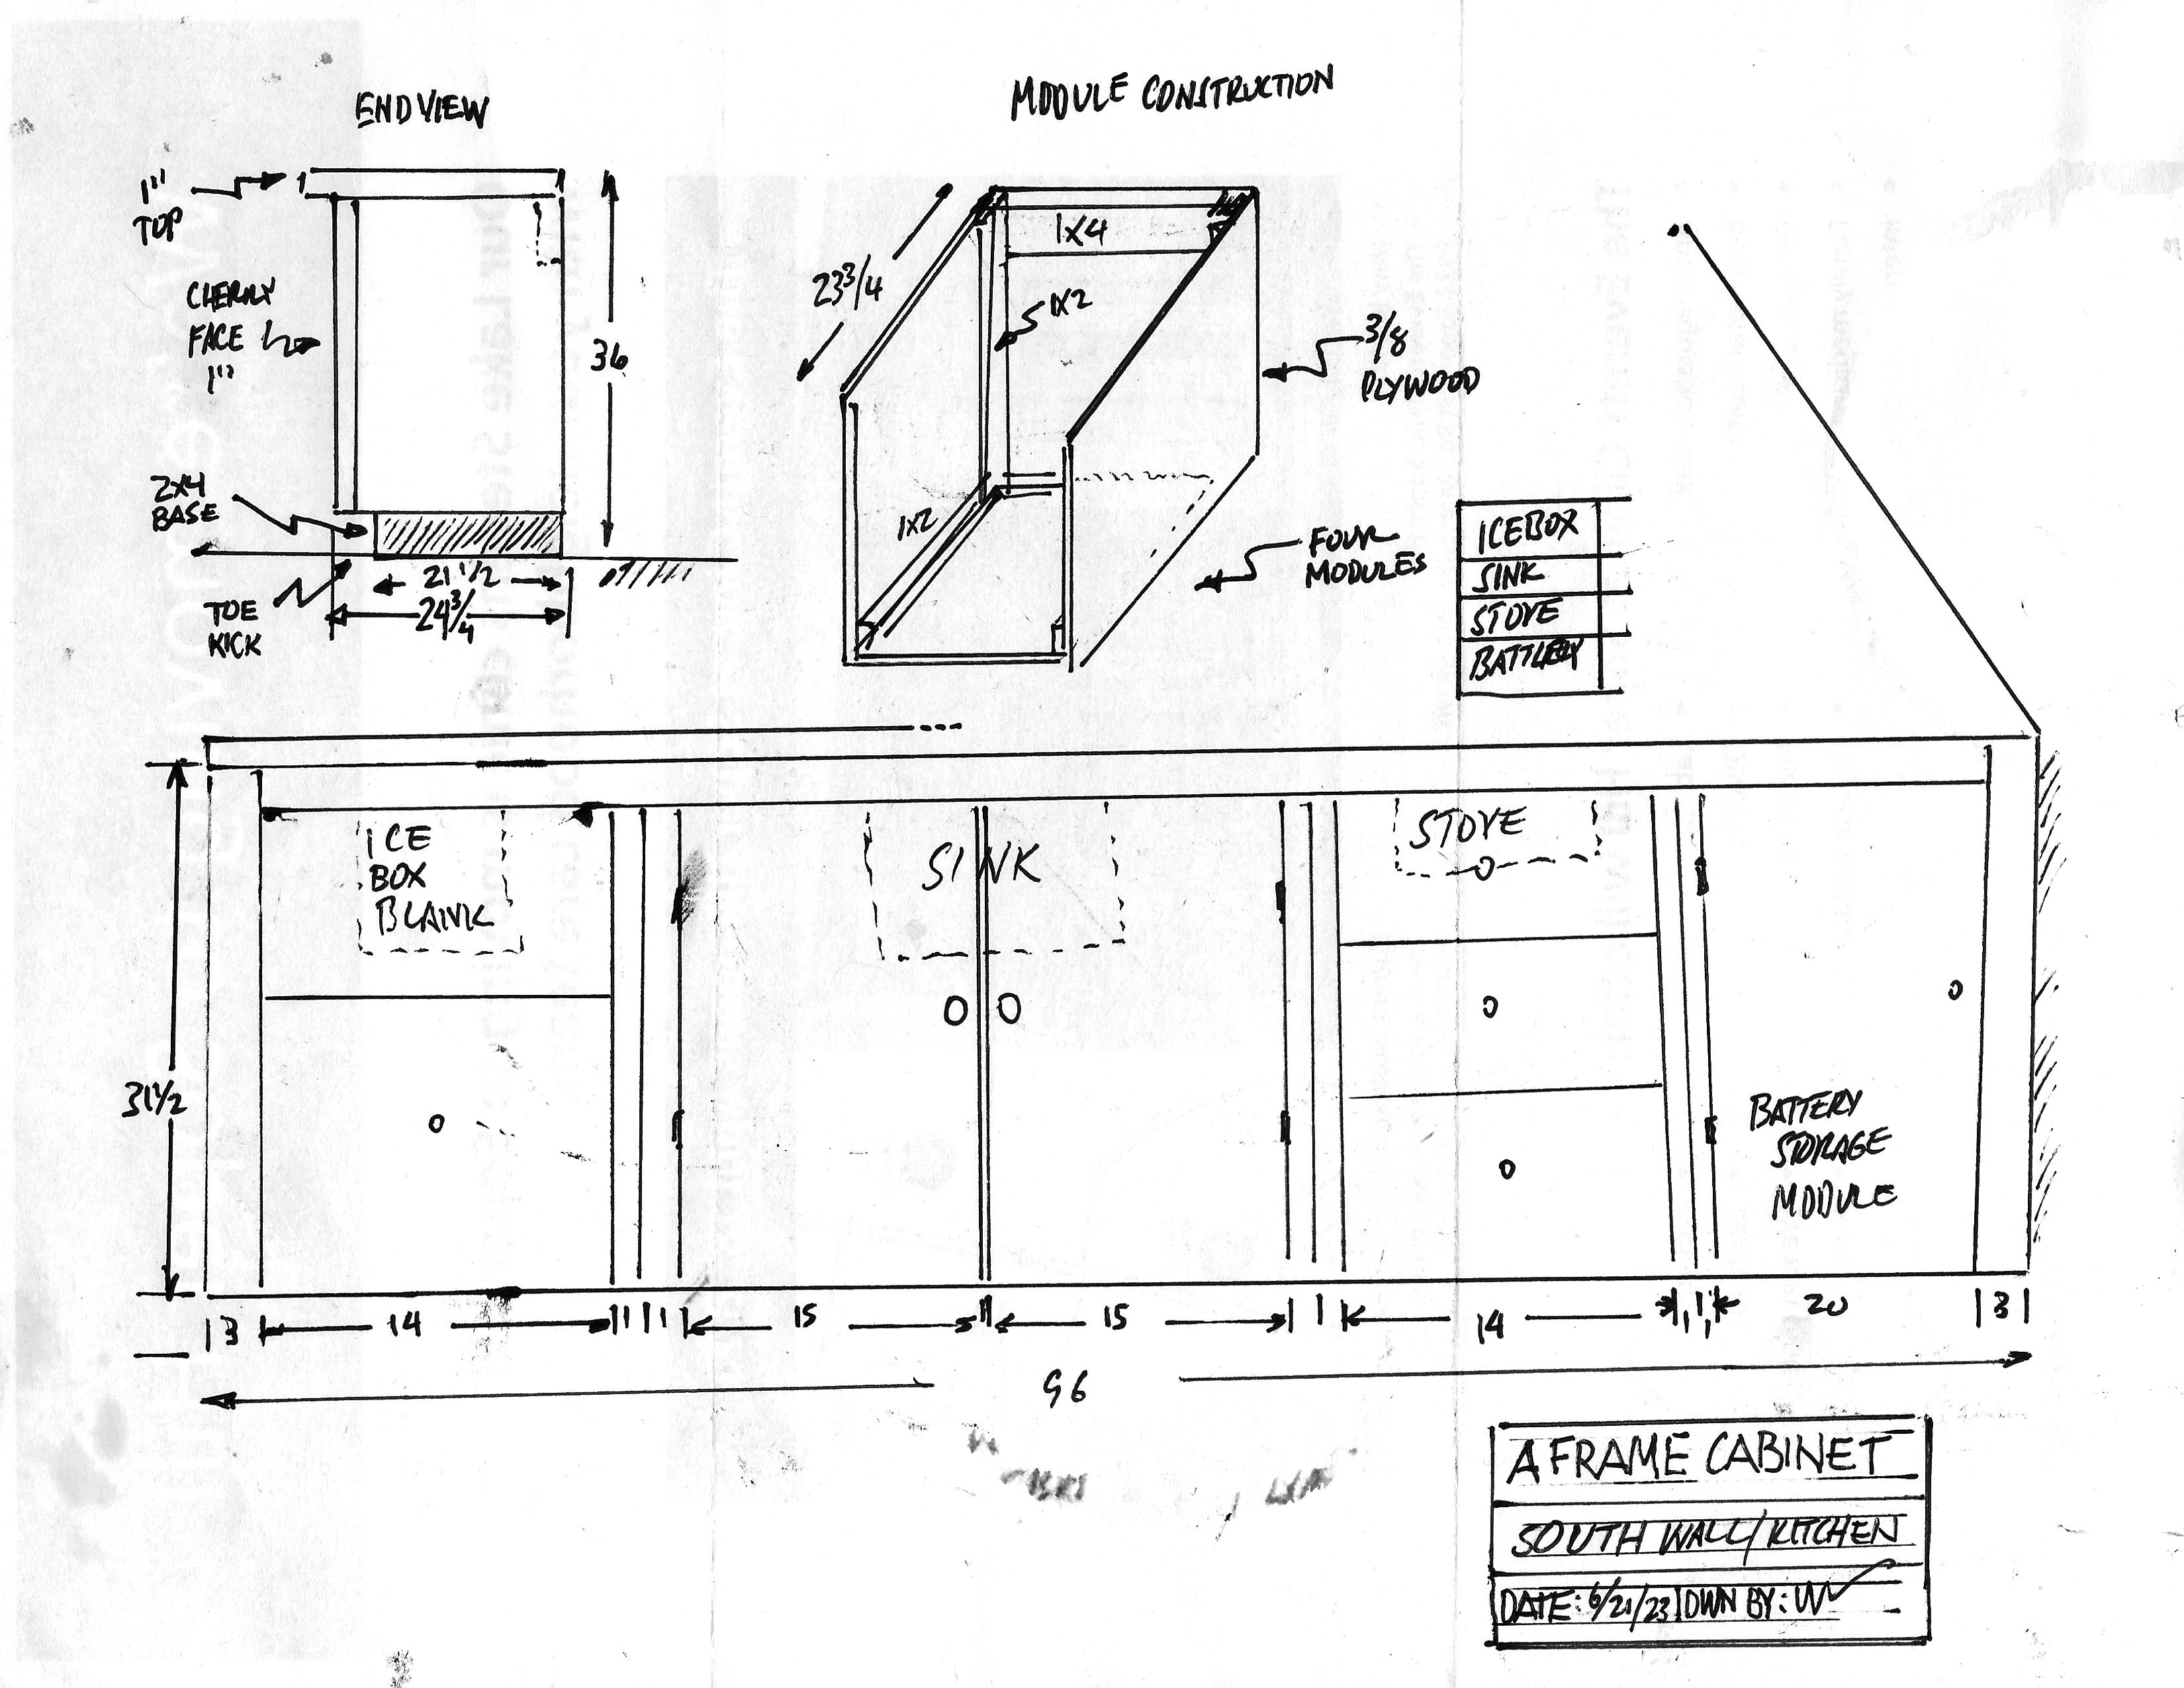
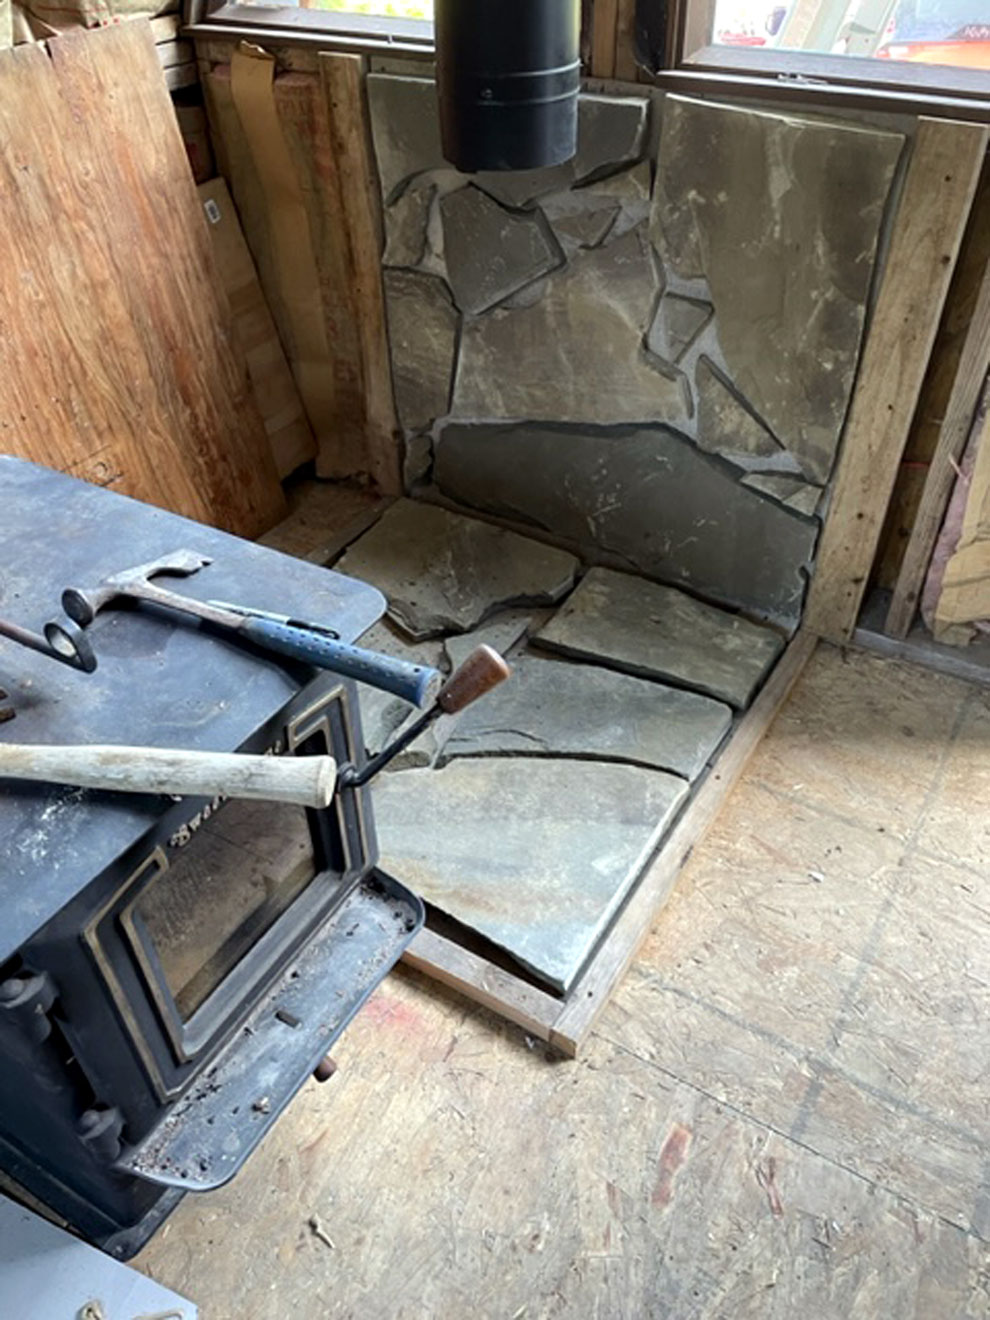
Finishing the flagstone stove base
July 2023
We bought the flagstones from "Simply
Rocks"
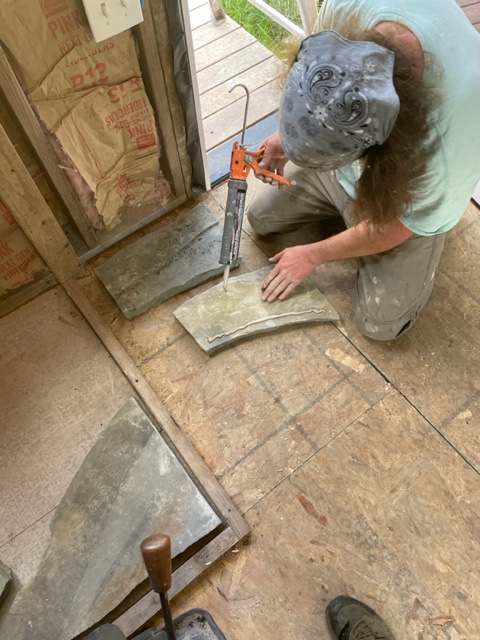
Here's Taylor gluing the pieces to
the hardiboard base
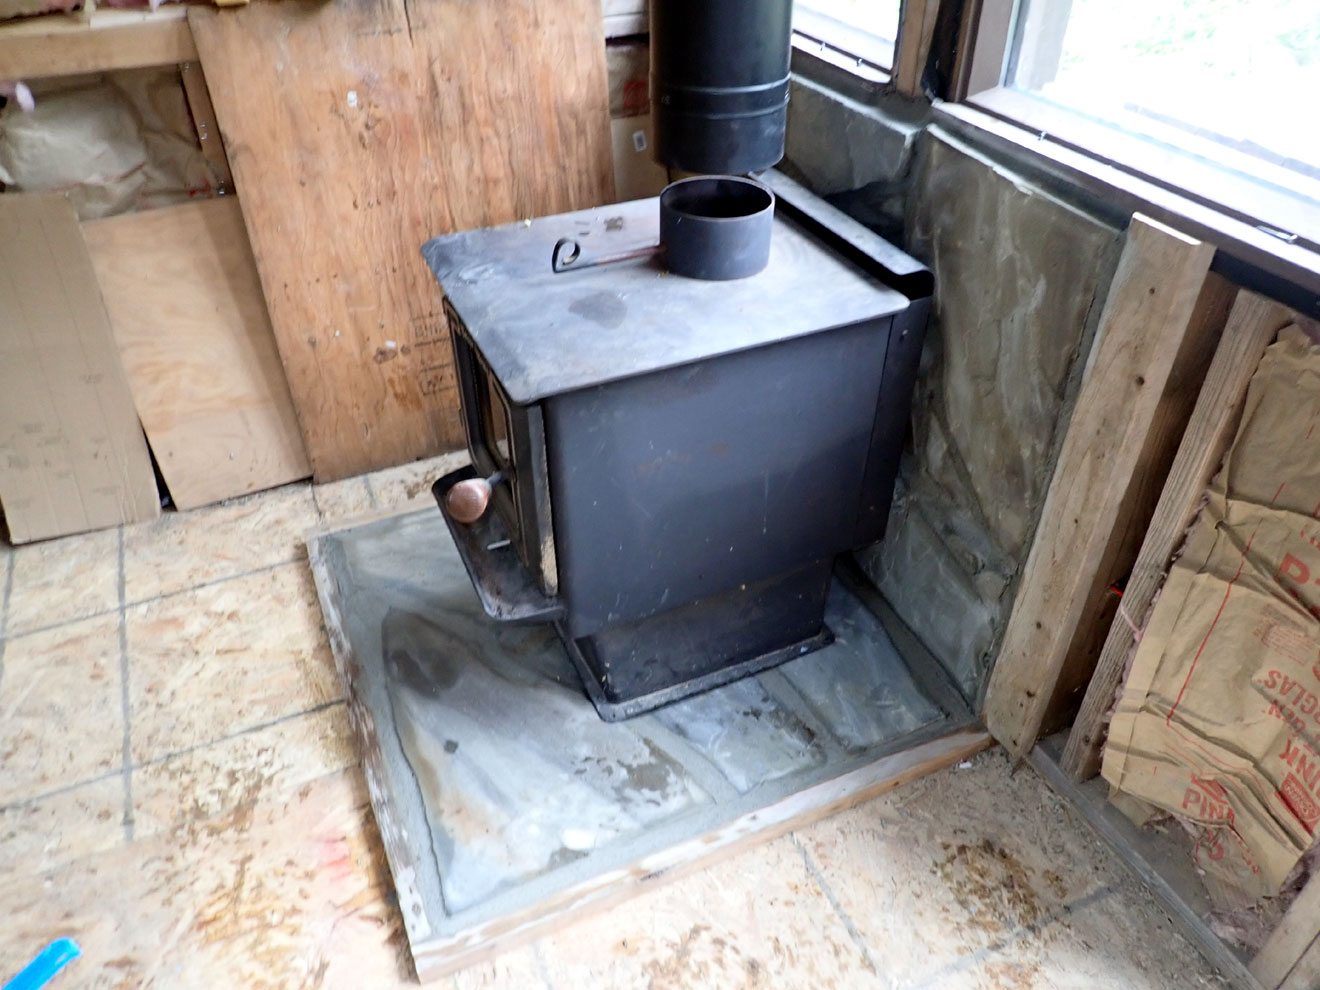
Finished base ready for stovepipe
hookup
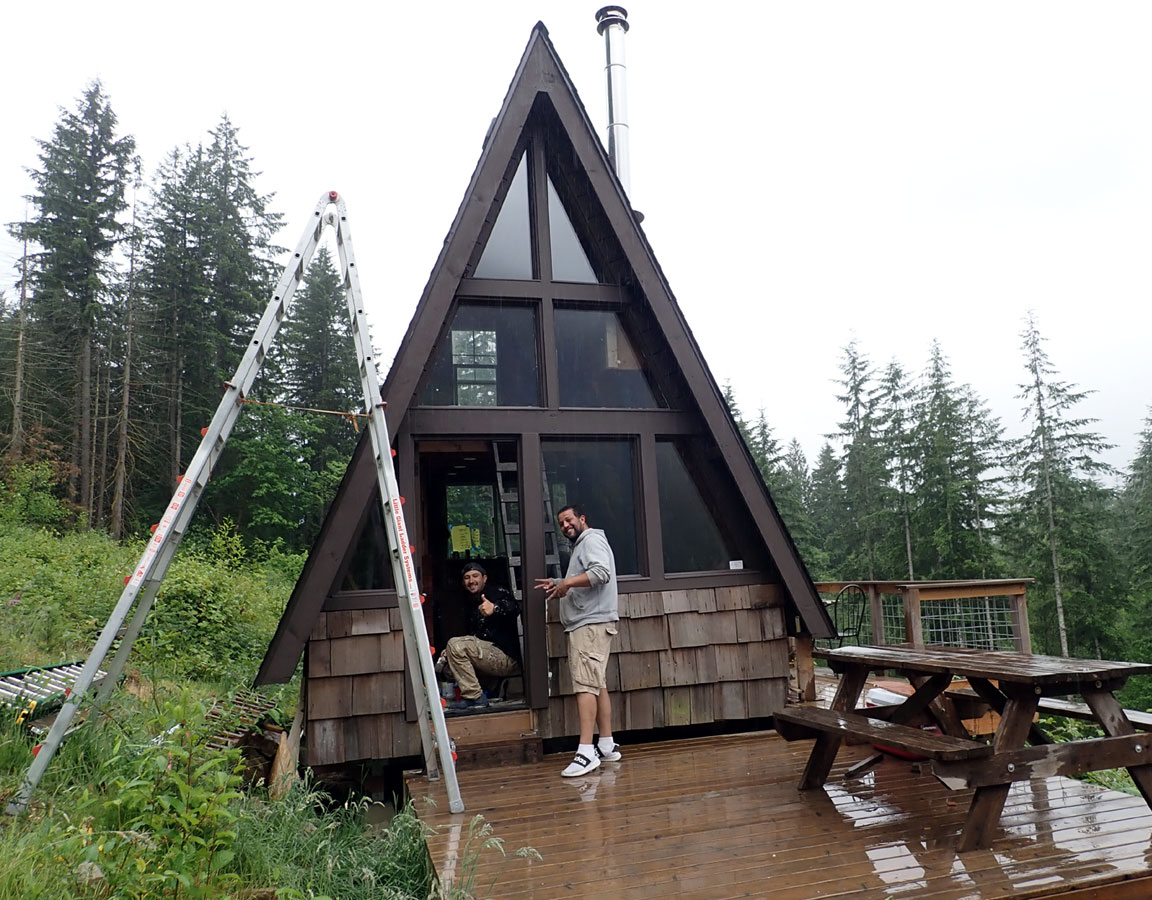
Trim Paint Complete 6/9/23 It rained!
Here's Ylber from
Dream Team Painting working
on the front trim and soffits.
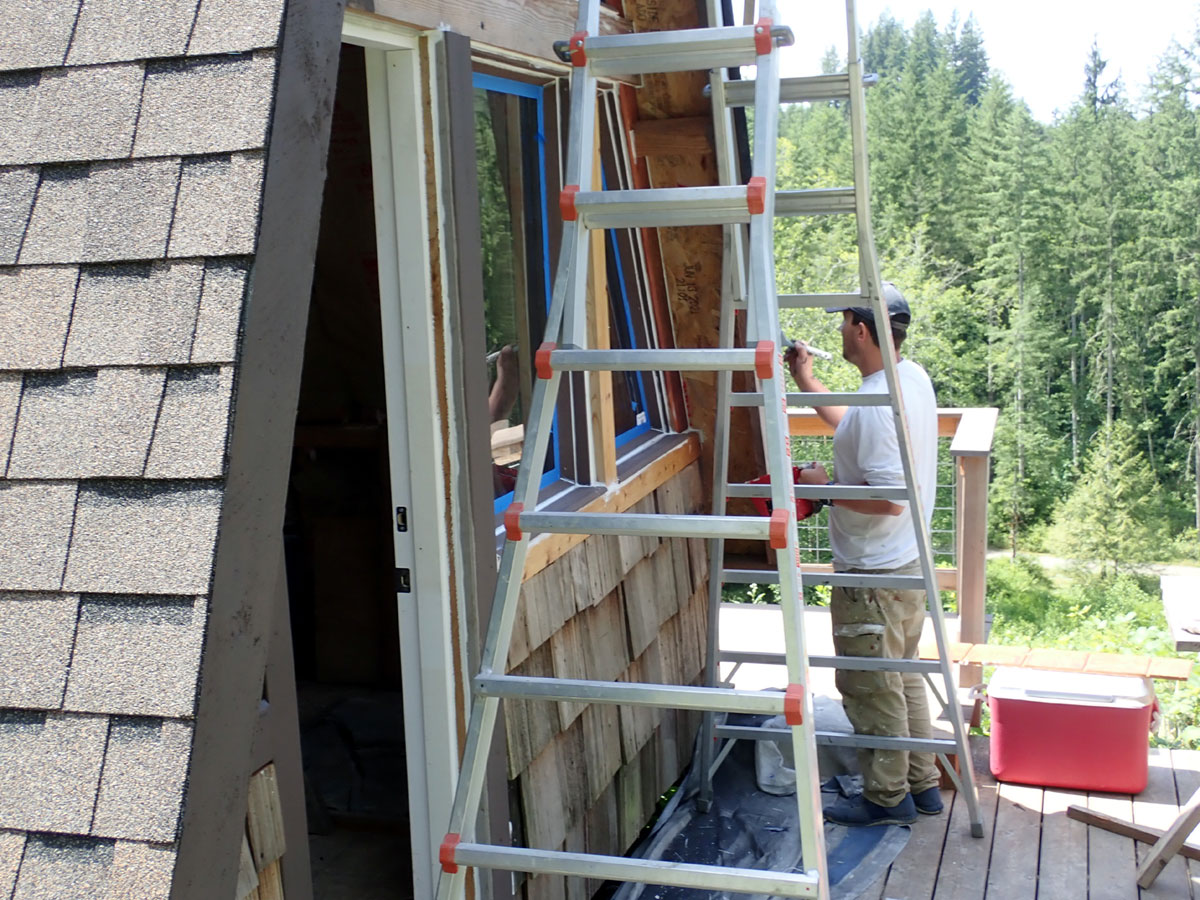
Youness working
South side trim
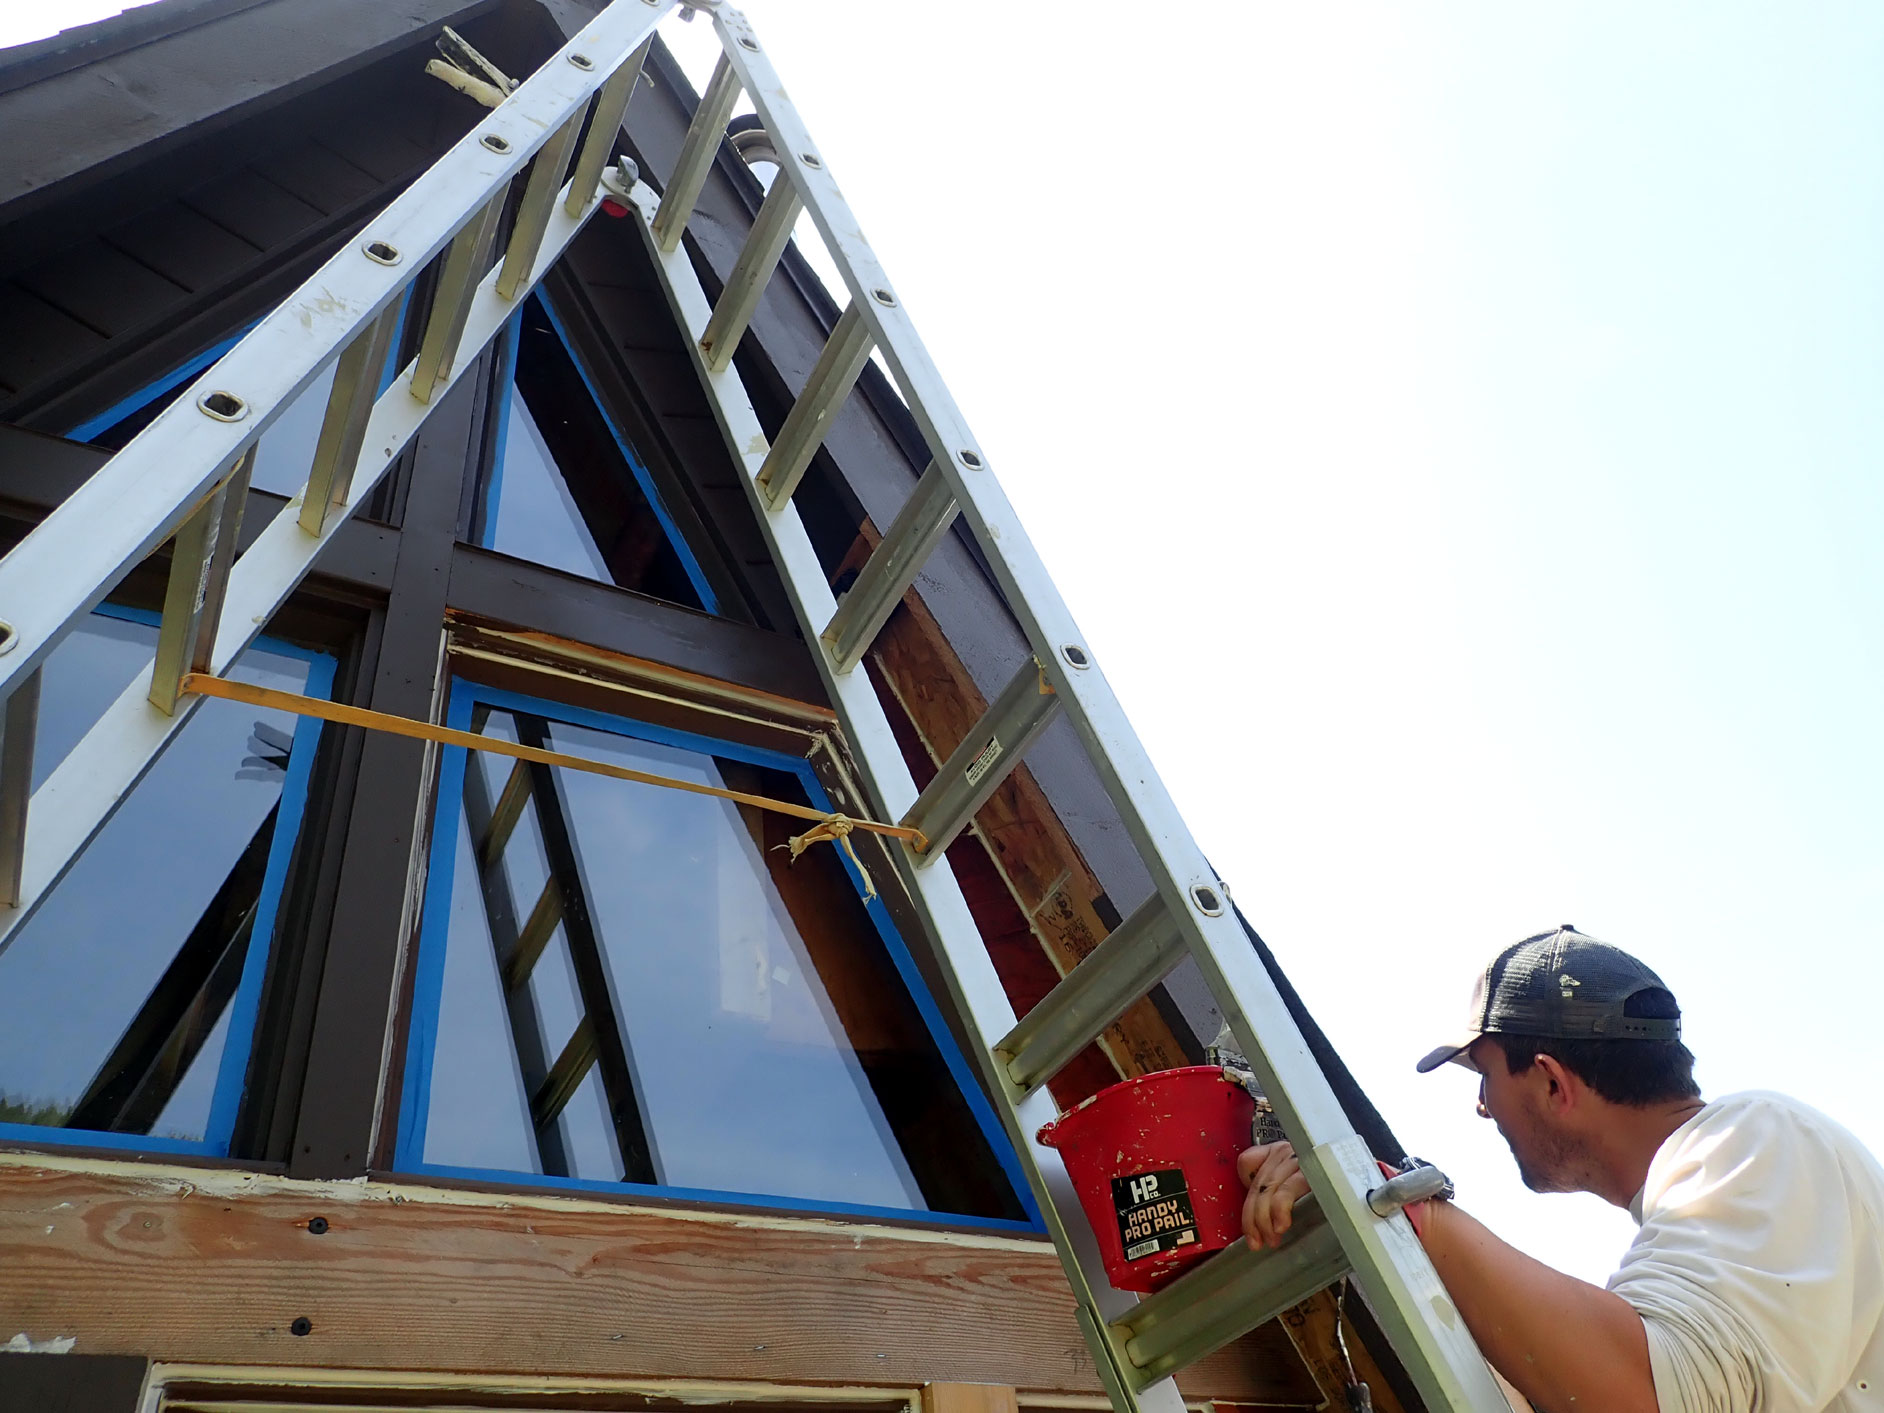
Our friend Ylber paying close
attention to detail.
Note all joints have been sealed.
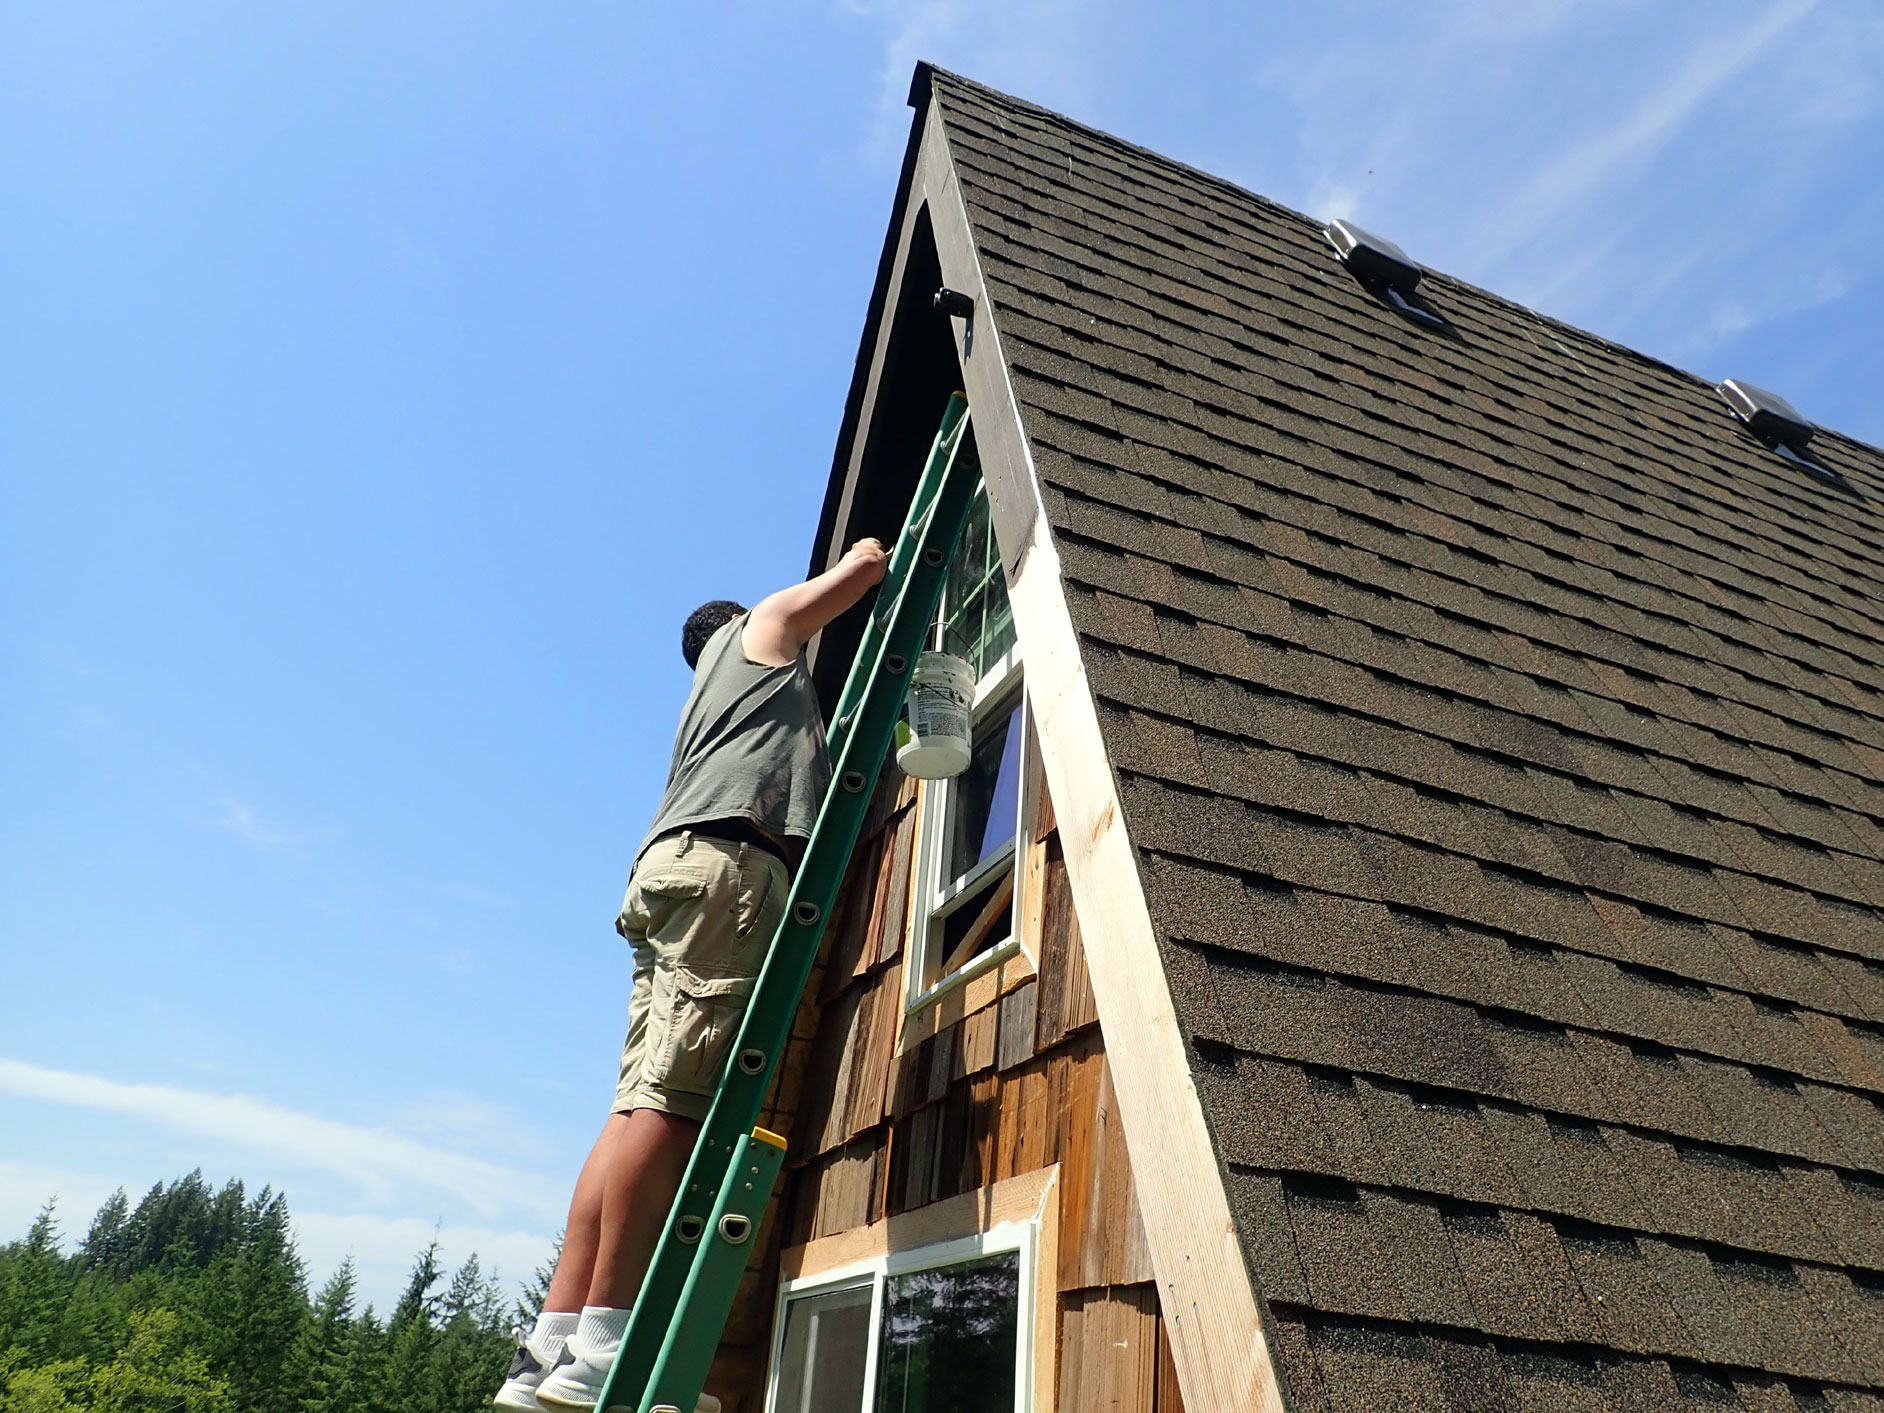
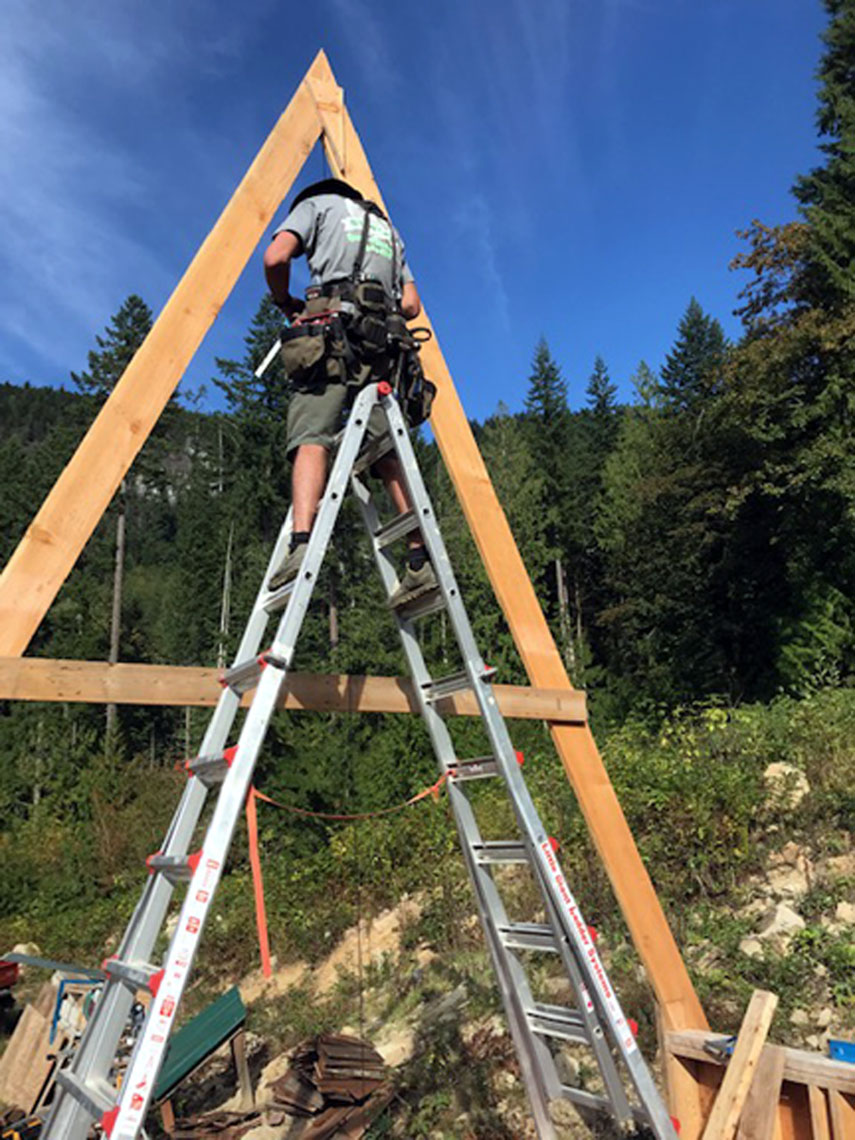
Youness on the ladder.
Note the insulator for the ham radio antenna (top center)
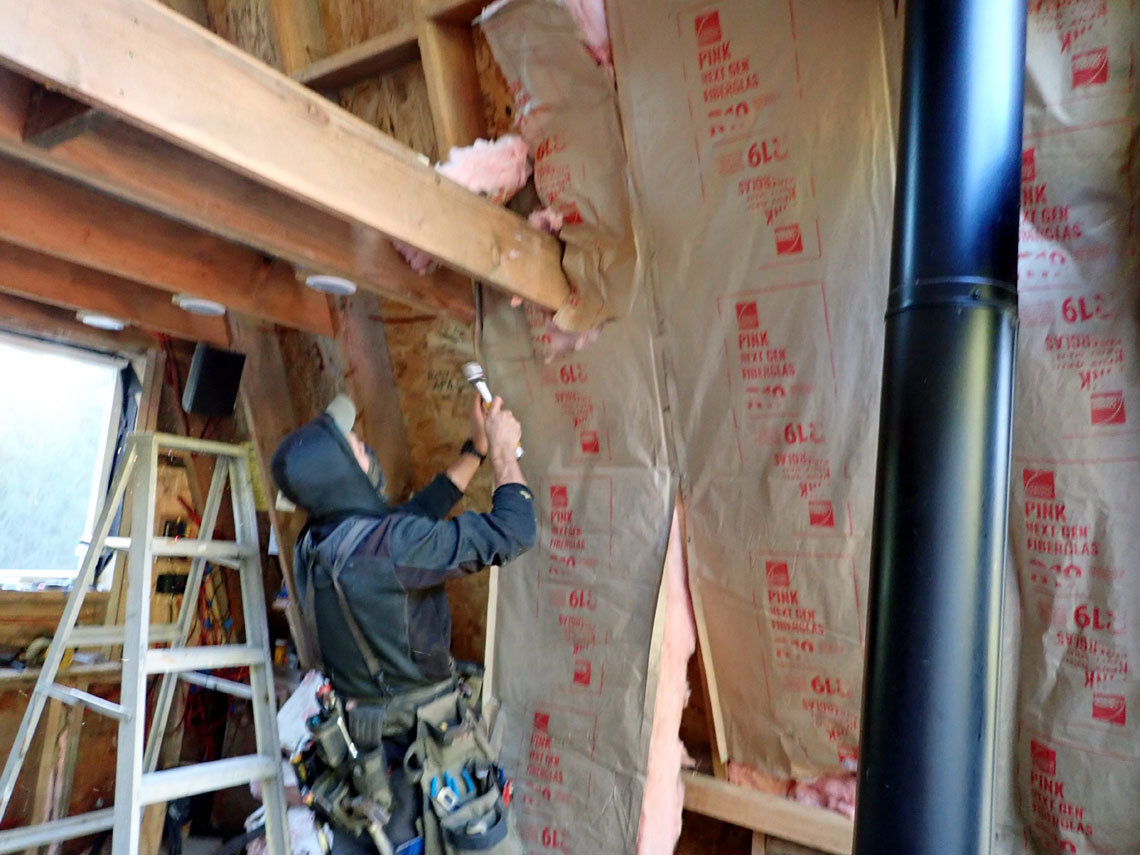
11/18/22
Installing R30 Insulation in the joist spaces.
Kitchen will go against the wall far left.
We light the stove and in a few minutes the room heats up to a nice
glow.
This is going to be a nice little cabin.

Another shot of the insulation going
in. That's friend Grier doing the work here.
Note the 12 Volt lighter socket above his left hand.

Helper Brandon looking down from the
loft during insulation install.
We are getting set to drill 2" cross ventilation holes at the top of the
rafters.
Note the LED "up lights" temp installed
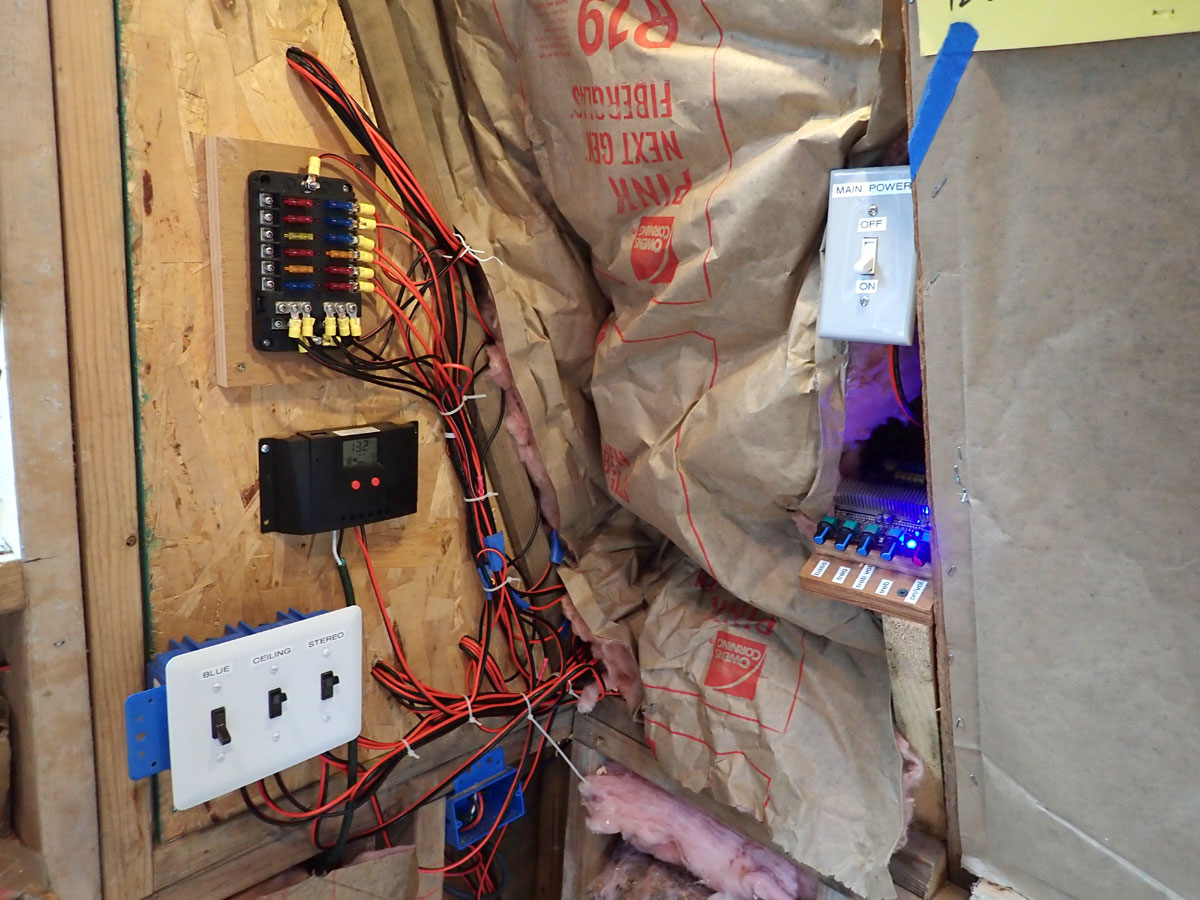
Electrical corner with fuse block,
solar controller and three temp switches..
On the right is the building master power switch and the Bluetooth
stereo amp
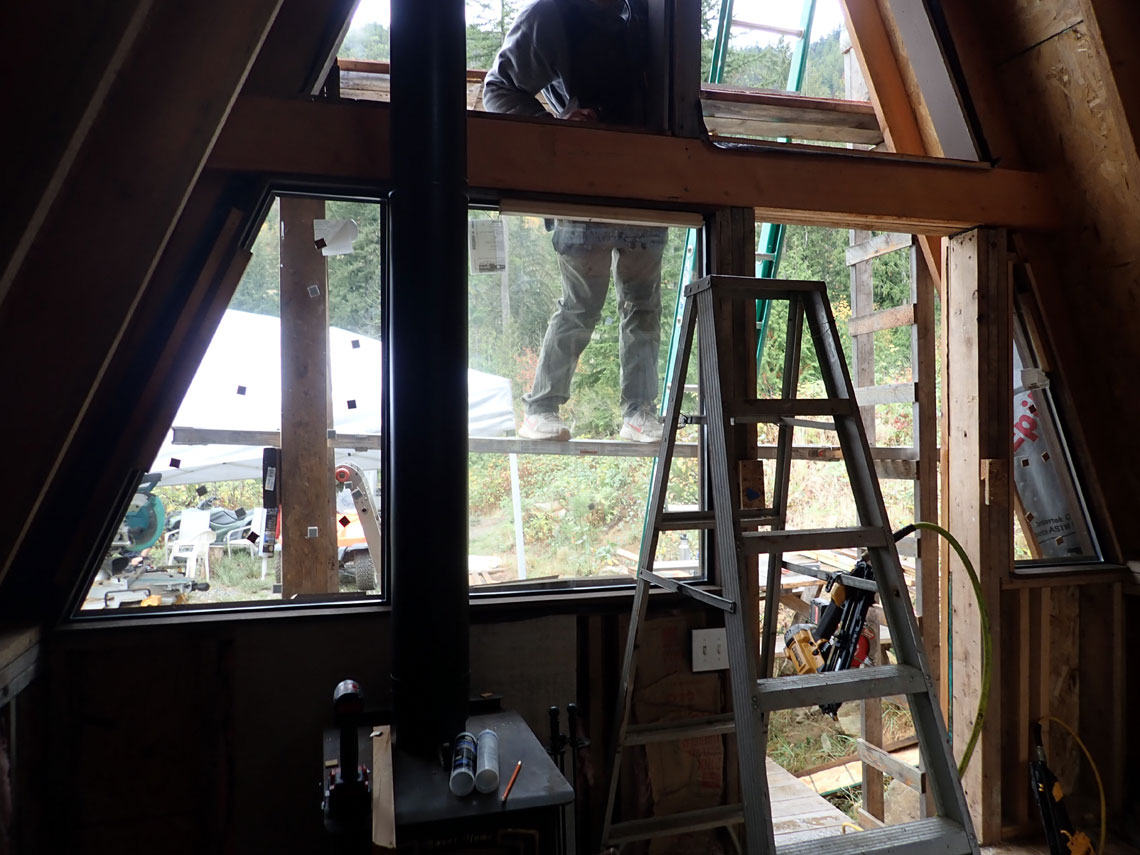
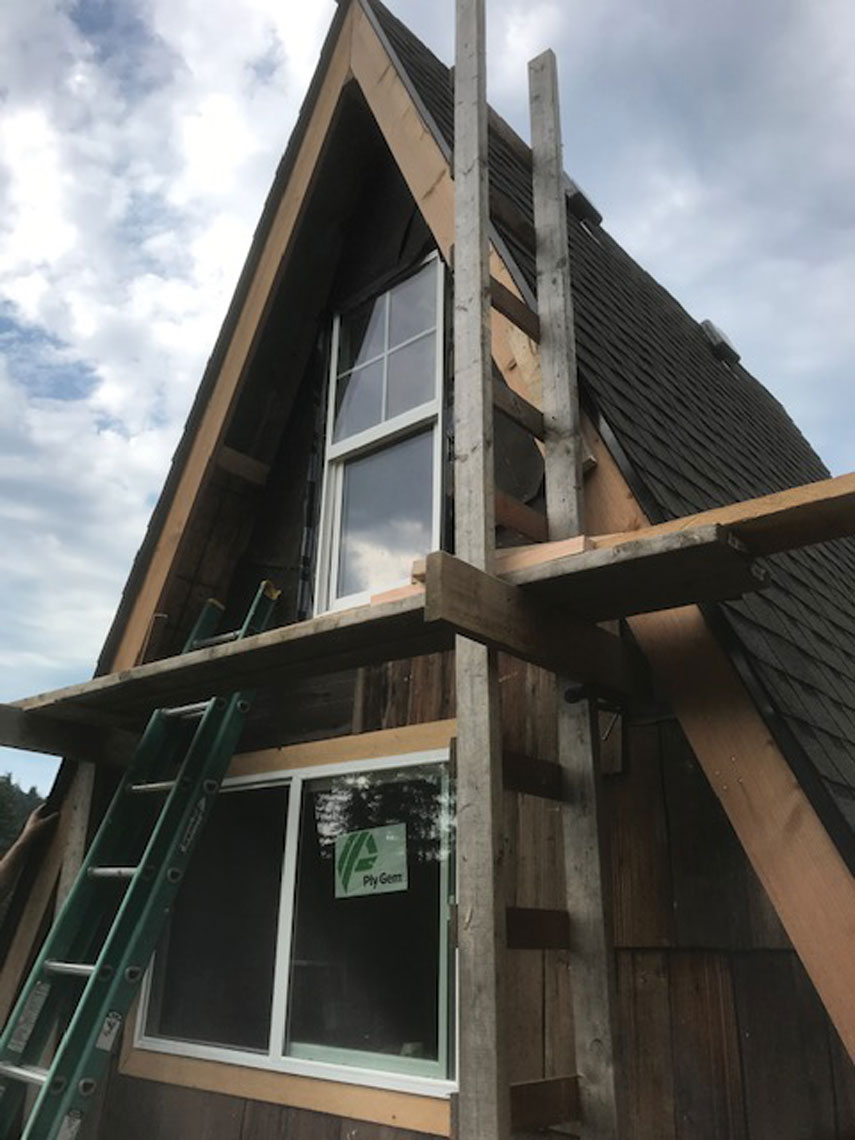
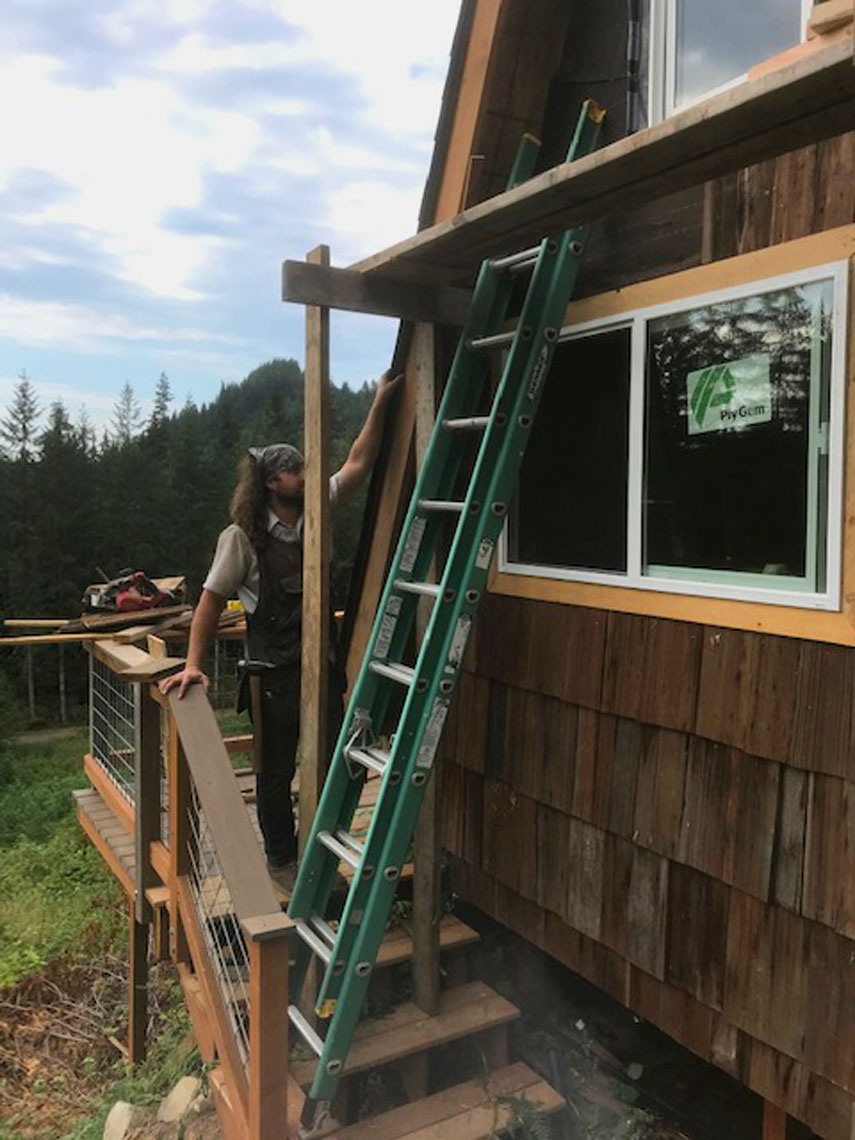
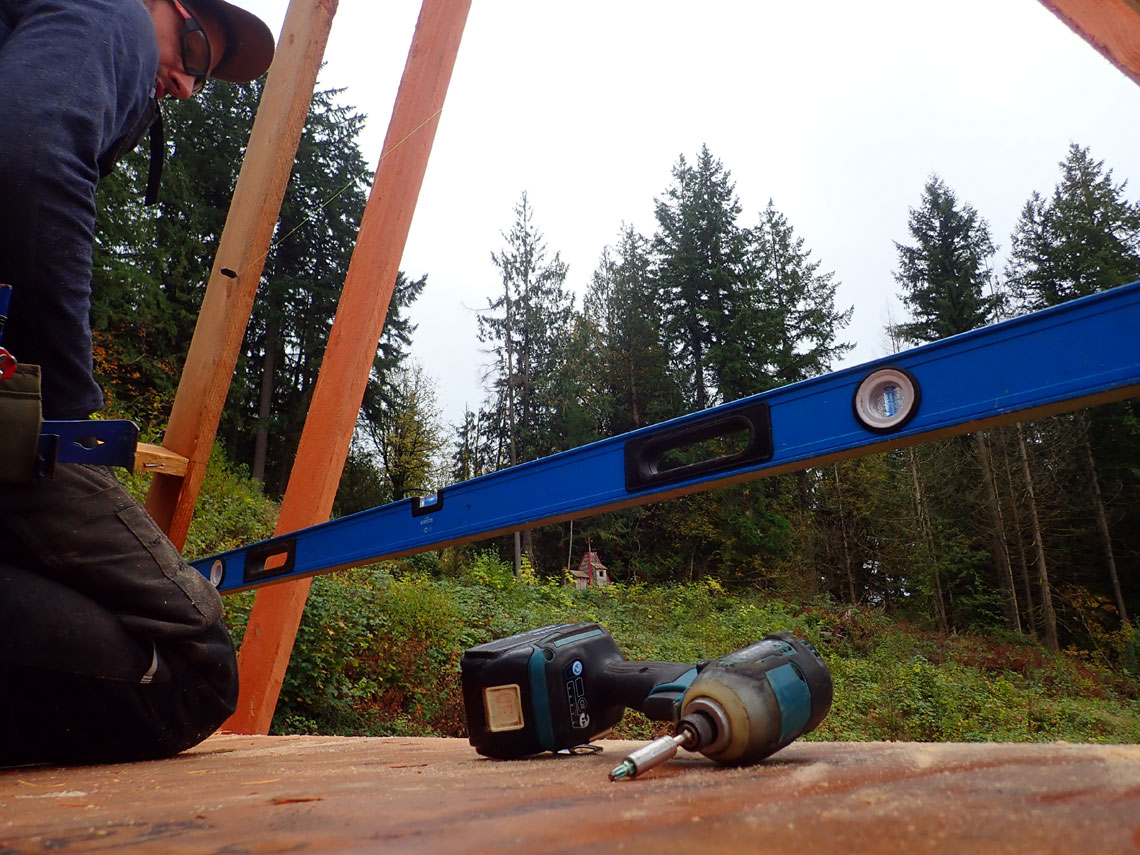
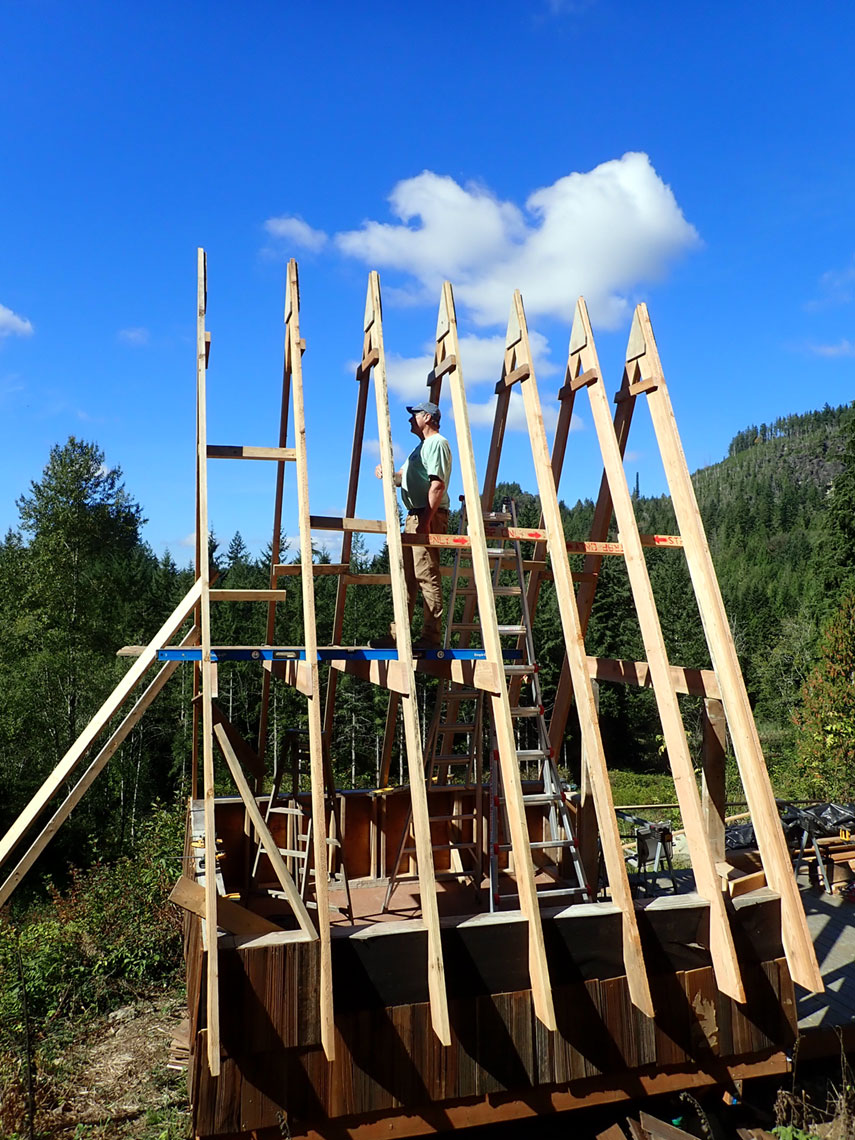
We built temporary - but sturdy
scaffolding to make it safer to work at waist/chest heights.
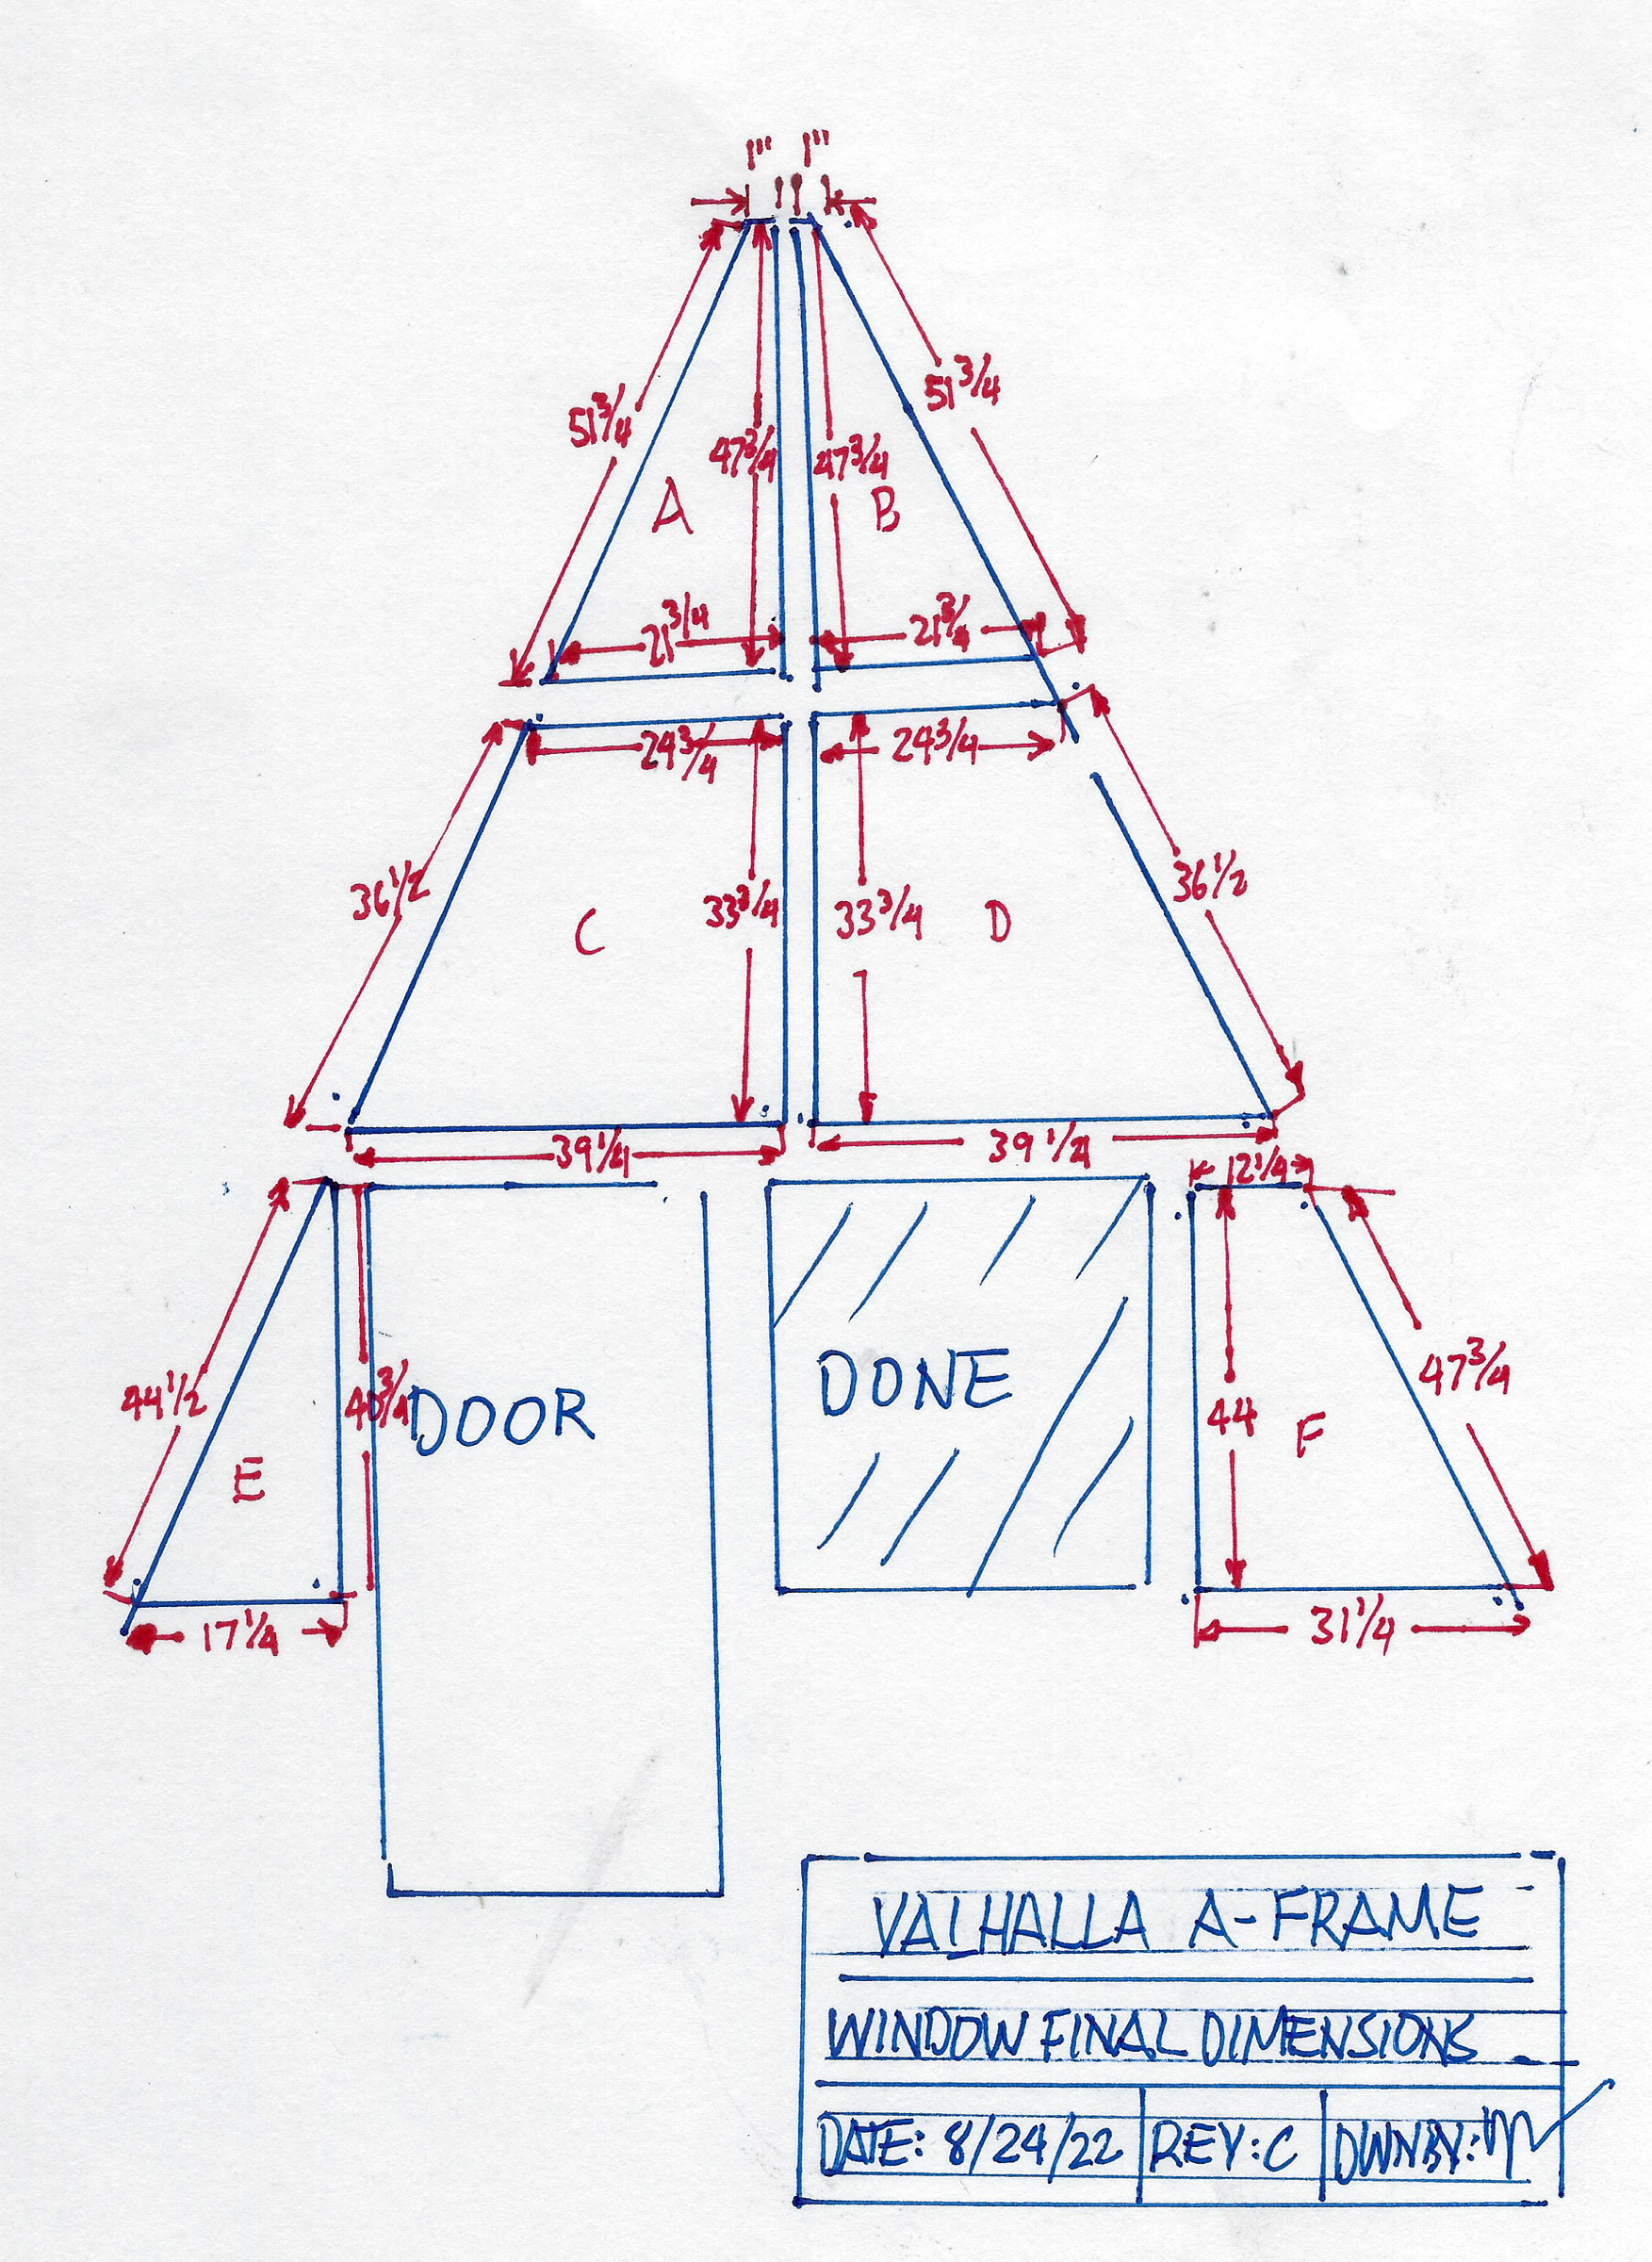
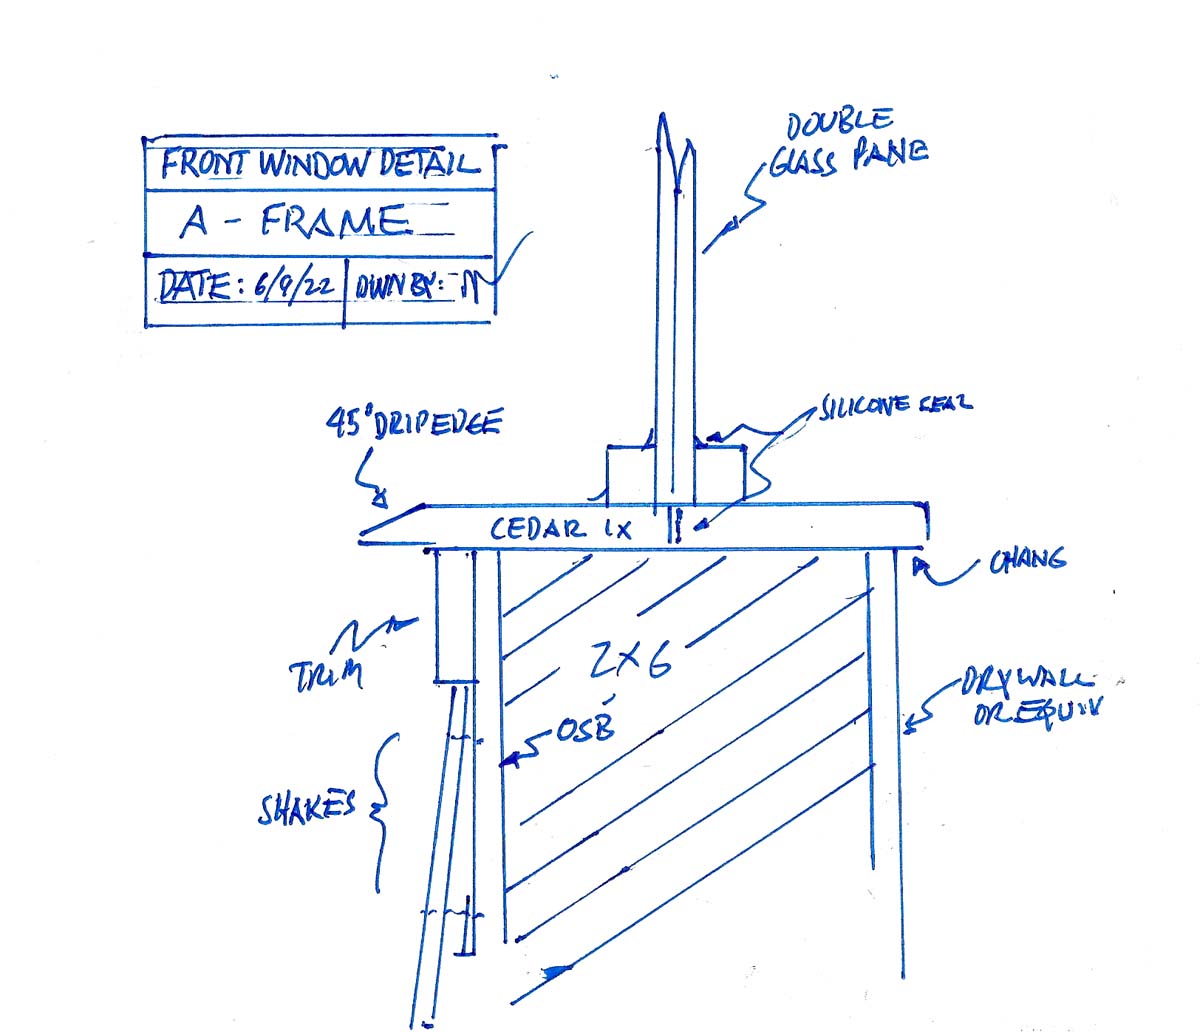
Every possible opening has a window!
View the sketch we used to order
the windows from Lund Glass
Todd Lund worked with us to make sure we got exactly what we wanted.
Note the sturdy pony wall repurposed from the nearby
cell tower construction
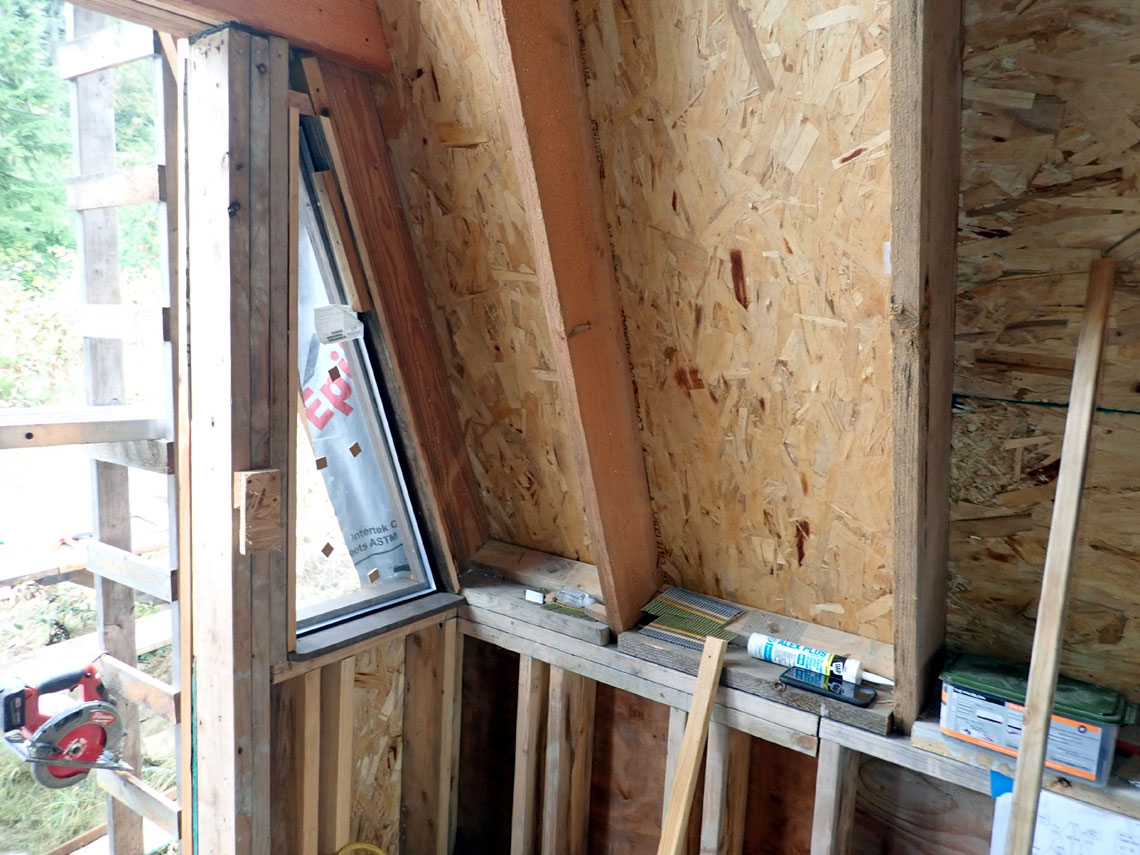
It took a lot of fooling around with
the compound angles.
view a sketch of the design
we used to hold the double pane glass in place.
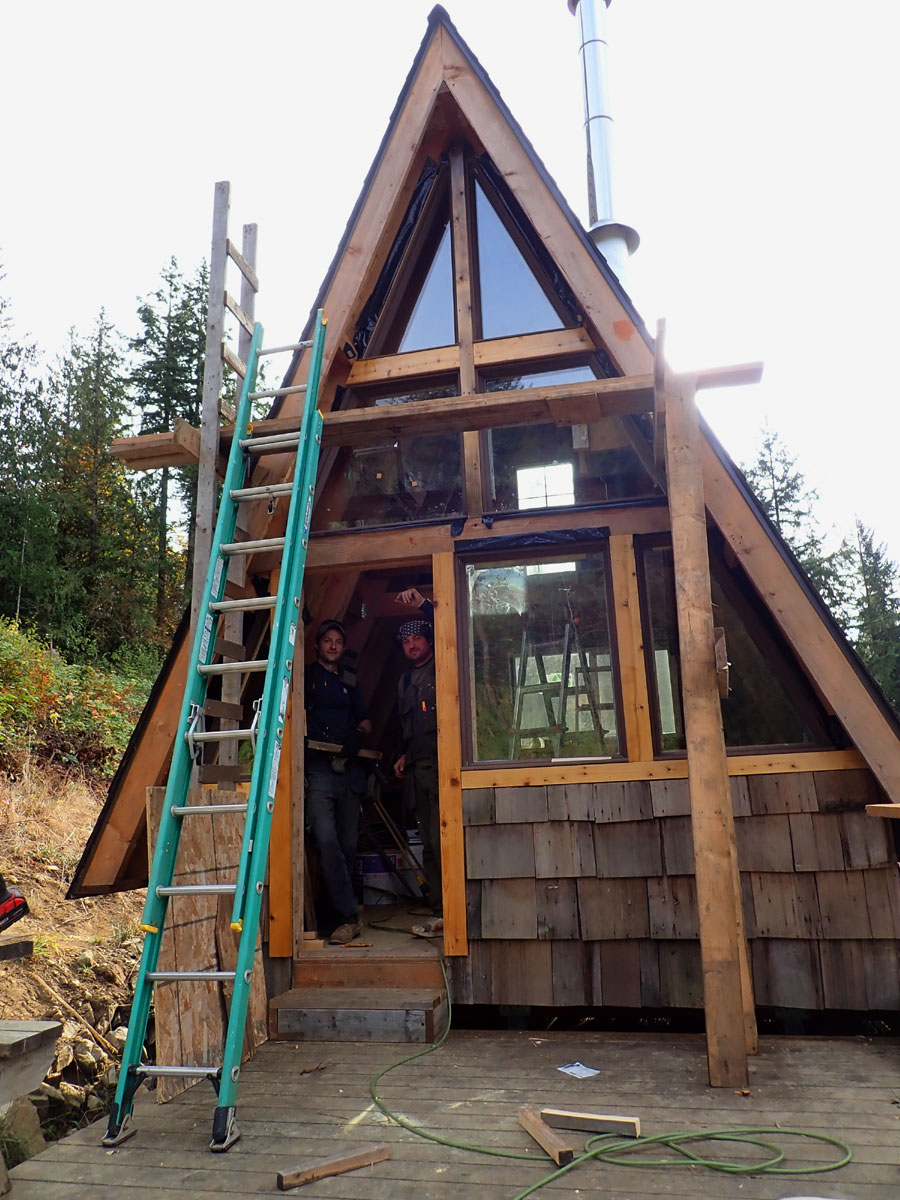
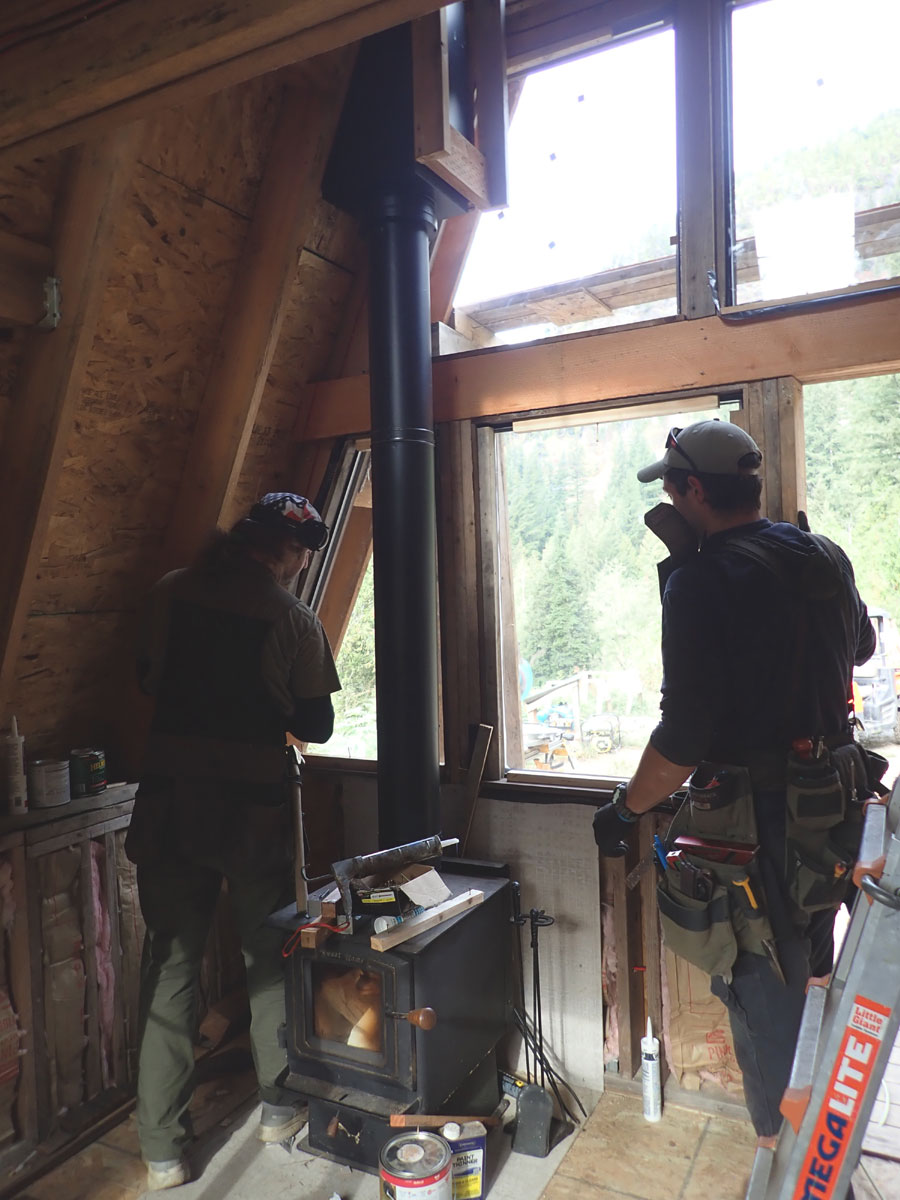
Window Installation!
L-R Grier, Taylor
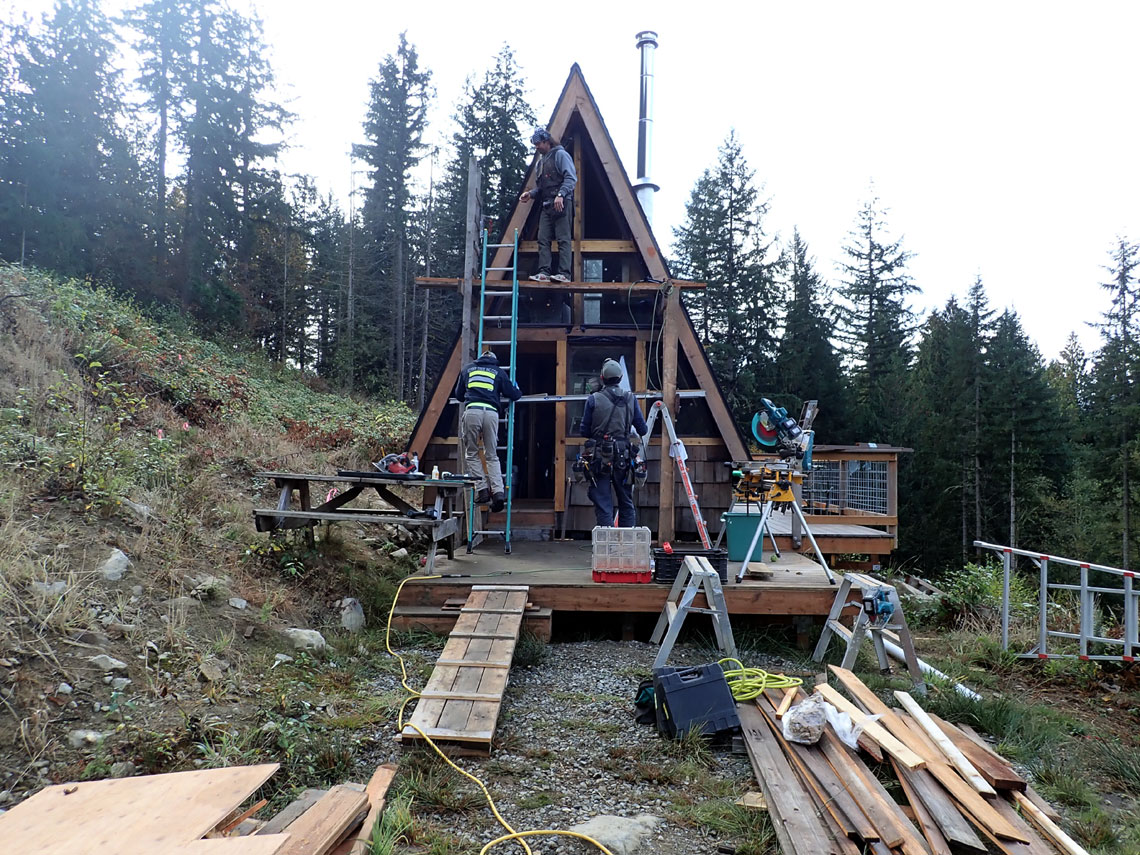
Three friends helping to get the
exterior window blocking and seal complete before the end of October. Note the full-size 10" Makita compound miter
saw, center right.
That thing ran on four Makita rechargeable batteries!
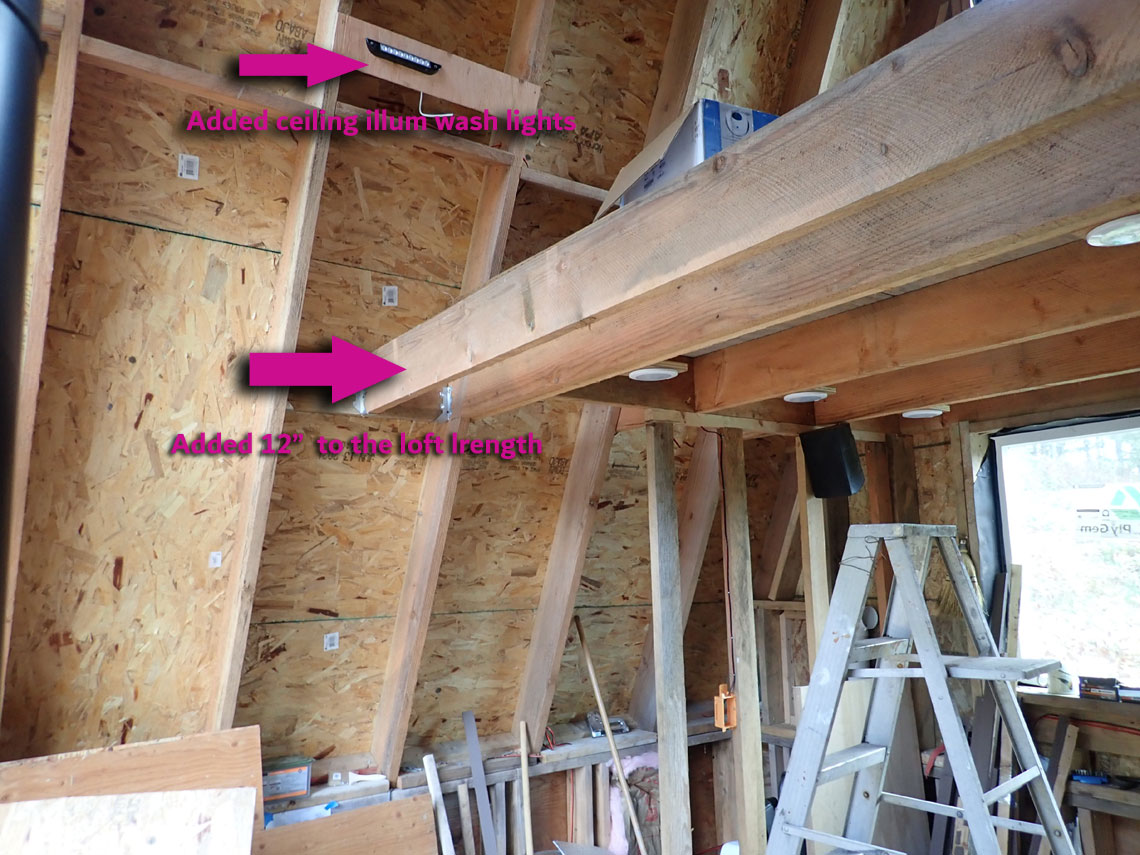
A late "change order"
Carpenters hate these but we designed the loft too
small.
It needed to be 80" deep to accommodate tall people and to add some
extra room. The other change was to add two LED "wash lights" to flood
the upper ceiling with light to add a spacious feel to the A-Frame at
night.
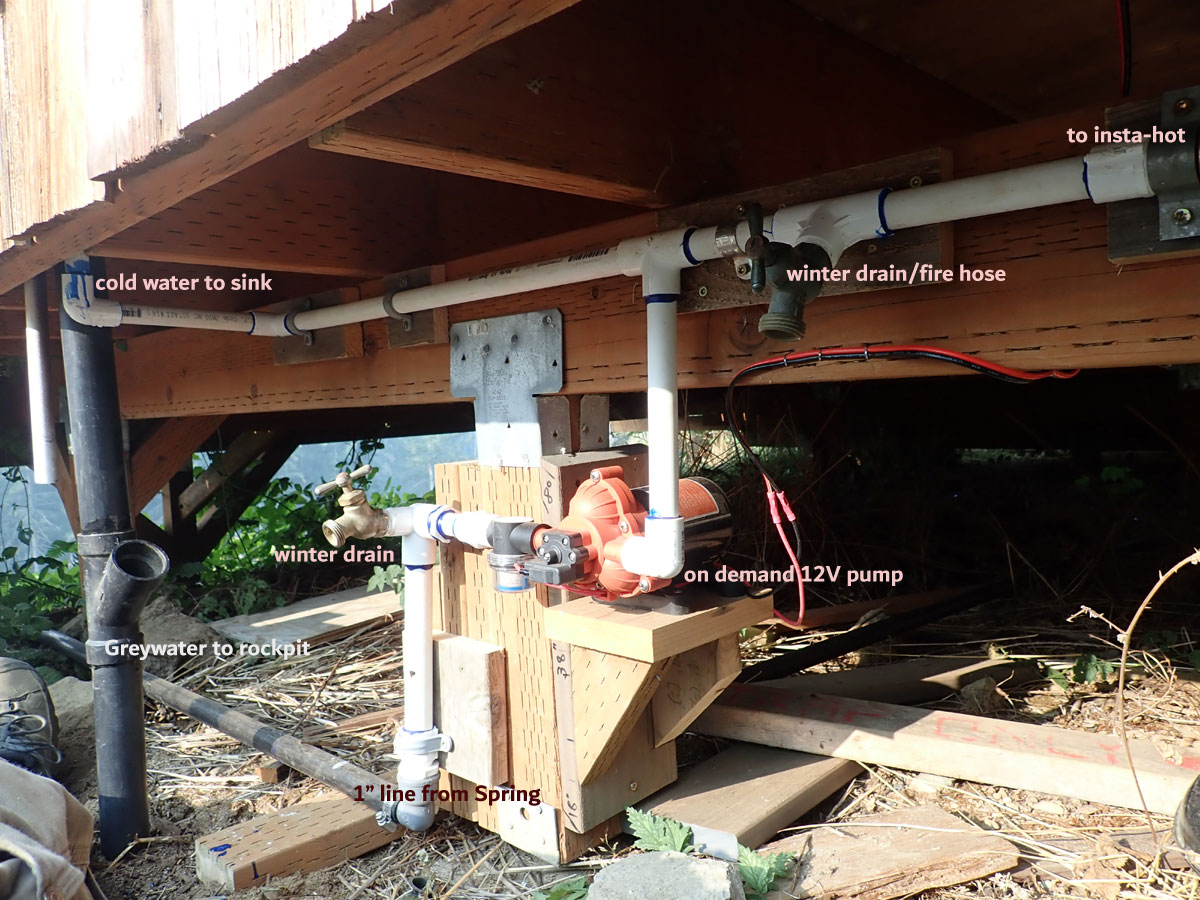
Cold water plumbing , demand pump and
grey water drain to rockpit.
View a sketch we worked
from to build the hot and cold piping

Separett Villa 9215
12Volt power in the blue box to the compost toilet. There's a small fan
that runs 24/7 and dries the solid material. Water goes down and out the
grey water drain.
Top 3.5" vent goes up 4' and out the back wall.
Separett website
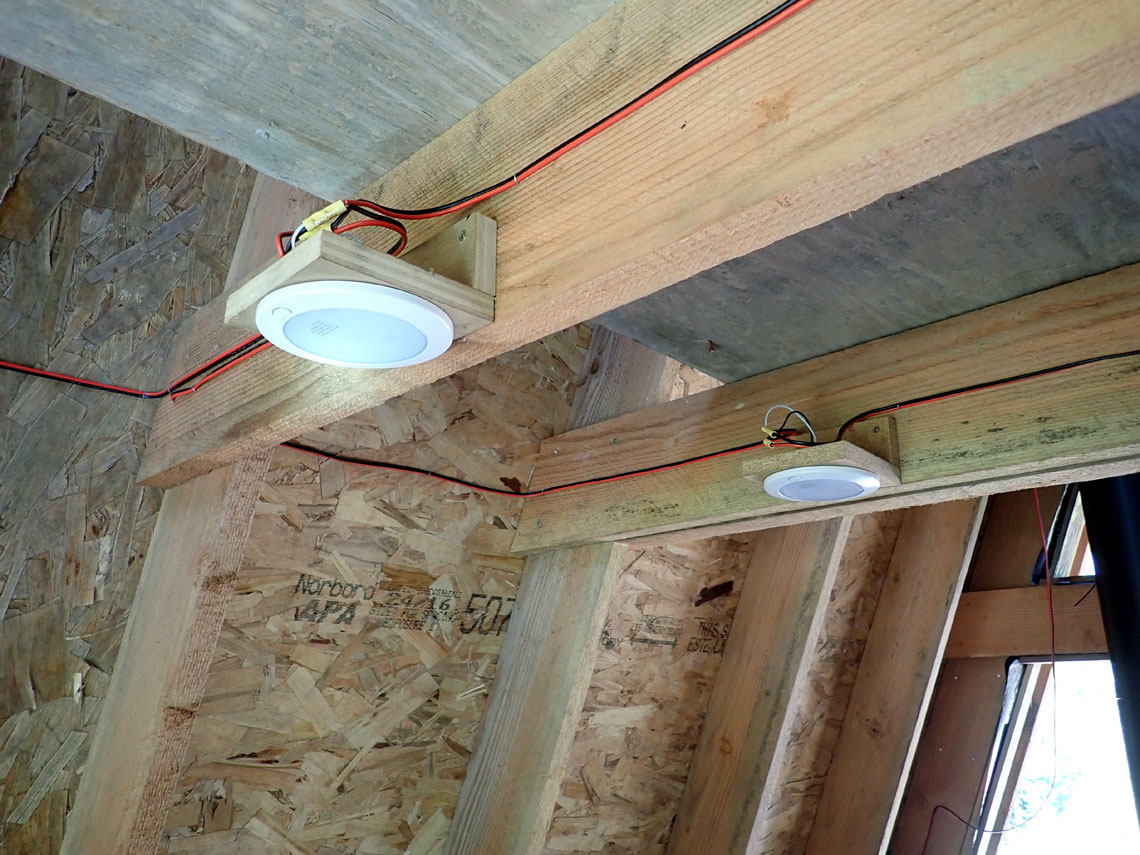
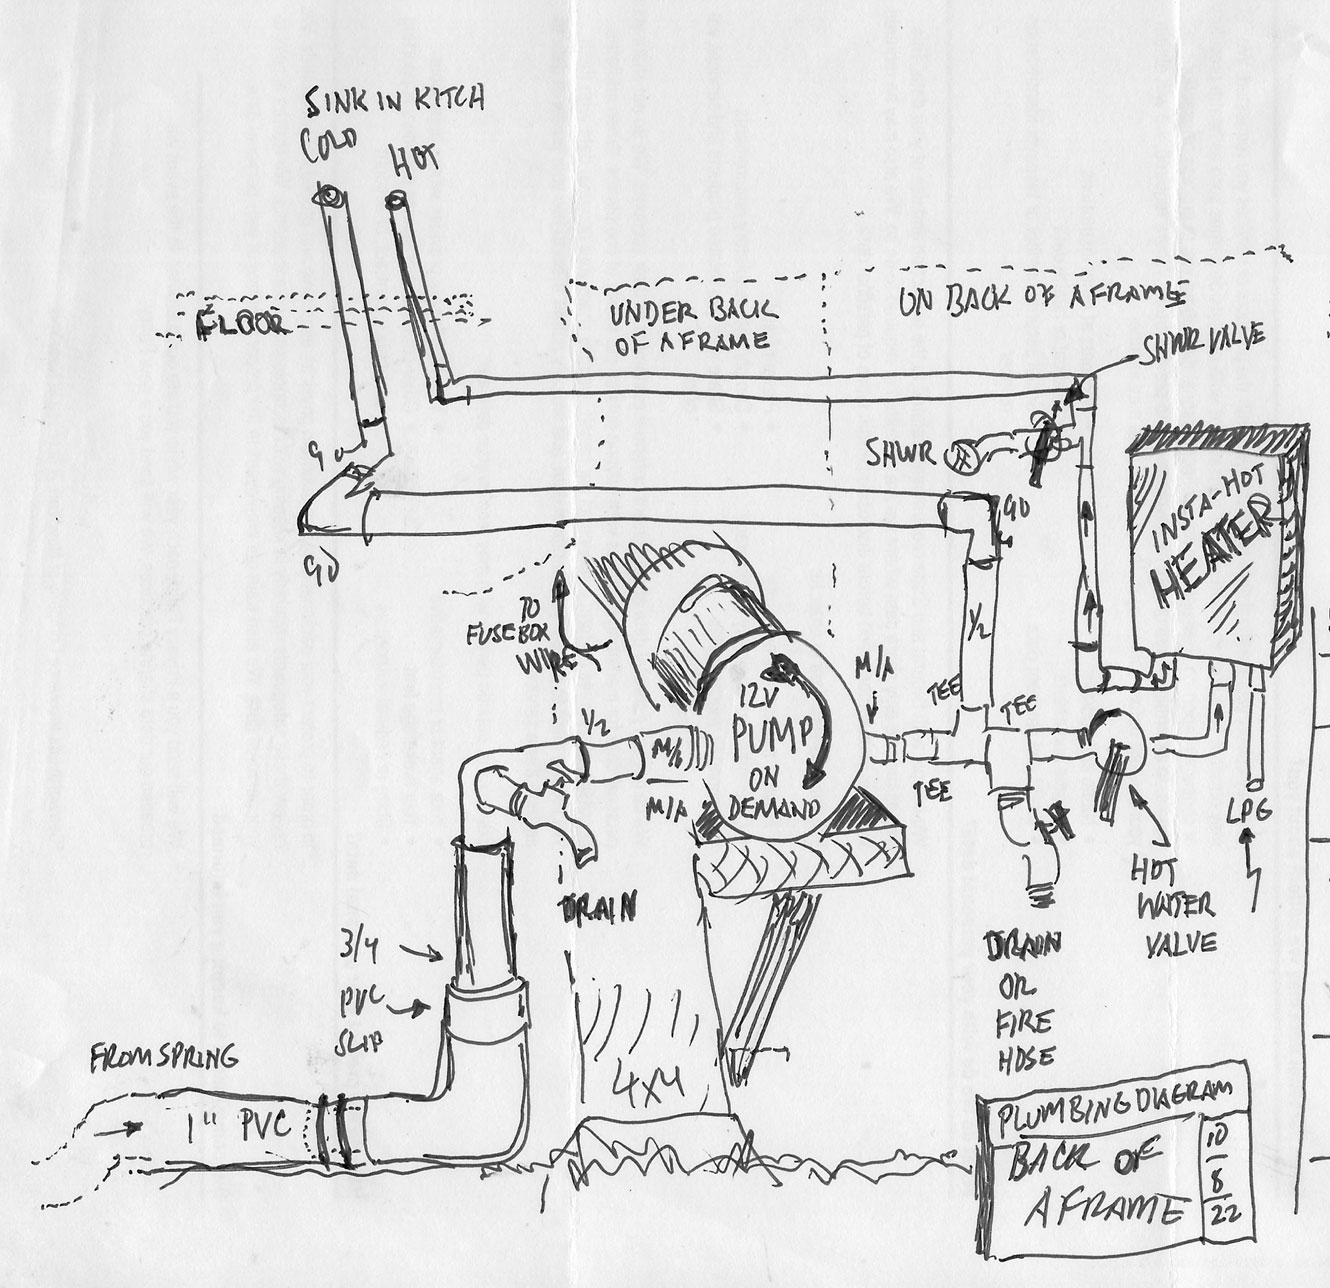
Kitchen LED fixtures found on EBay
Six "cool-white" mounted in the main room ceiling under the loft.
From the
"12 volt online" store
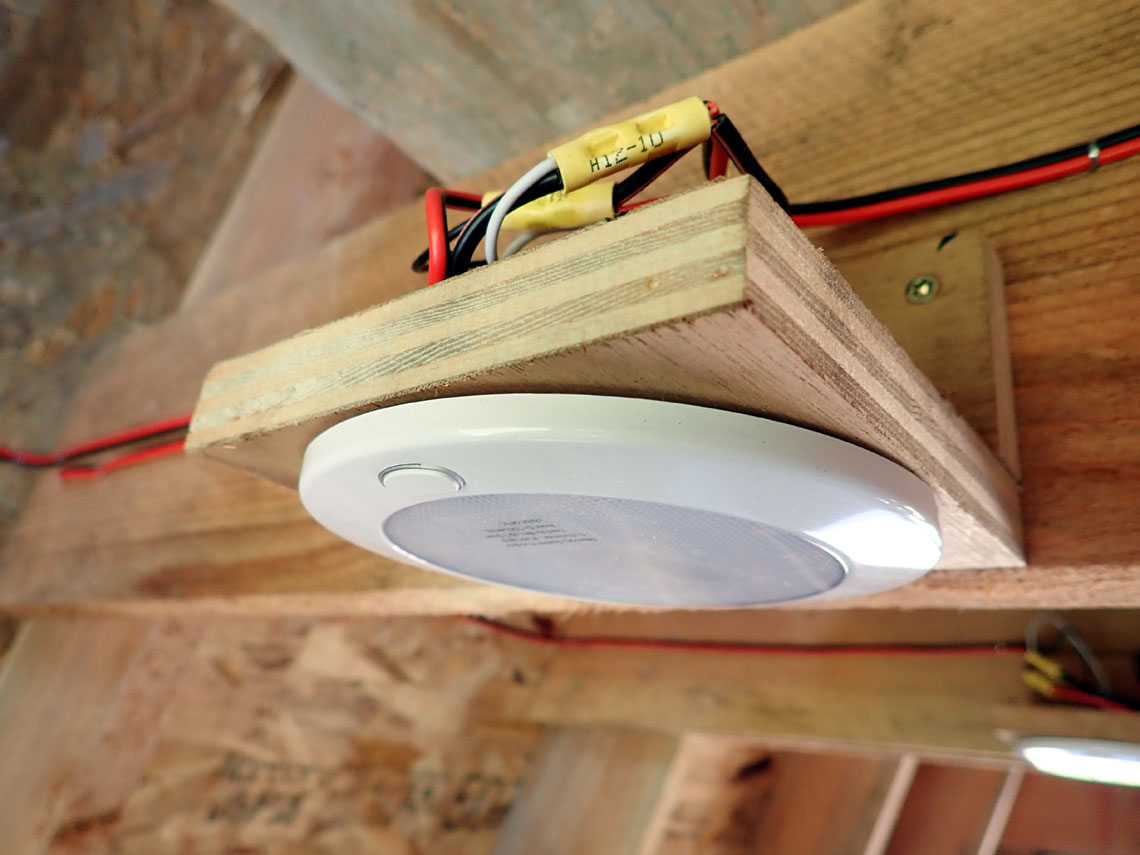
You hit the little button and hold it
down and it dims to where you want.
Plus, when you turn it off and back on, it remembers the setting.
This is a temporary mounting scheme until we are ready to design
the finished ceiling.
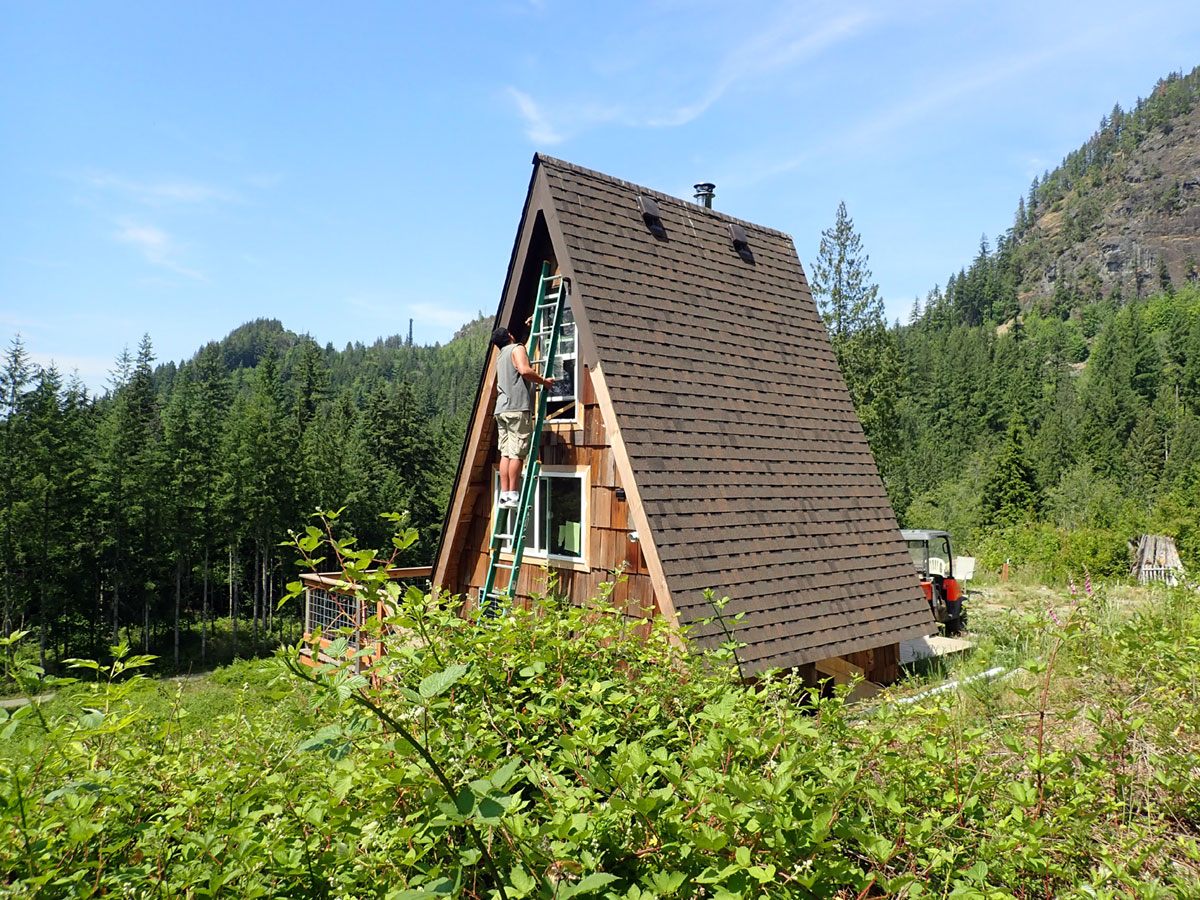
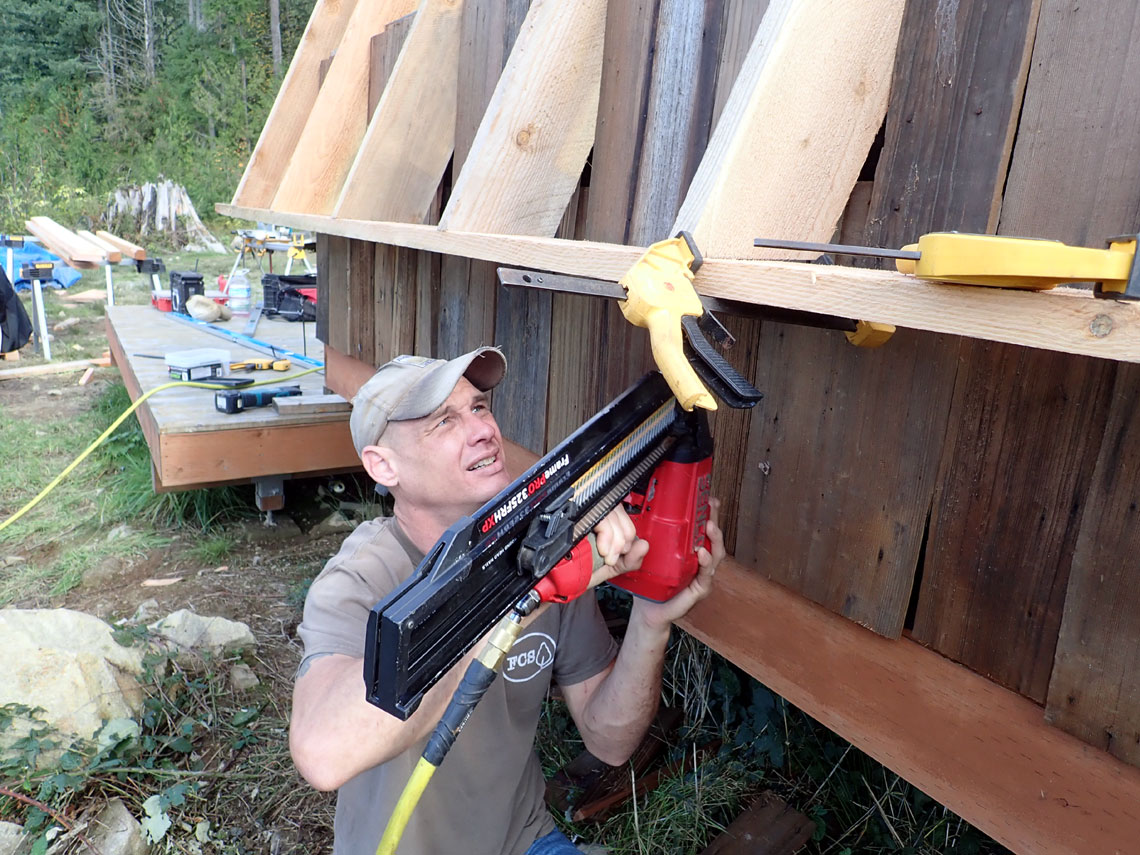
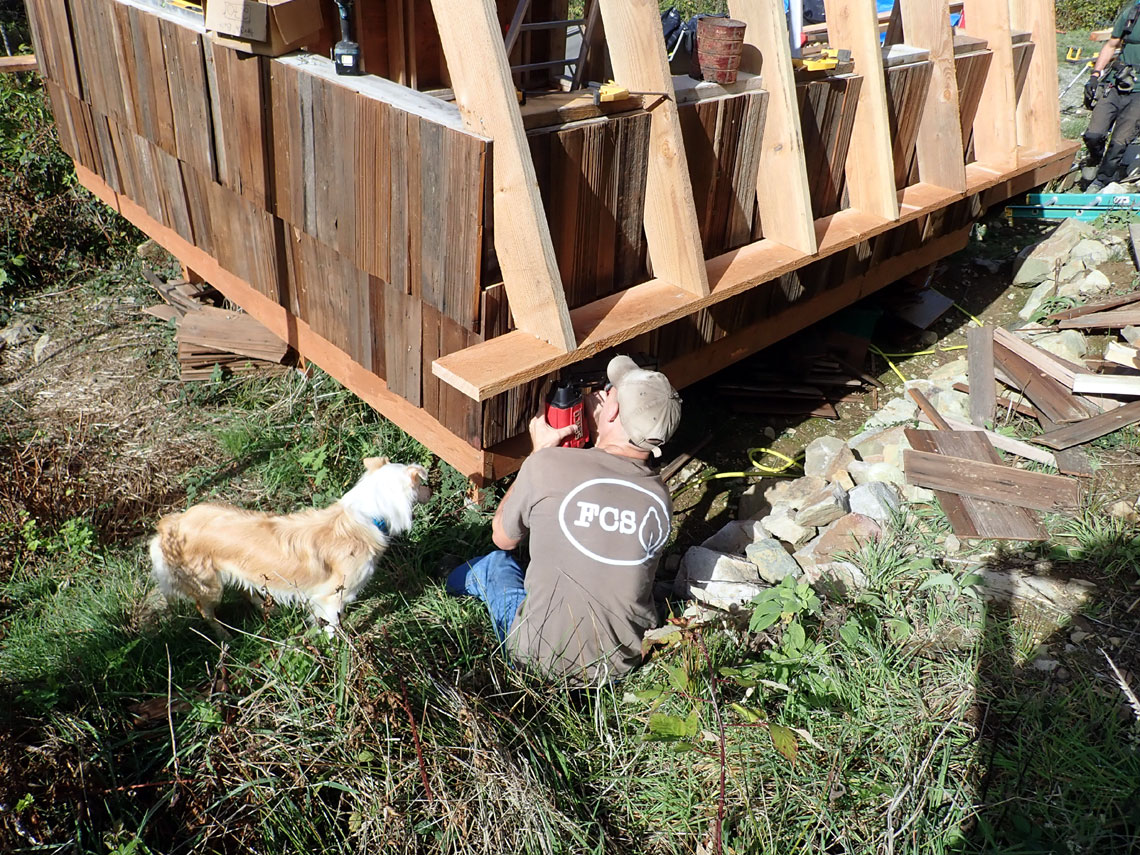
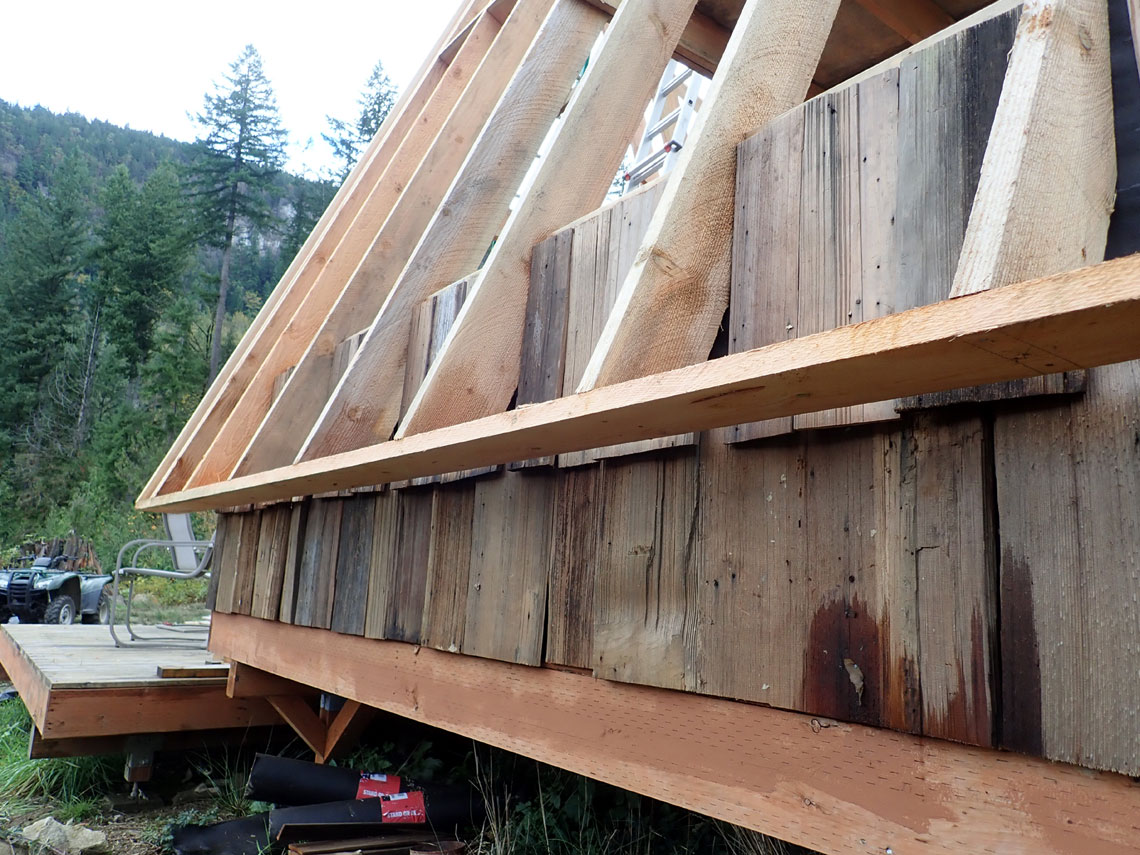
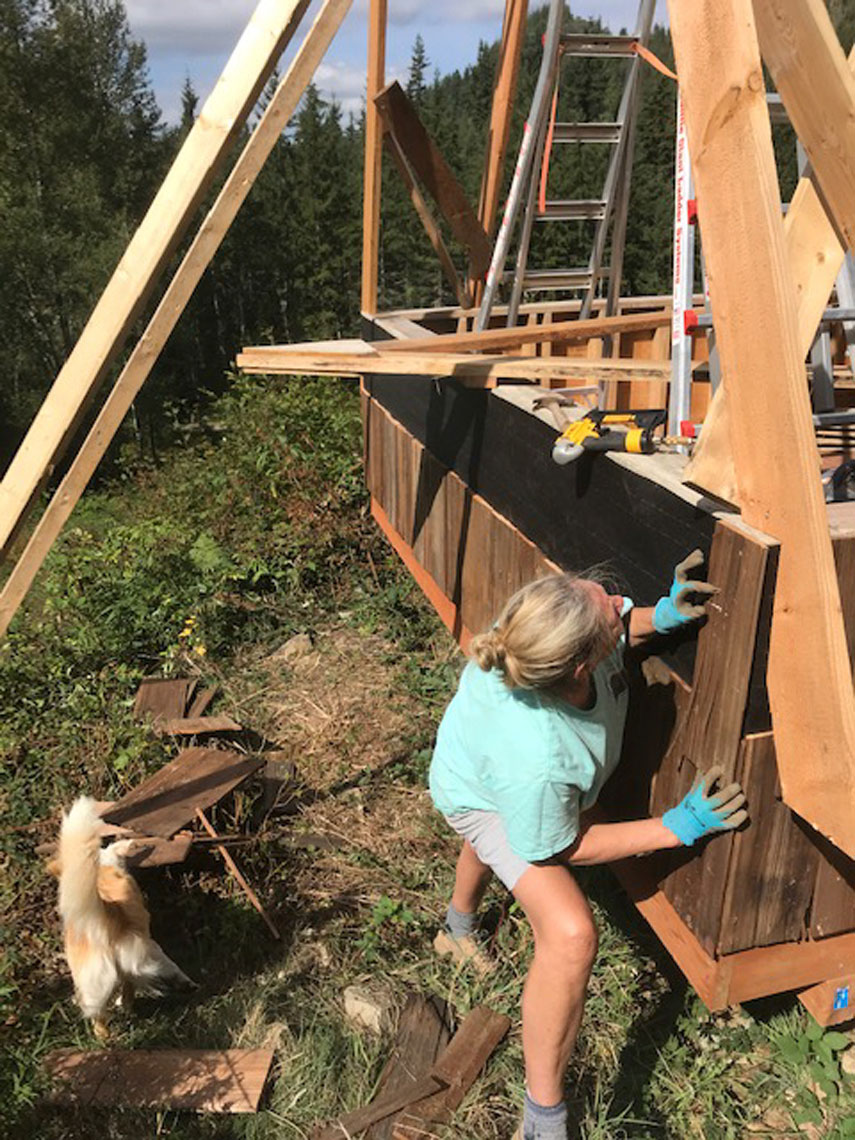
Working on the Back Wall
Shakes and window trim August 2022
Shakes were repurposed from the
homestead house
Taylor helping to finish it up
 I
I
Making and installing the cedar facing for the
windows
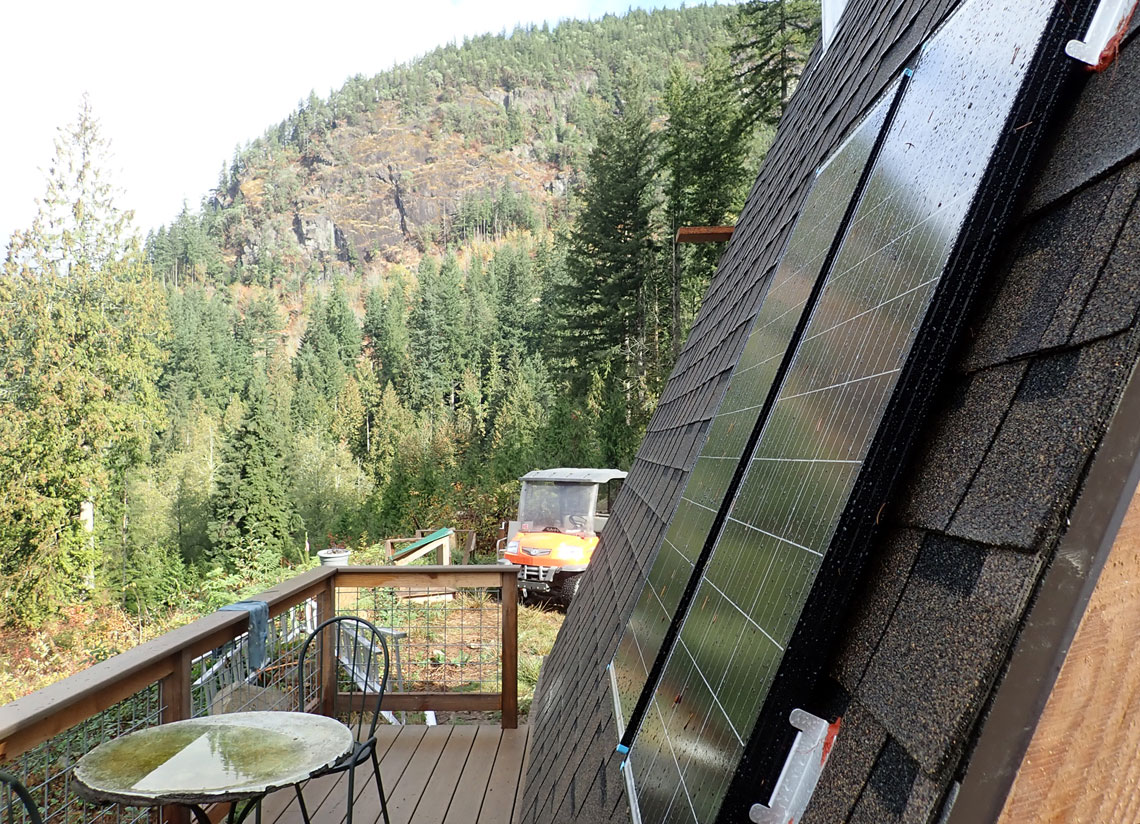
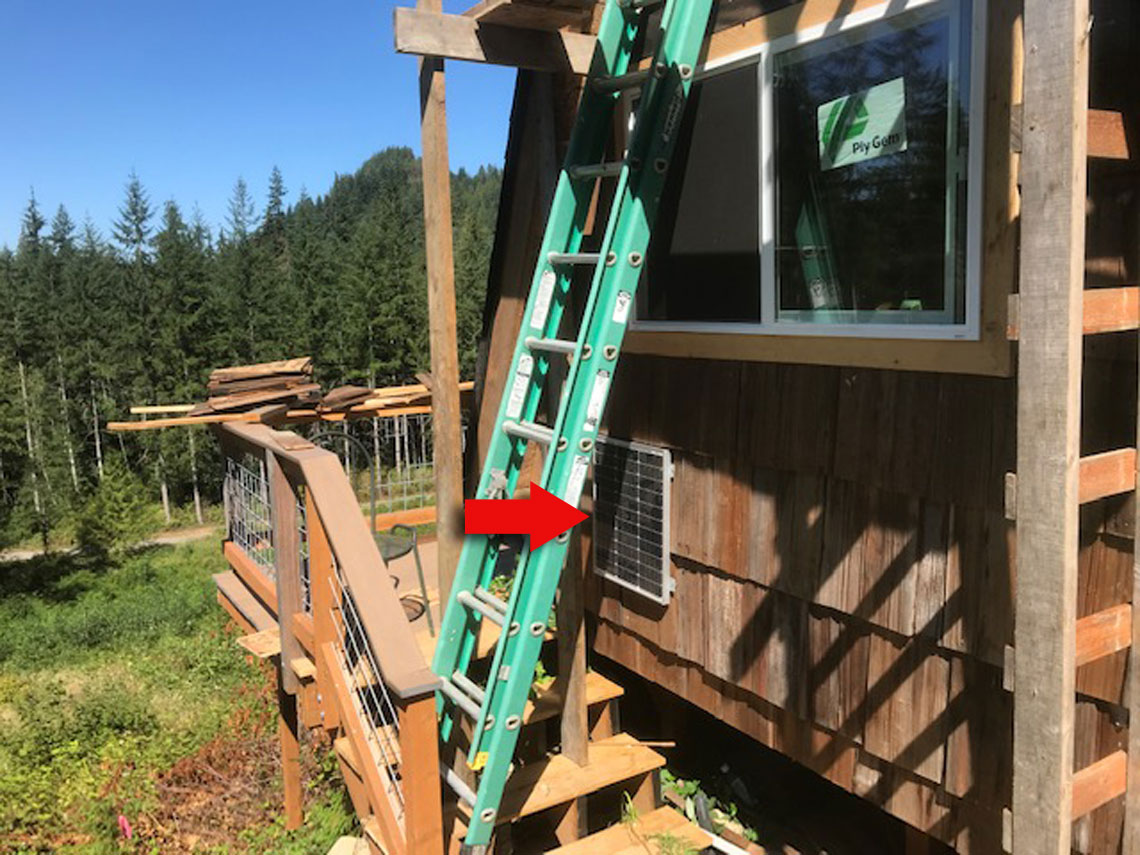
Pair of 100W
Renogy solar panels
facing west
View a shot of the one panel on
the south side, it gets morning sun.

Chimney installation
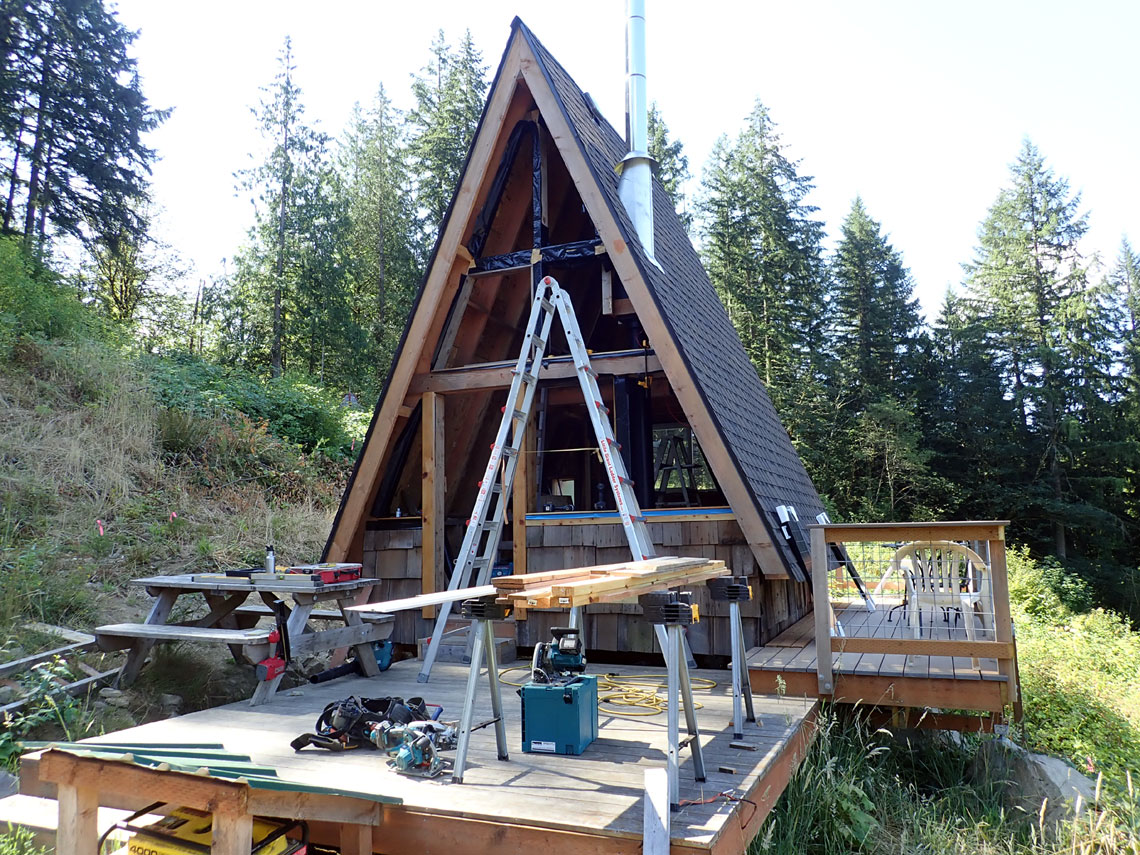
August 2022
Working on the cedar facing for the windows
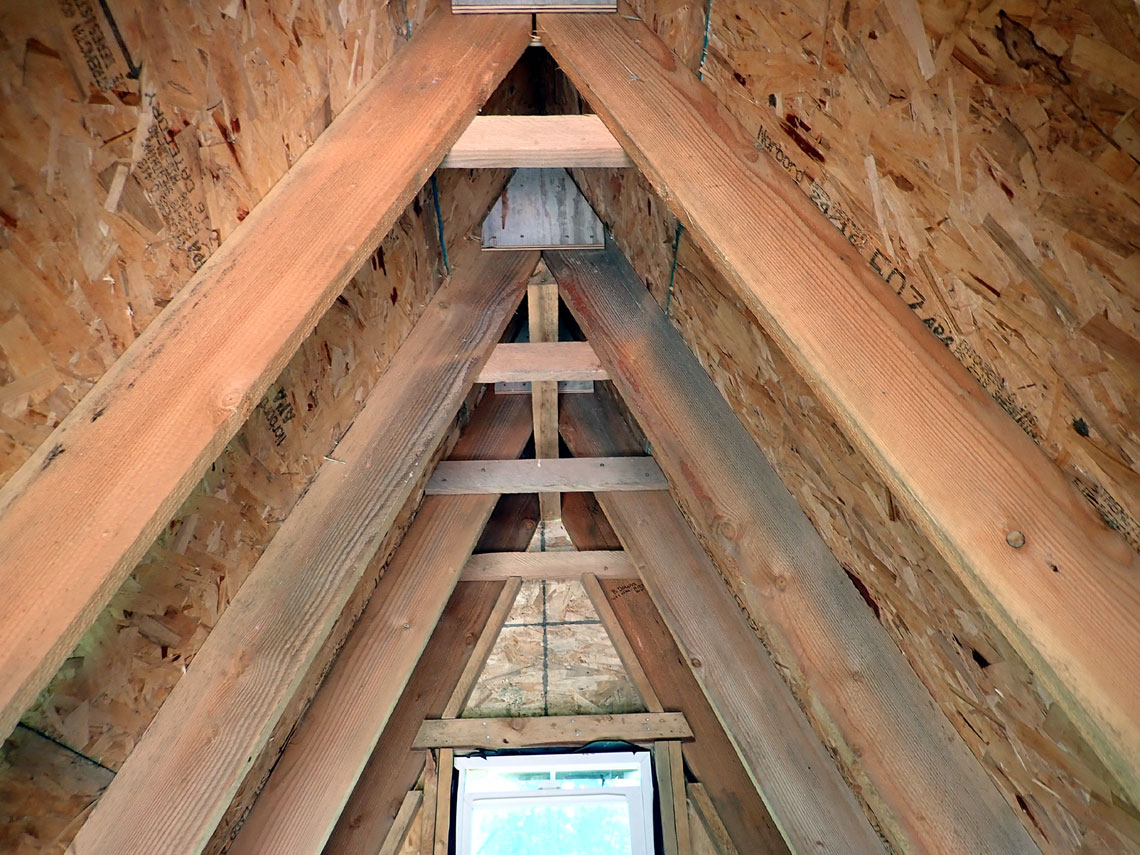
A-Frame collar ties and loft window

Kitchen and electrical corner
Note the "high-end" Advent "Calypso" 2 way speaker top center (R ch)
A few temp circuits were set up to use the stereo and try out the lights
Sunny July workday
Wood Stove in Left foreground with pipe straight up
40W Bluetooth Amplifier and main power
switch
Temporarily mounted for some tunes while working.
July 2022
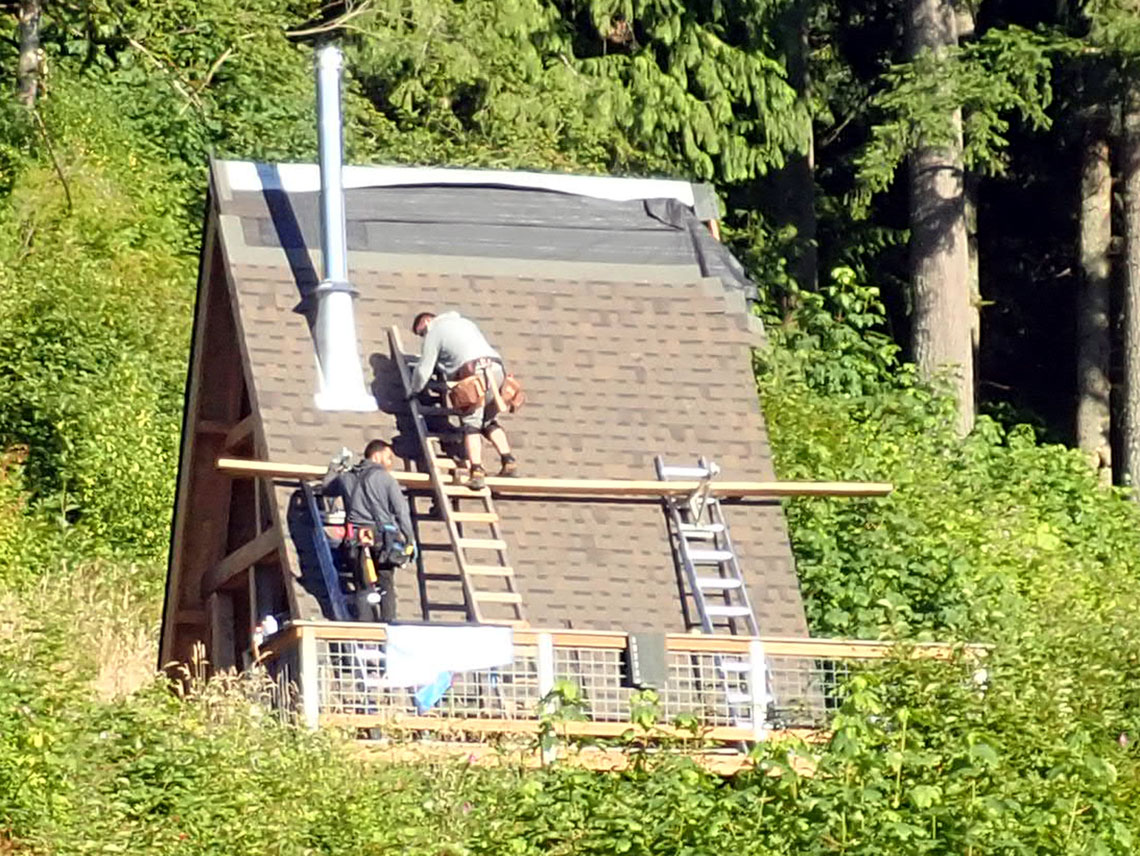
Telephoto shot of Jose and Luis
They
put up the roofing in one day
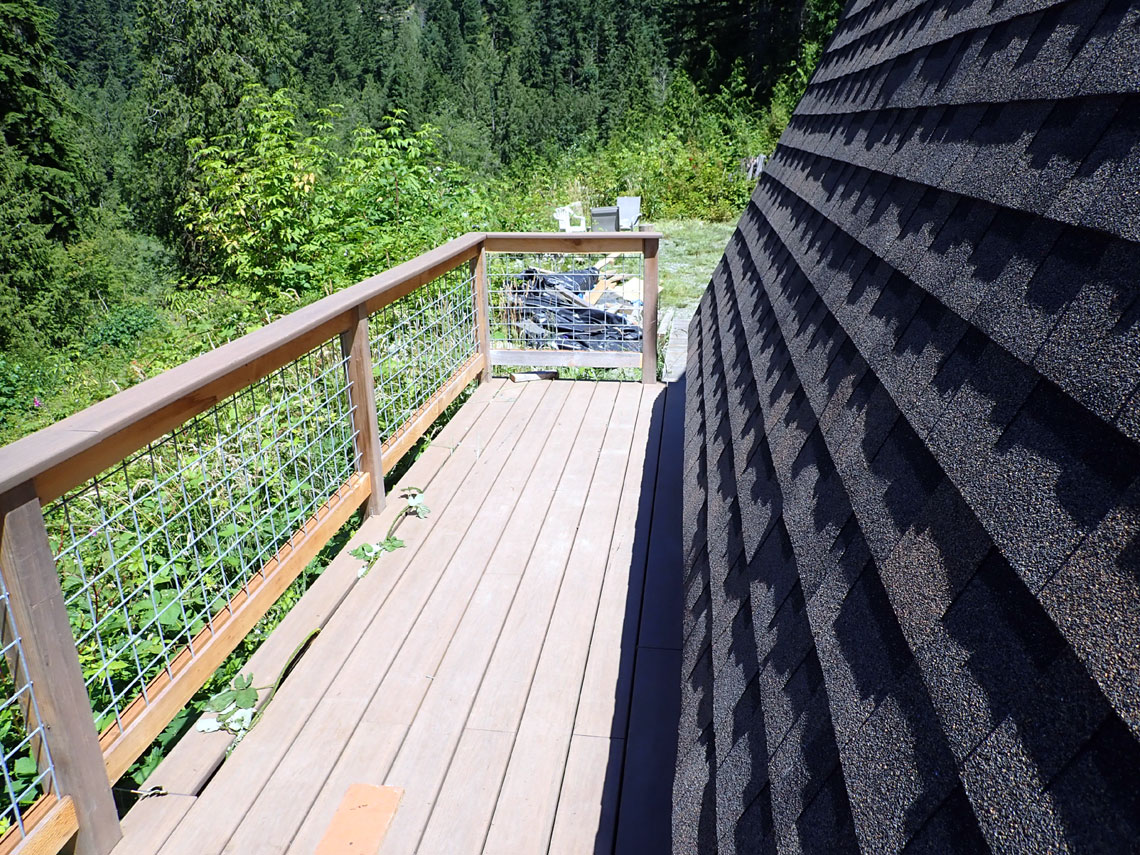
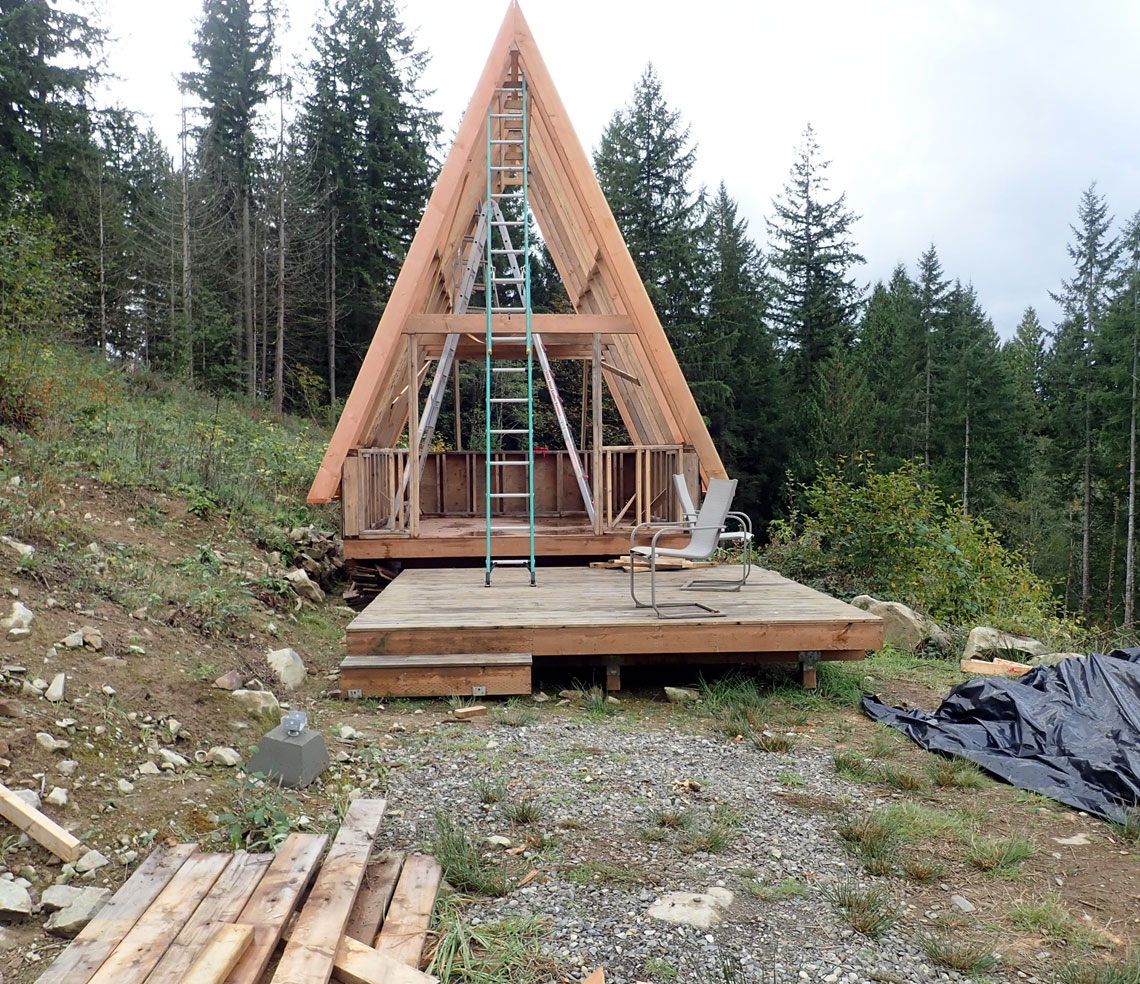
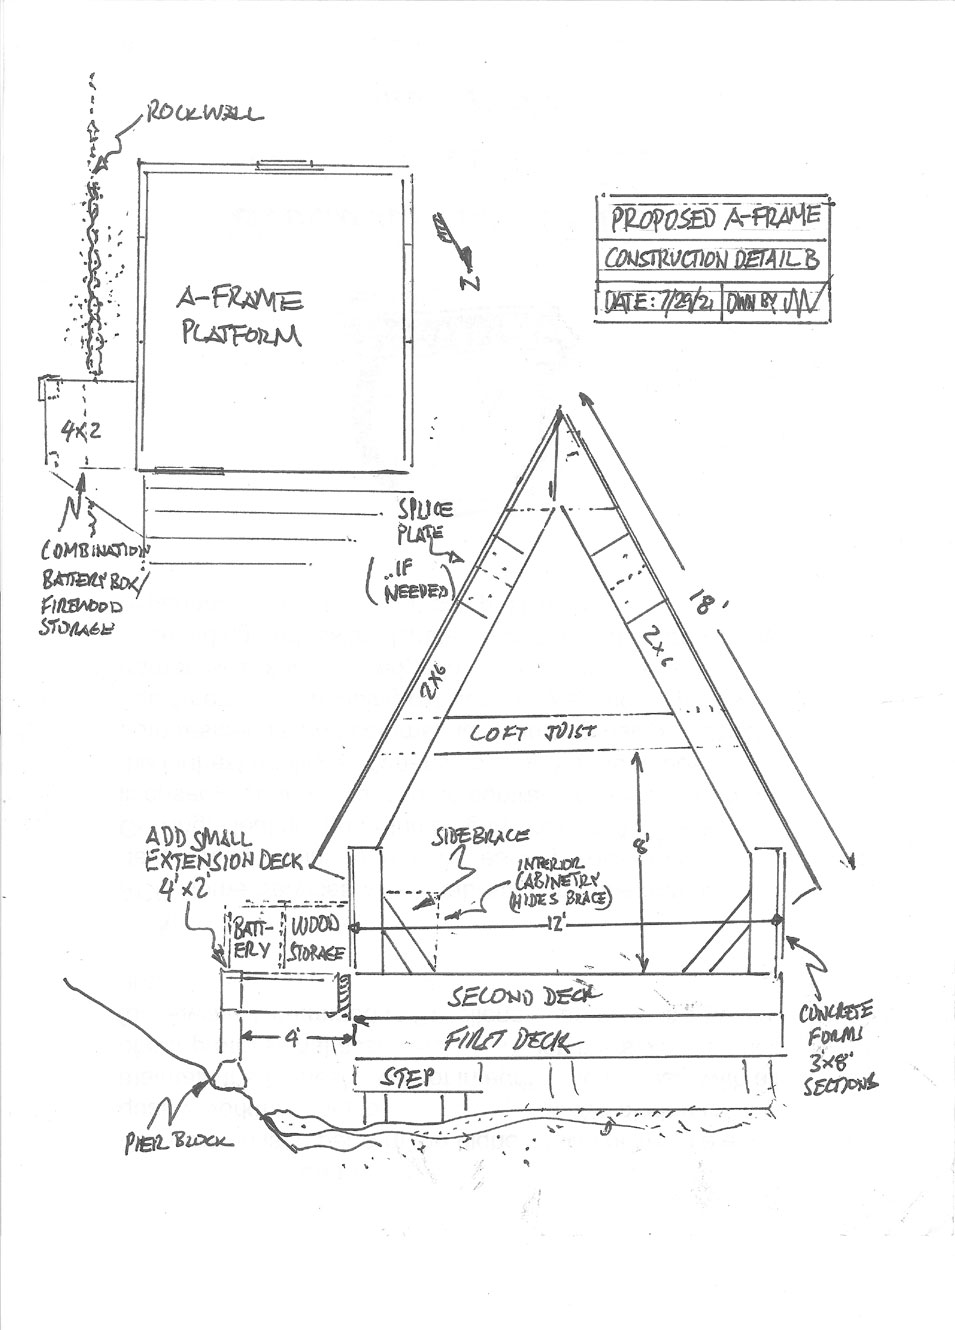
Looking north
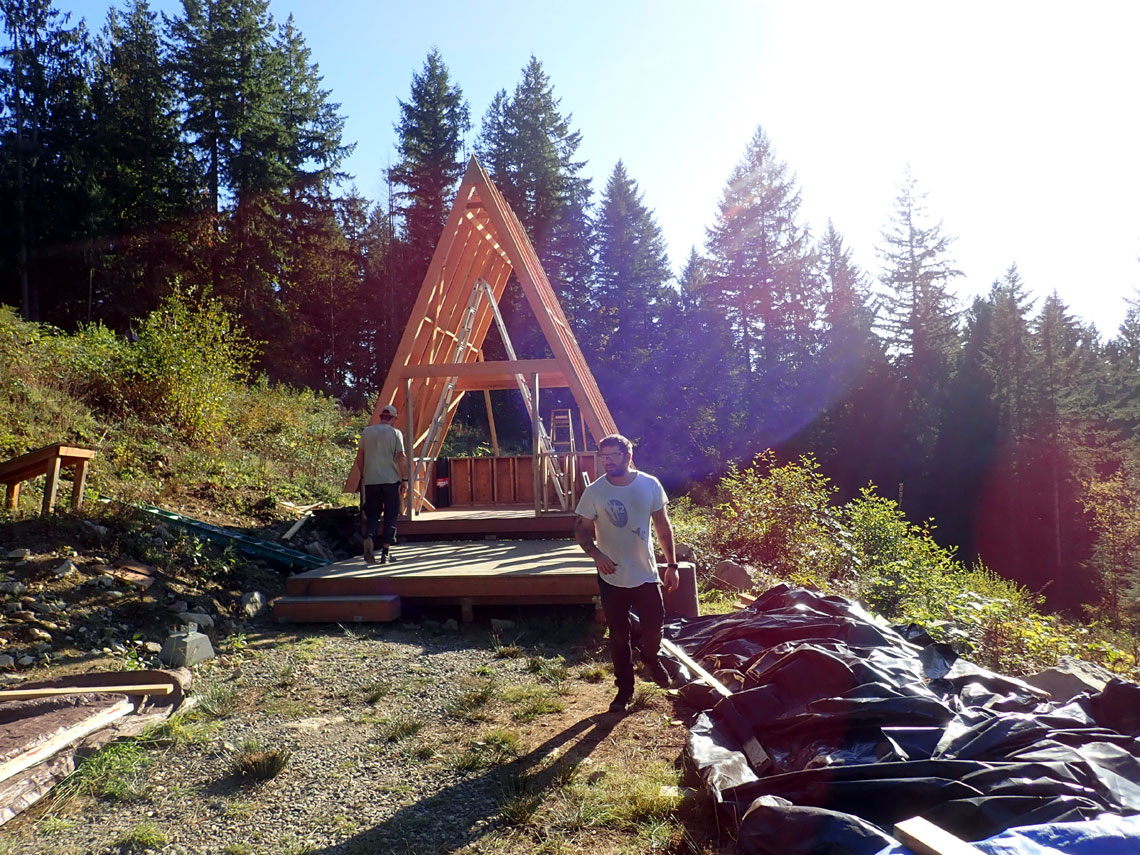
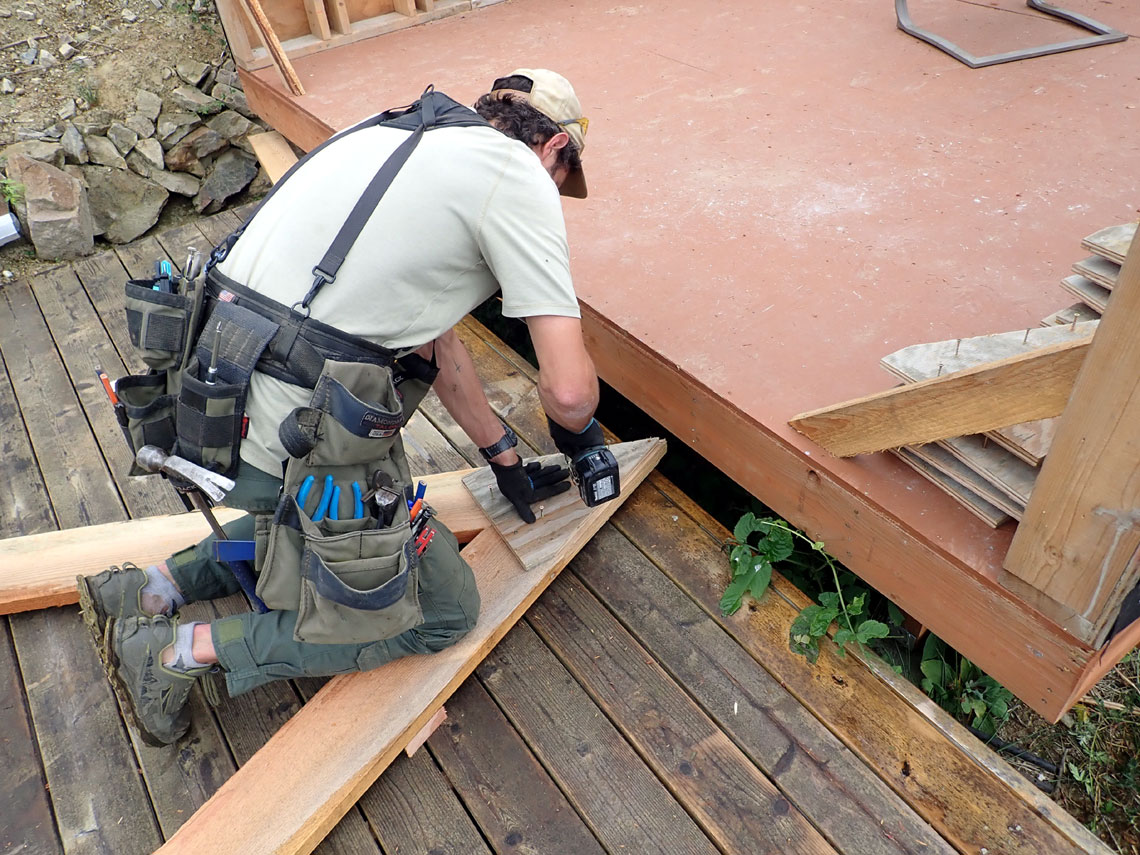
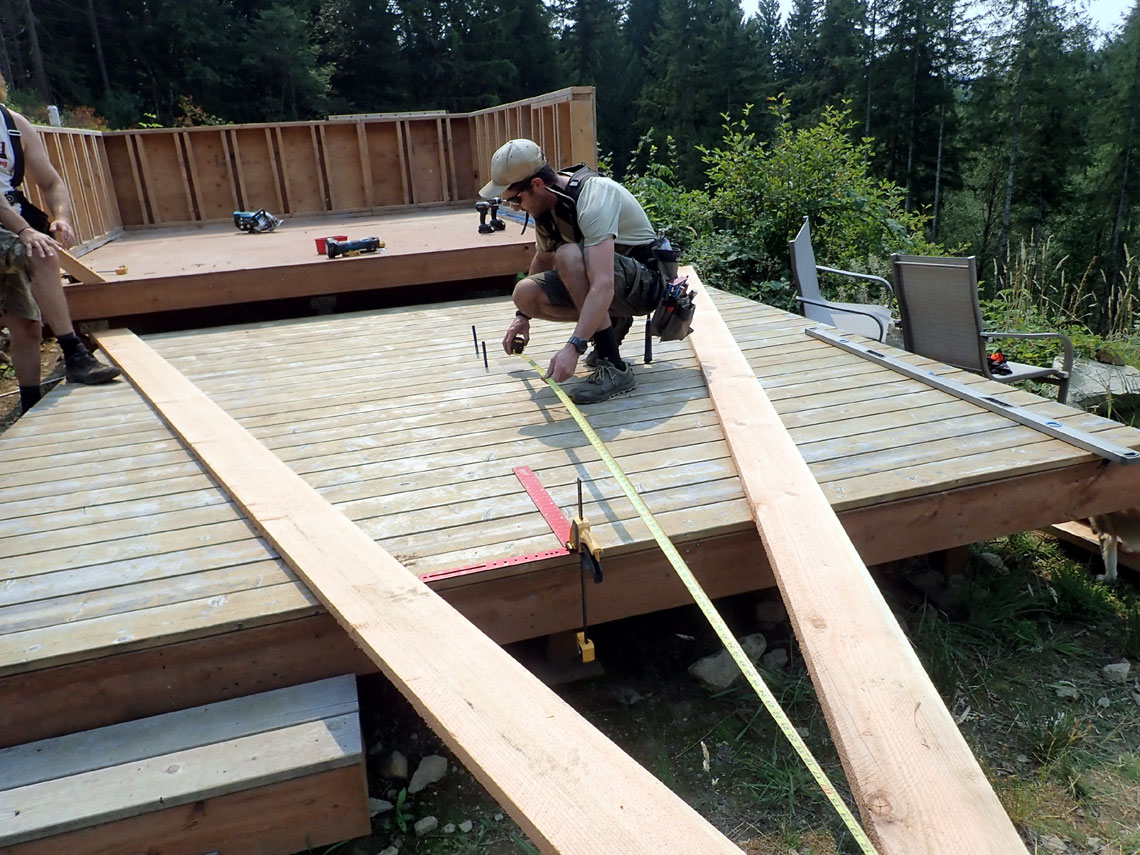
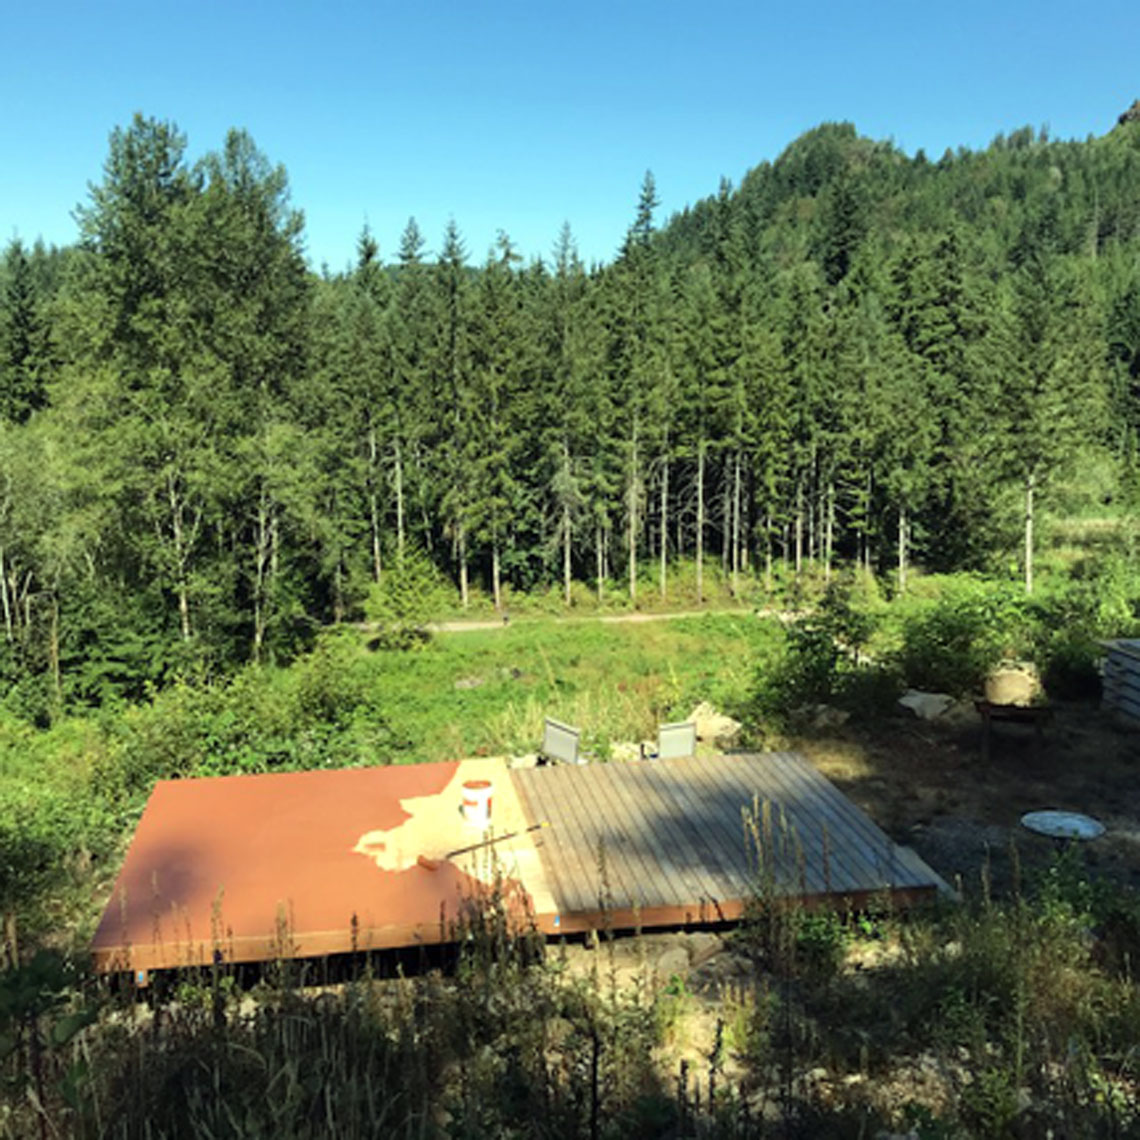
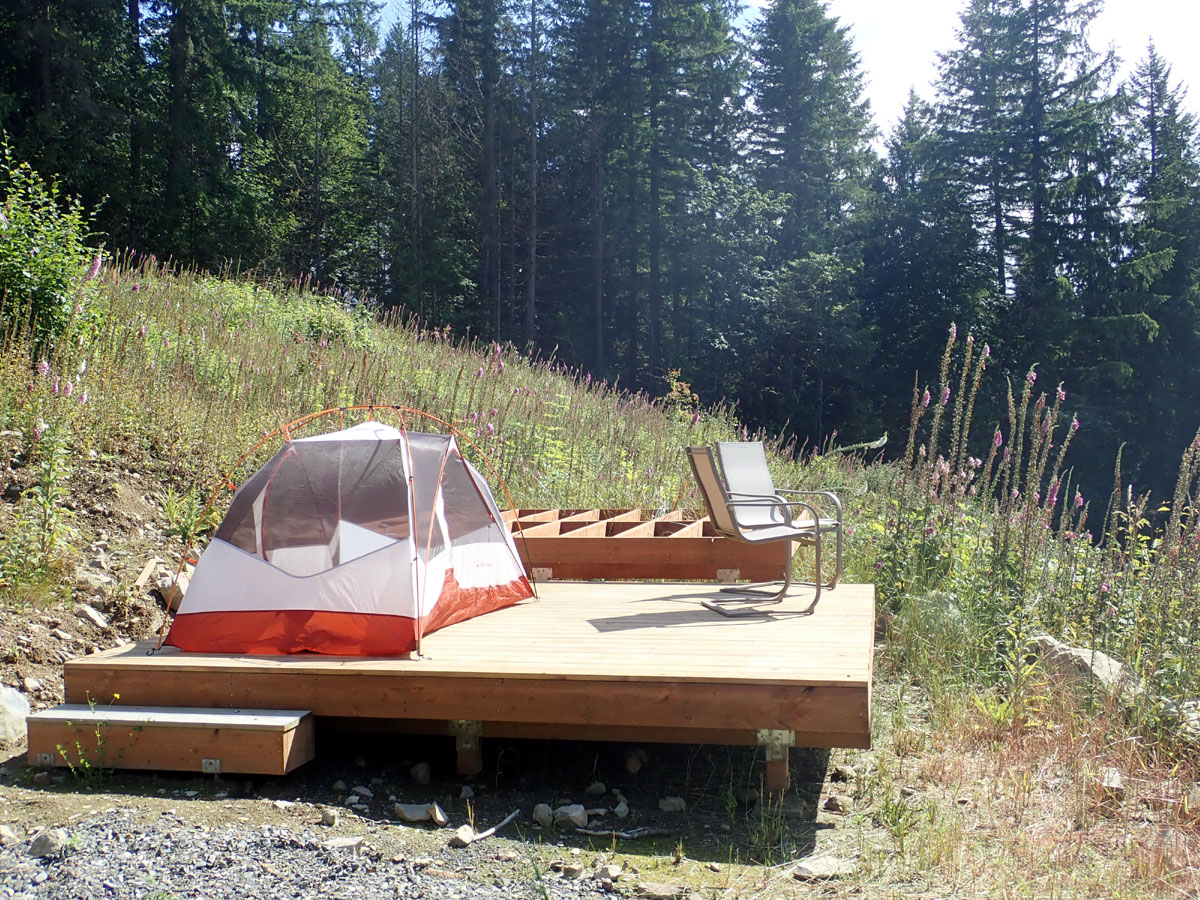
A step off to the 12x12 deck
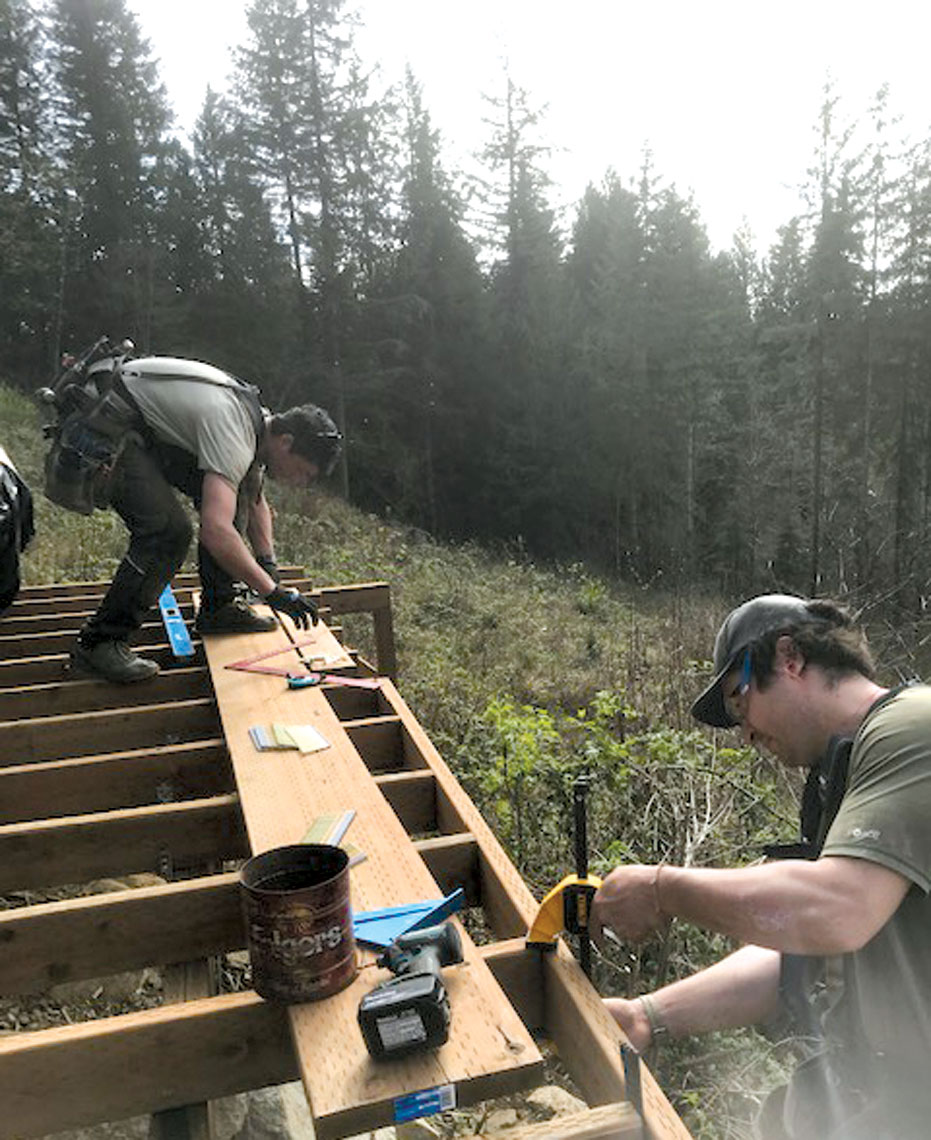
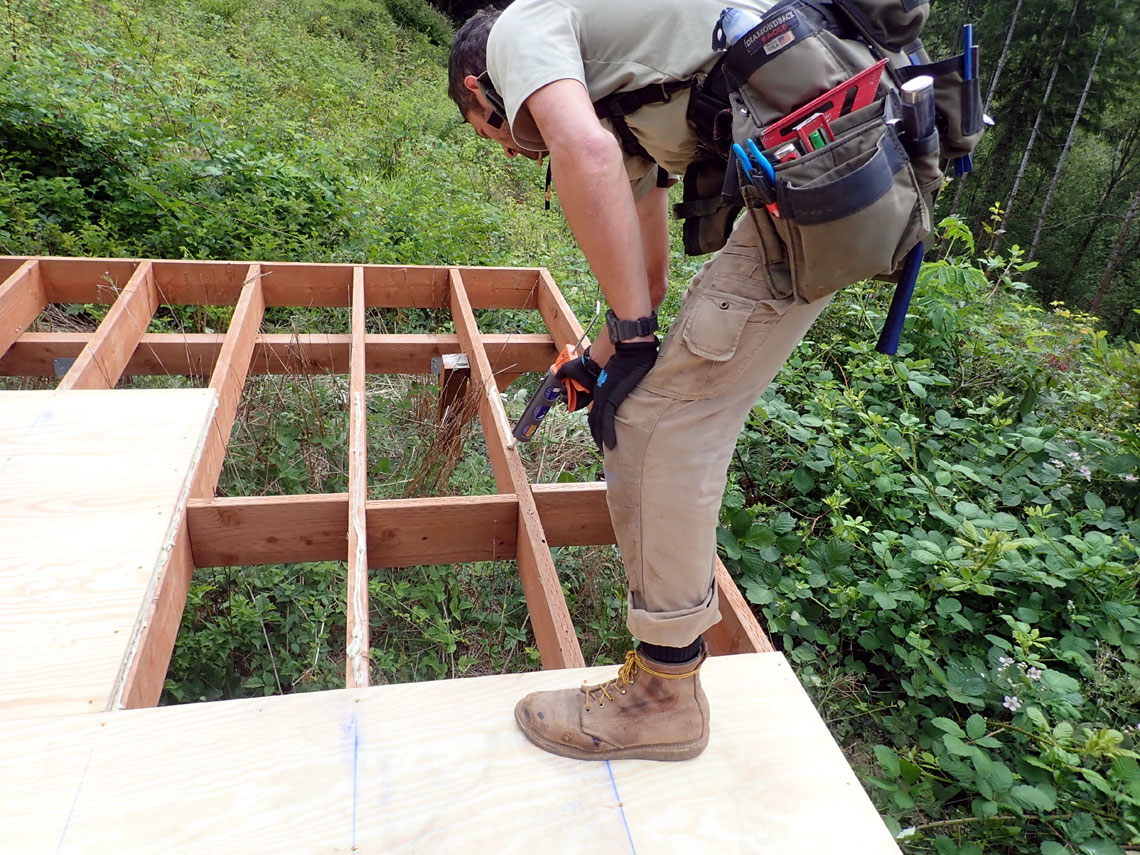
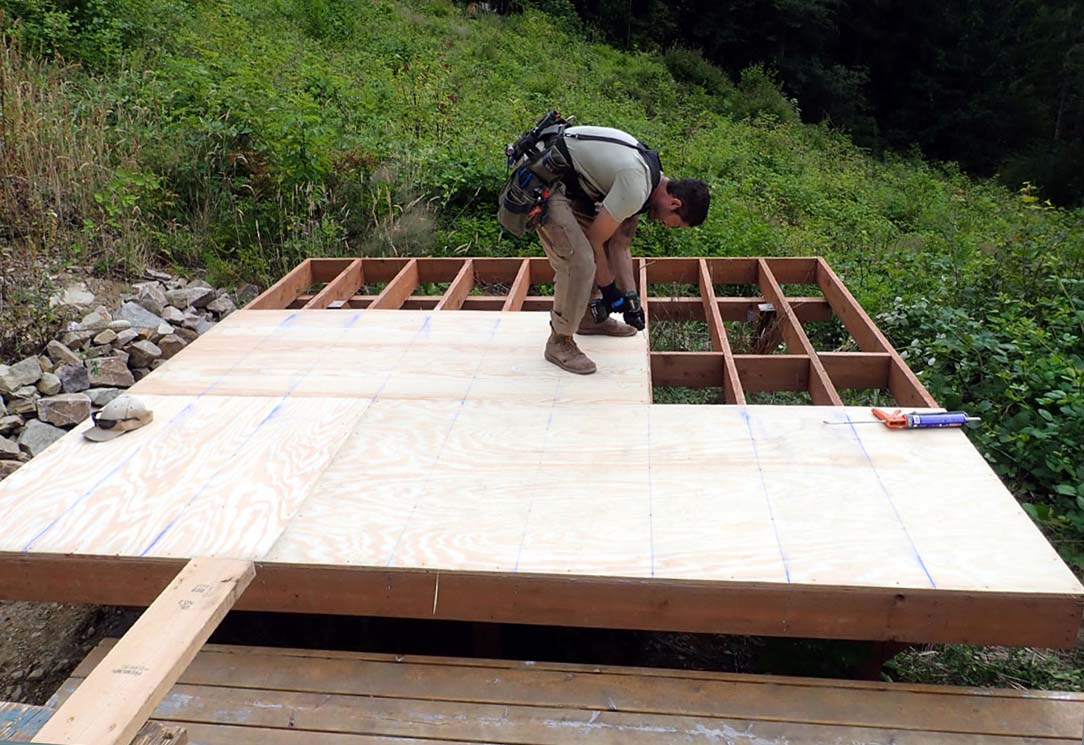
Spring 2022
Building the deck
(L-R) Grier, Tyler
Note the metal Folgers coffee can of nails

We got a great deal on an odd lot of
composite decking.
The width was determined by that old "bistro" table and chairs.
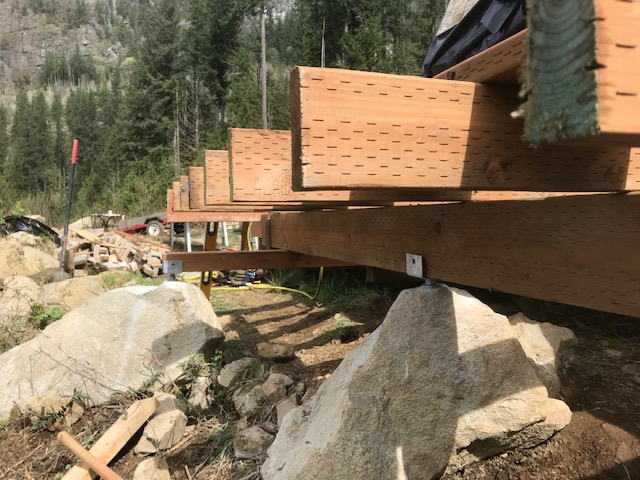
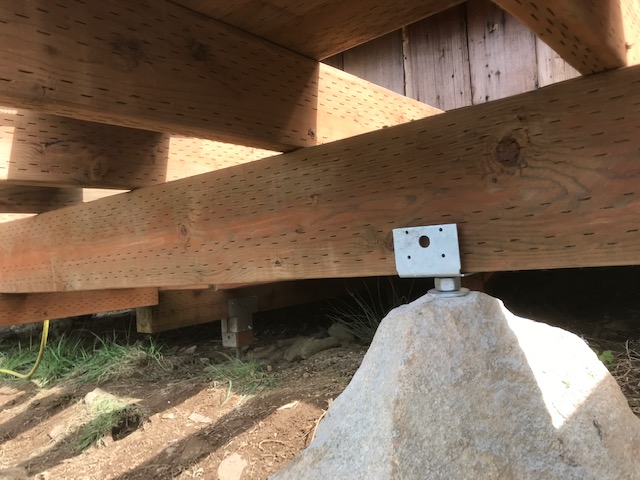
These
granite boulders made a great base for the deck.
A geologist told us the the whole huckleberry hill is an ancient granite
"uplift". It is not the same kind of rock as the mountain in the
background.
Everything was nailed just after this photo was taken
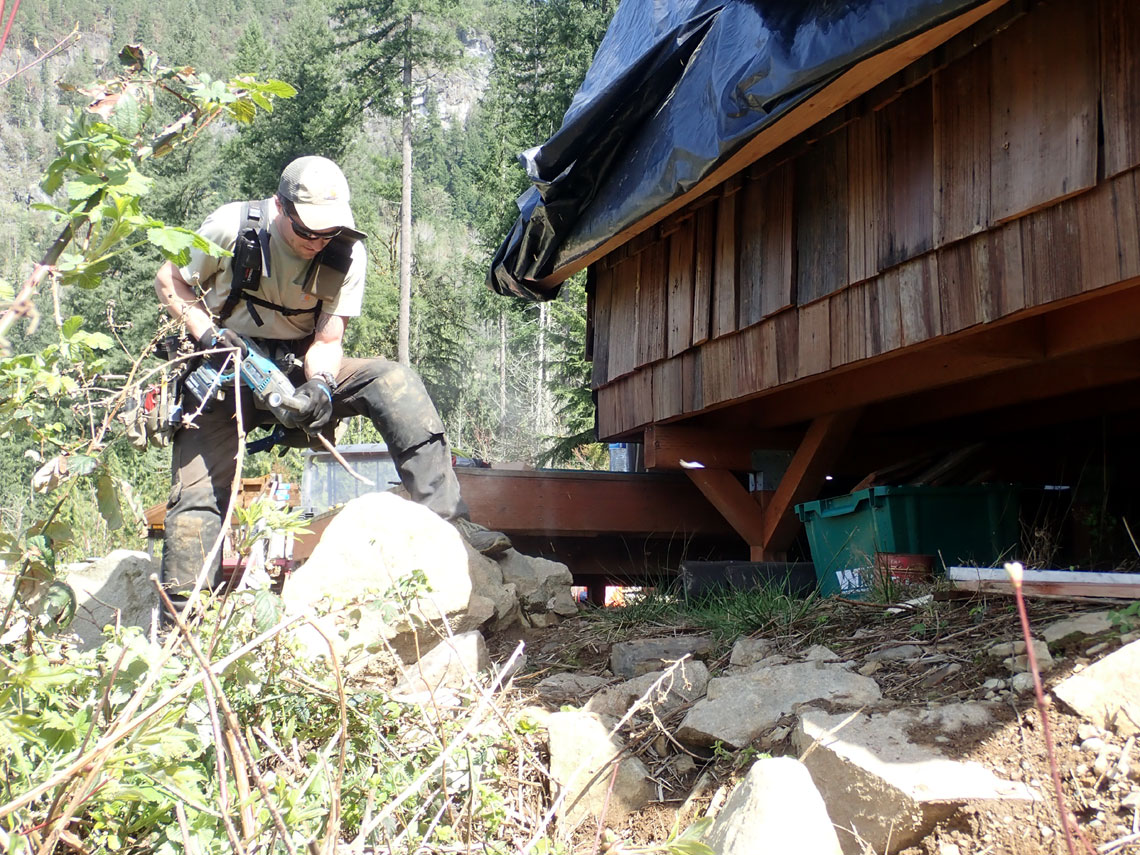
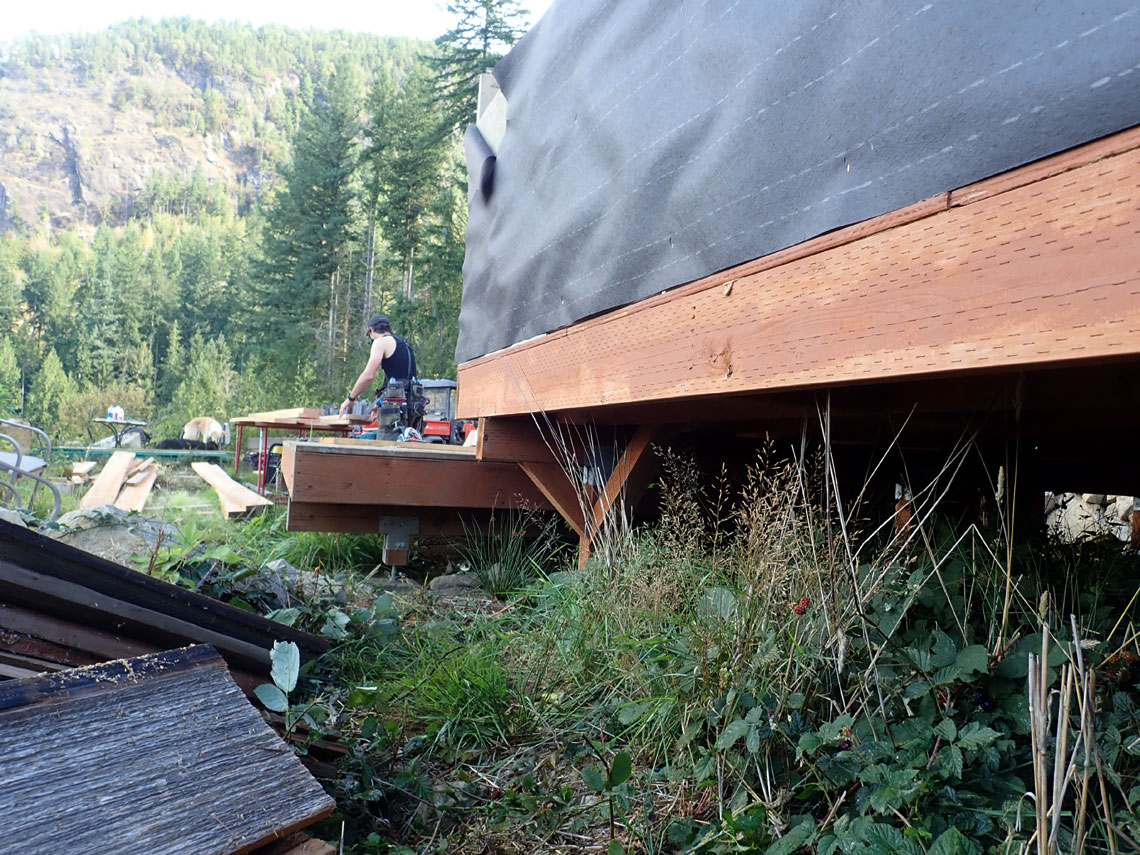
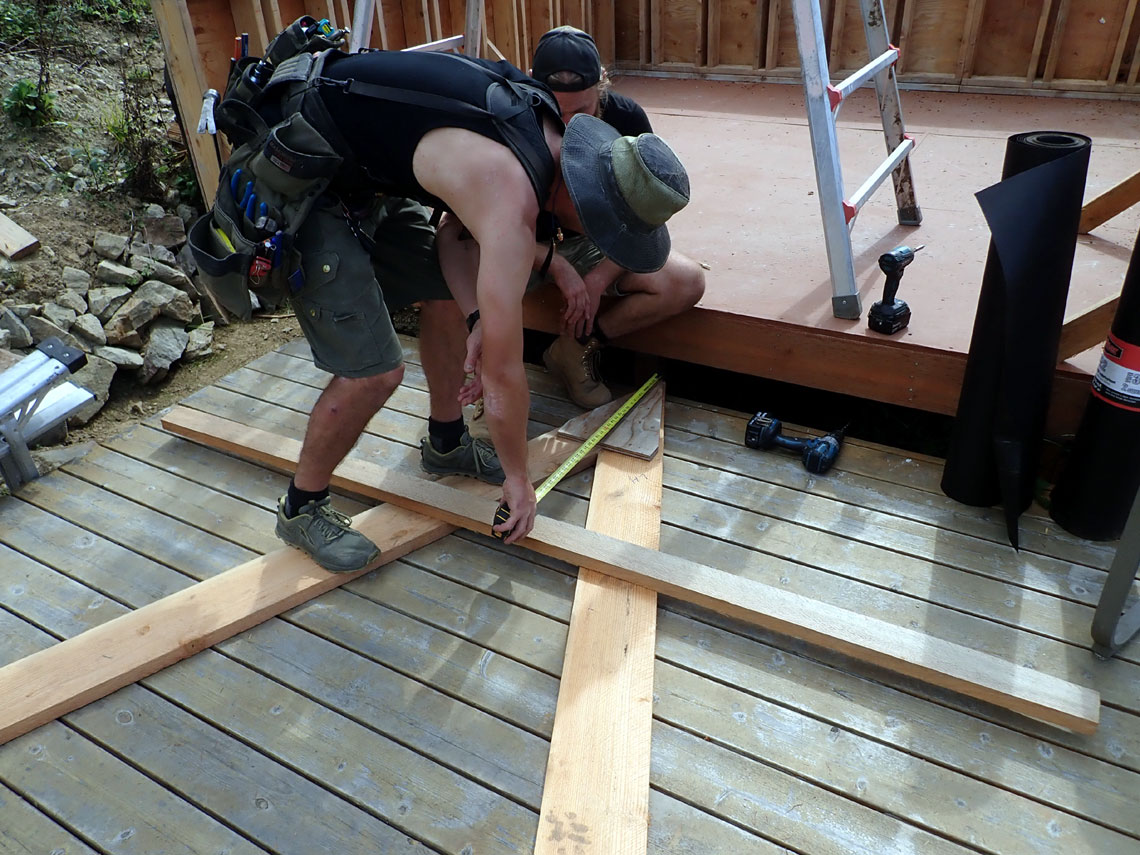
We decide that we need a
small deck along the West side.
This was to allow access to the shower and utilities along the back wall
The deck would also provide a safe ladder base for the upcoming chimney
and roof install. Using a power chisel to flatten the
top of two granite boulders
Preparing the North corner for the
stove installation
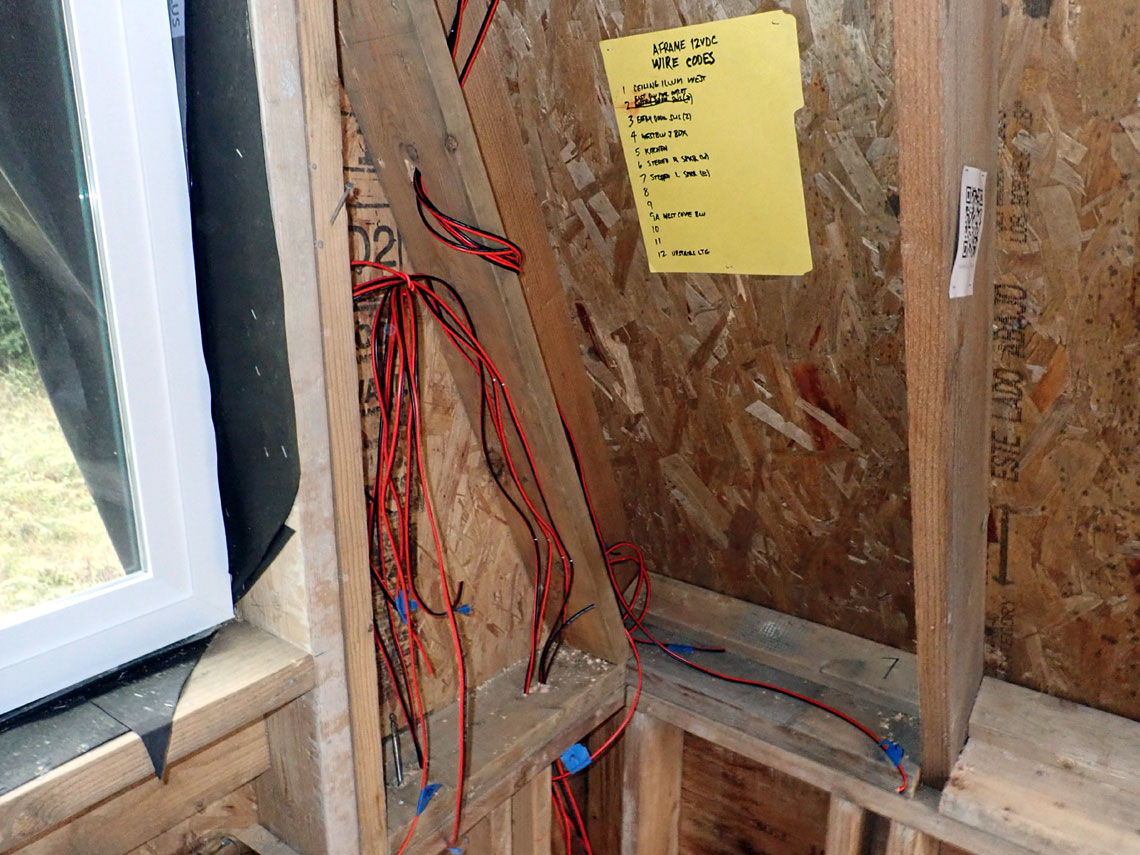
Here's the corner where the fuse box,
solar controller and battery bank will reside.
Each wire is numbered as to where it goes on the wall chart.
Wiring the cabin for 12 Volts
View close up of that box with Ham Radio
coax cable
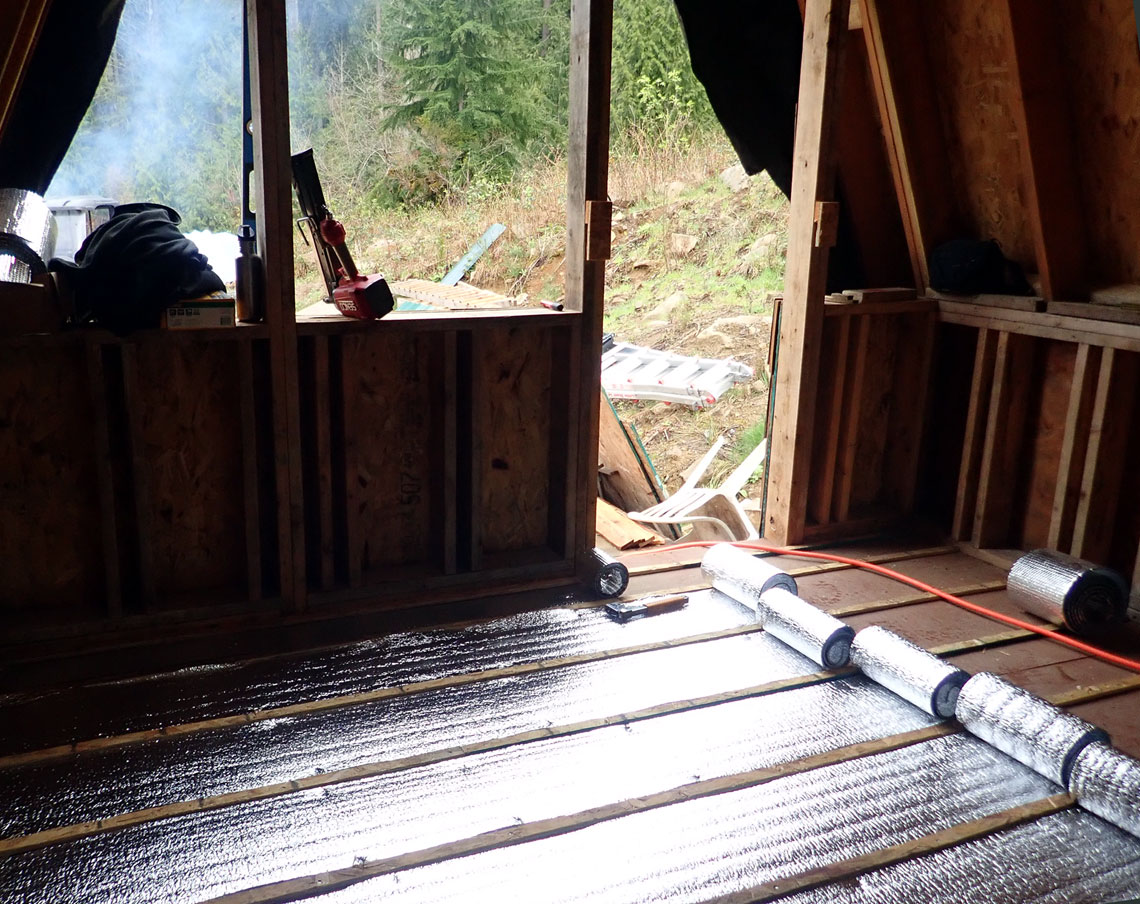
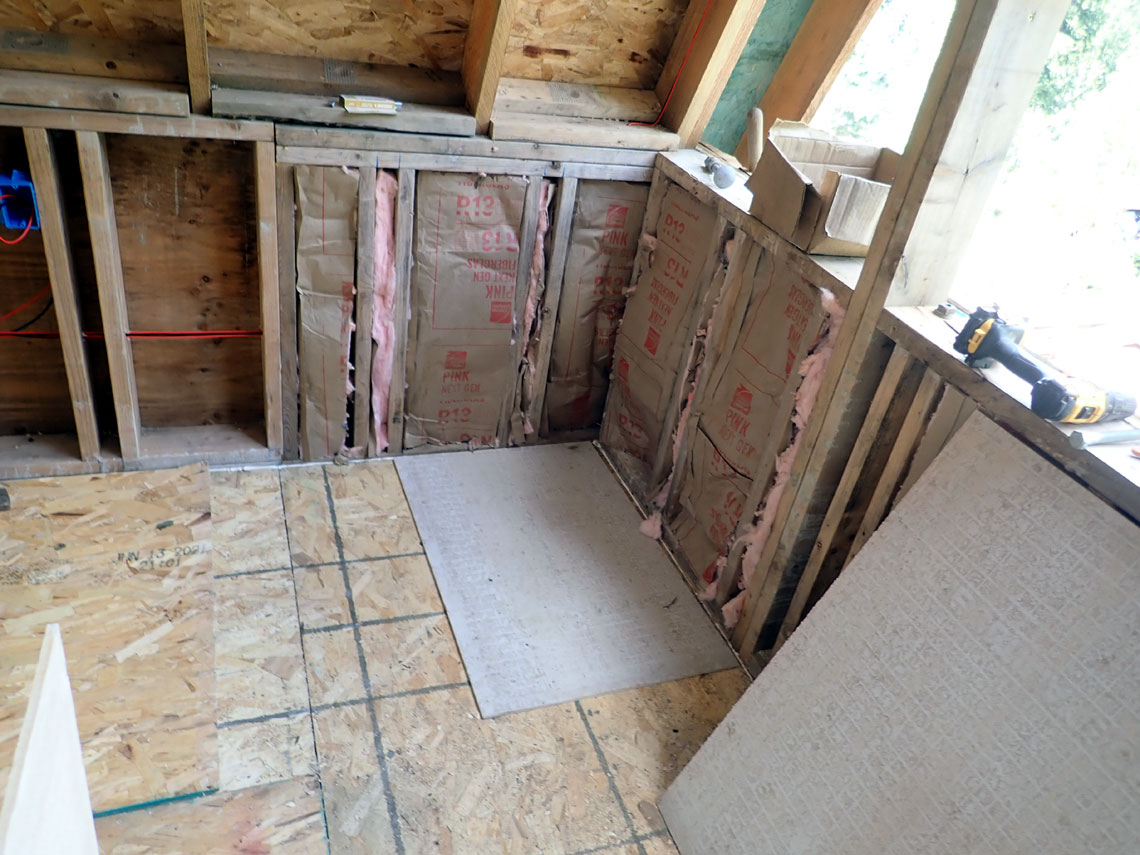
We install an insulated floor.
This is like bubble wrap with aluminized Mylar on each side
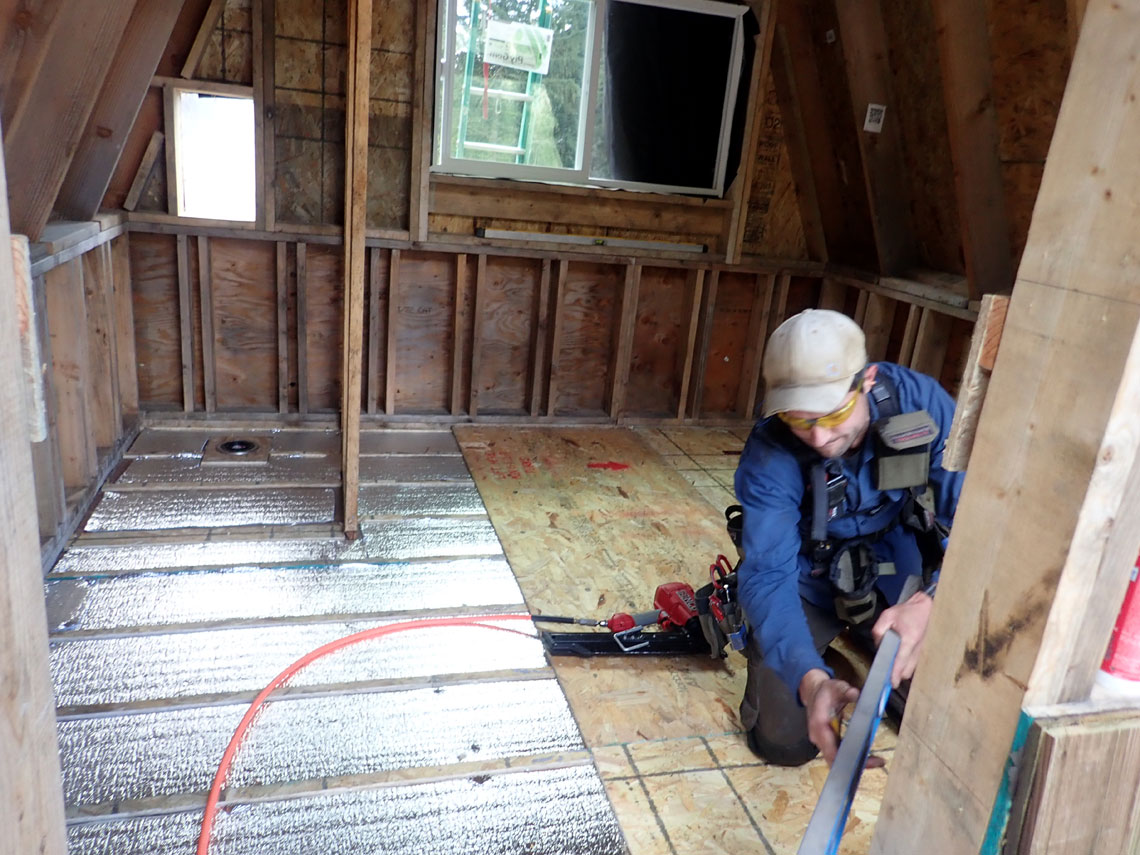
New sub floor nailed over the insulation.
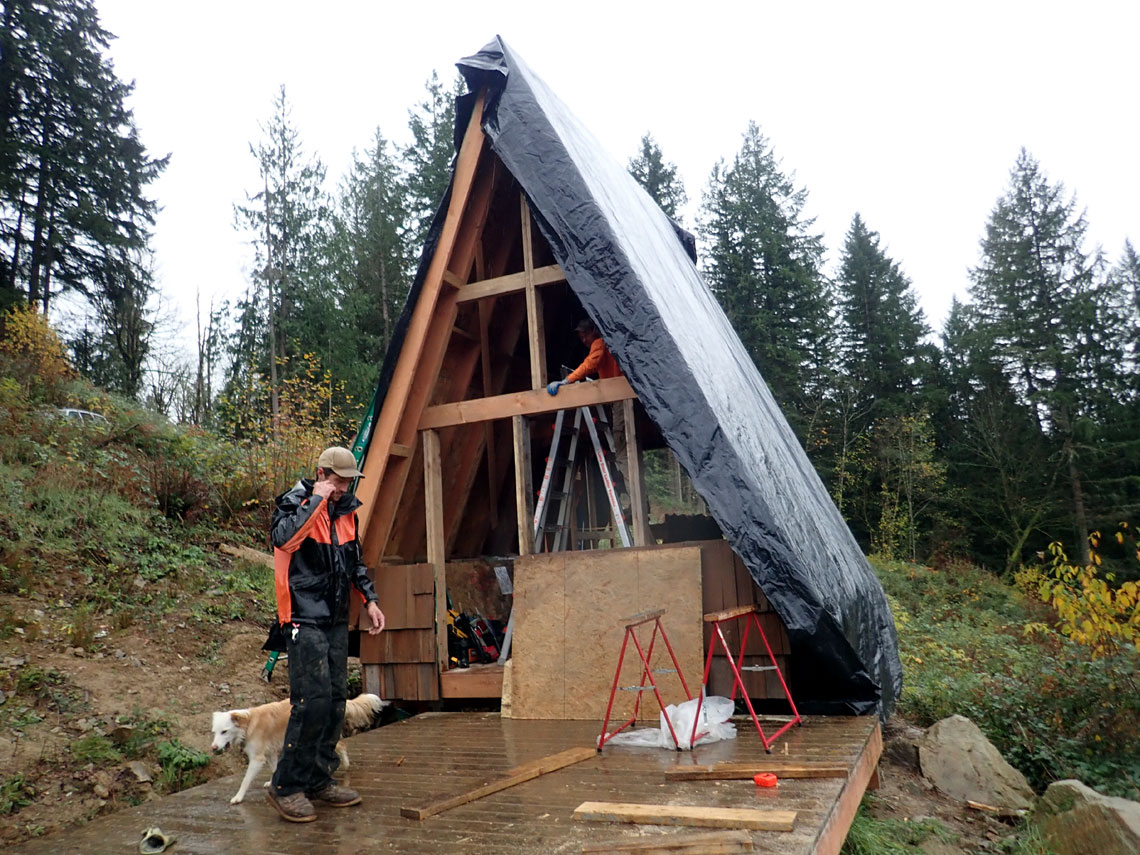
Fall 2021
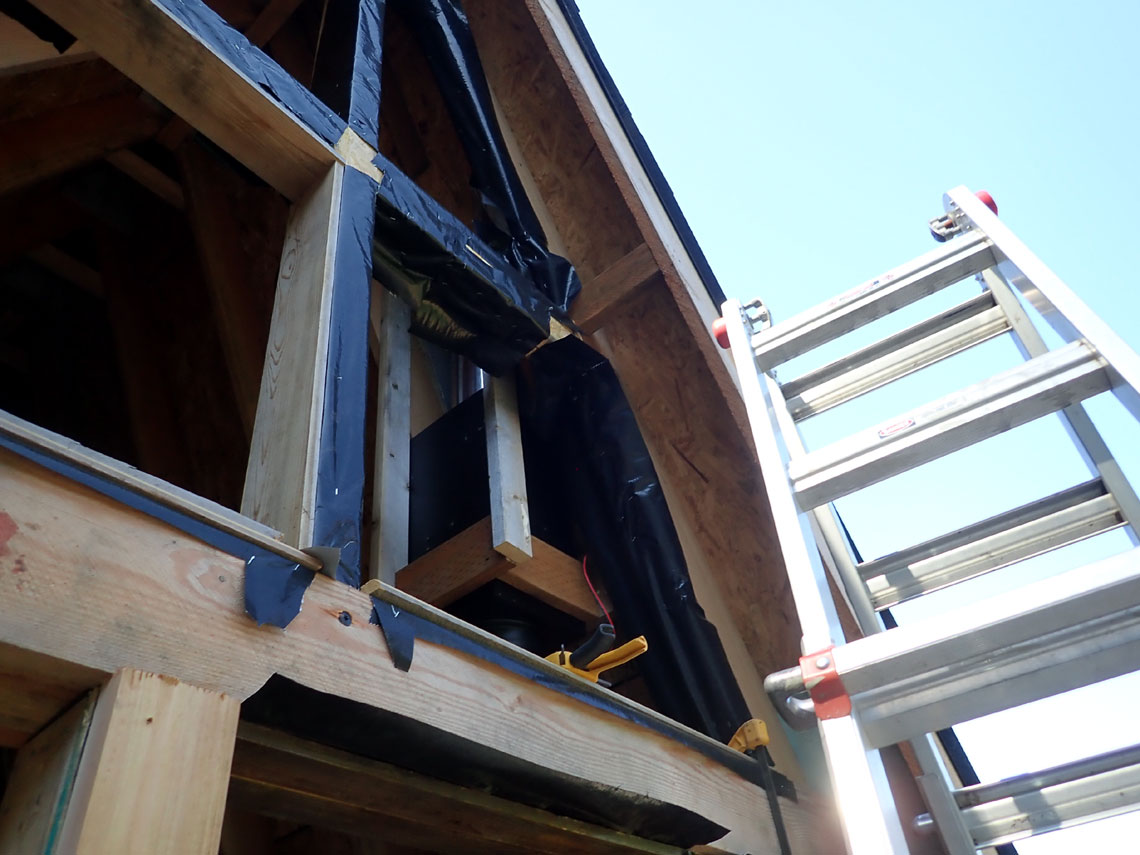
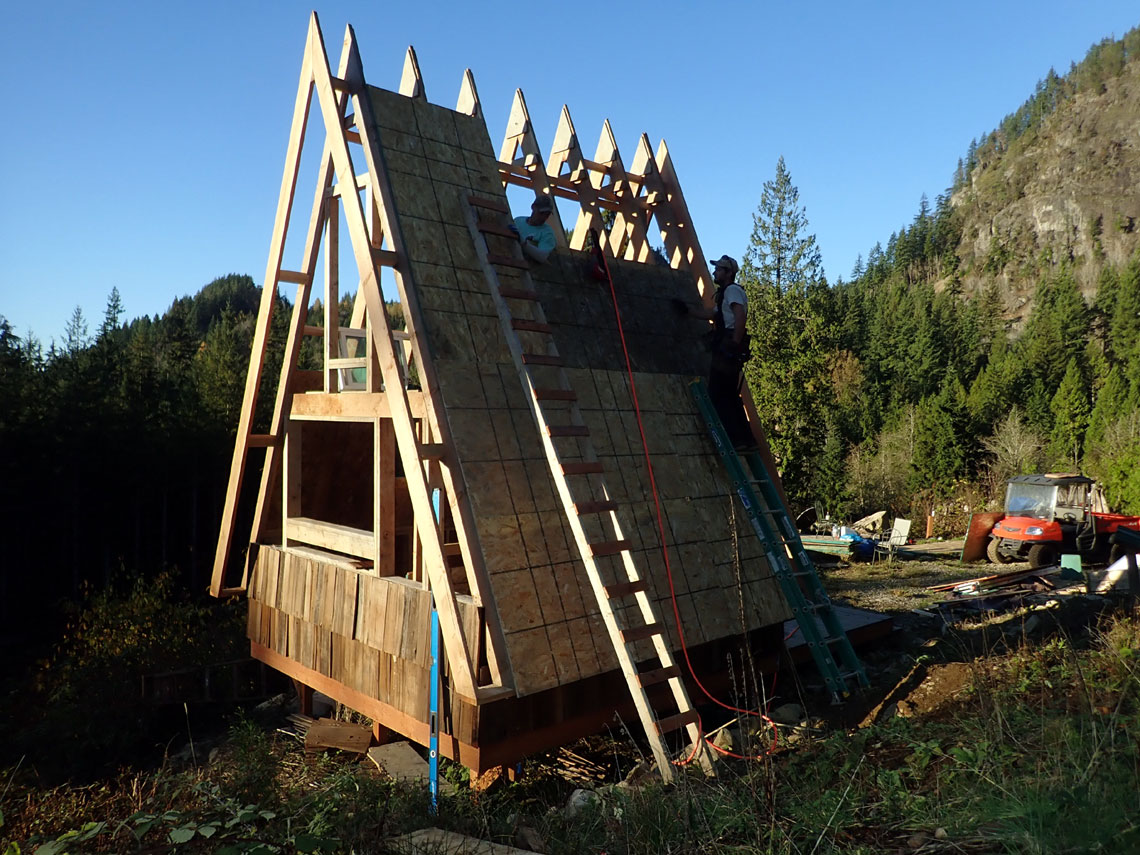
We cover the roof with 10mil black
plastic
(L-R) Sage, Grier and Blaine (on interior ladder)
Getting the last pieces of the roof
nailed in place.
Its beginning to rain..
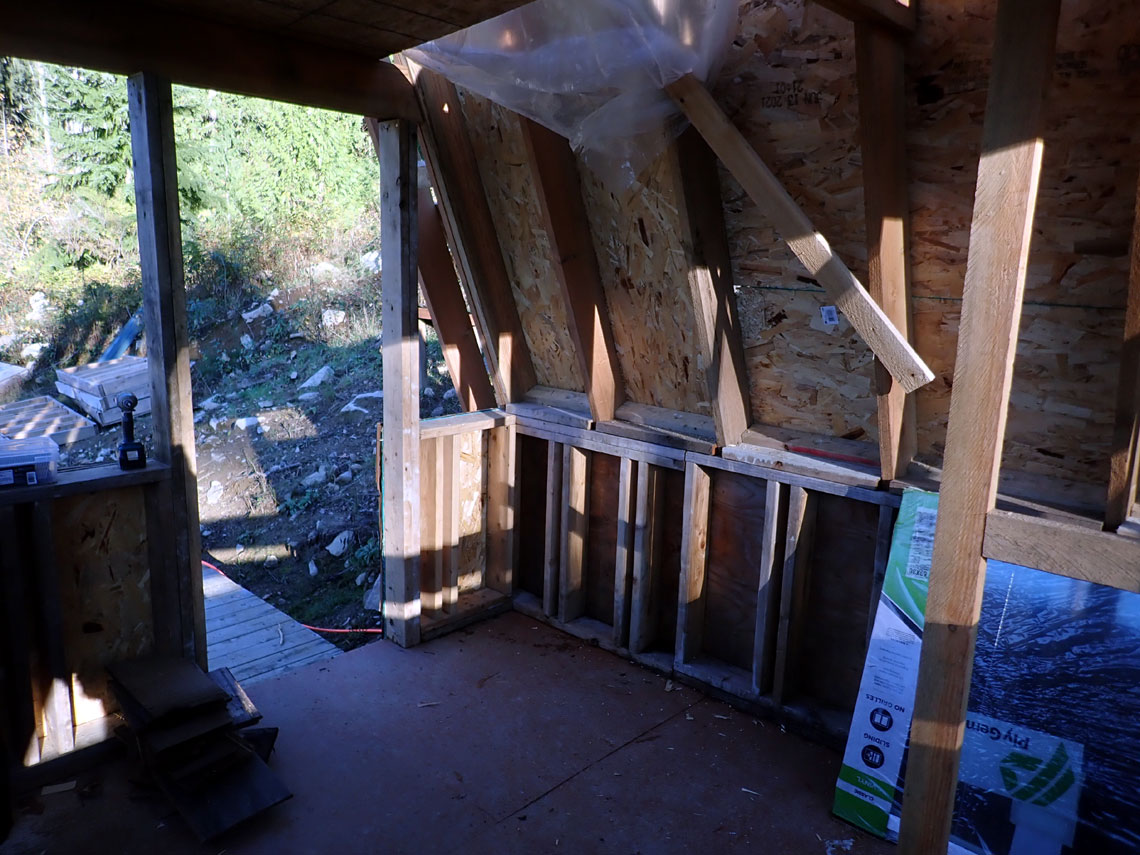
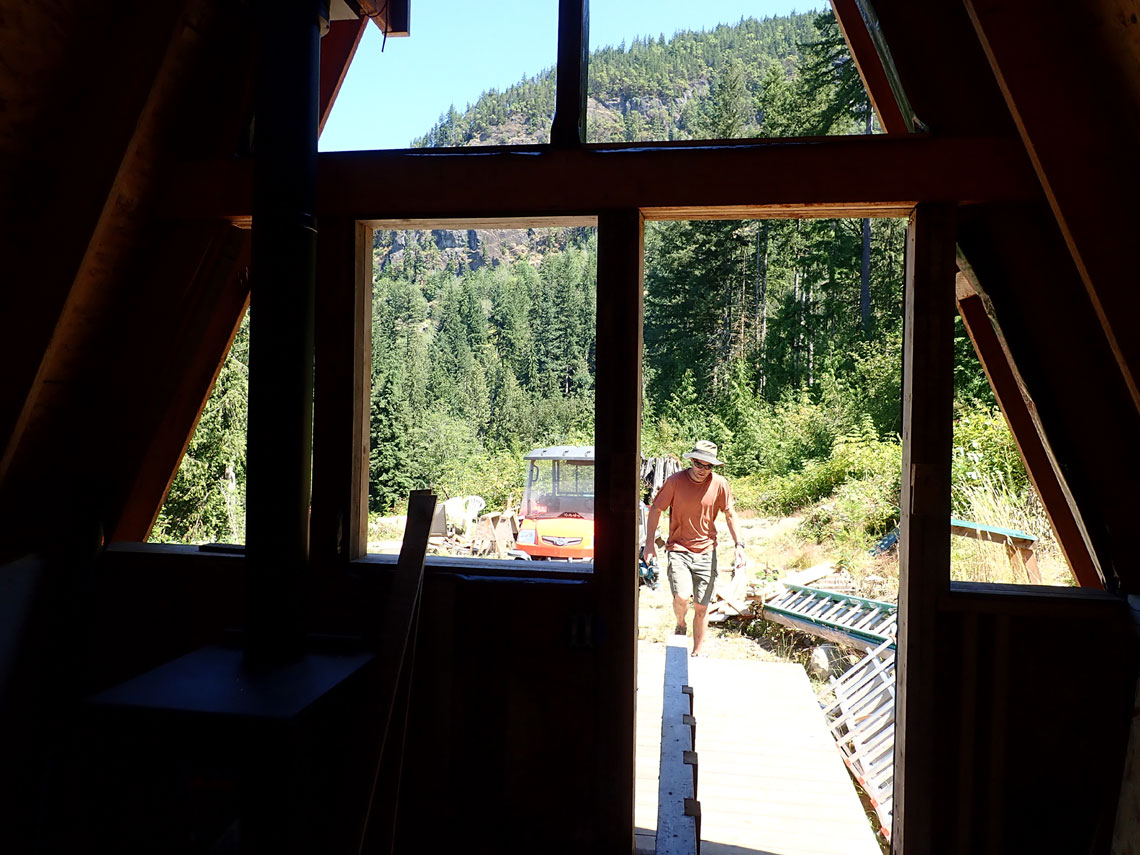
Interior looking out the roughed-in
front door opening
Note the heavy-duty pony wall salvaged from the cell tower concrete
forms.
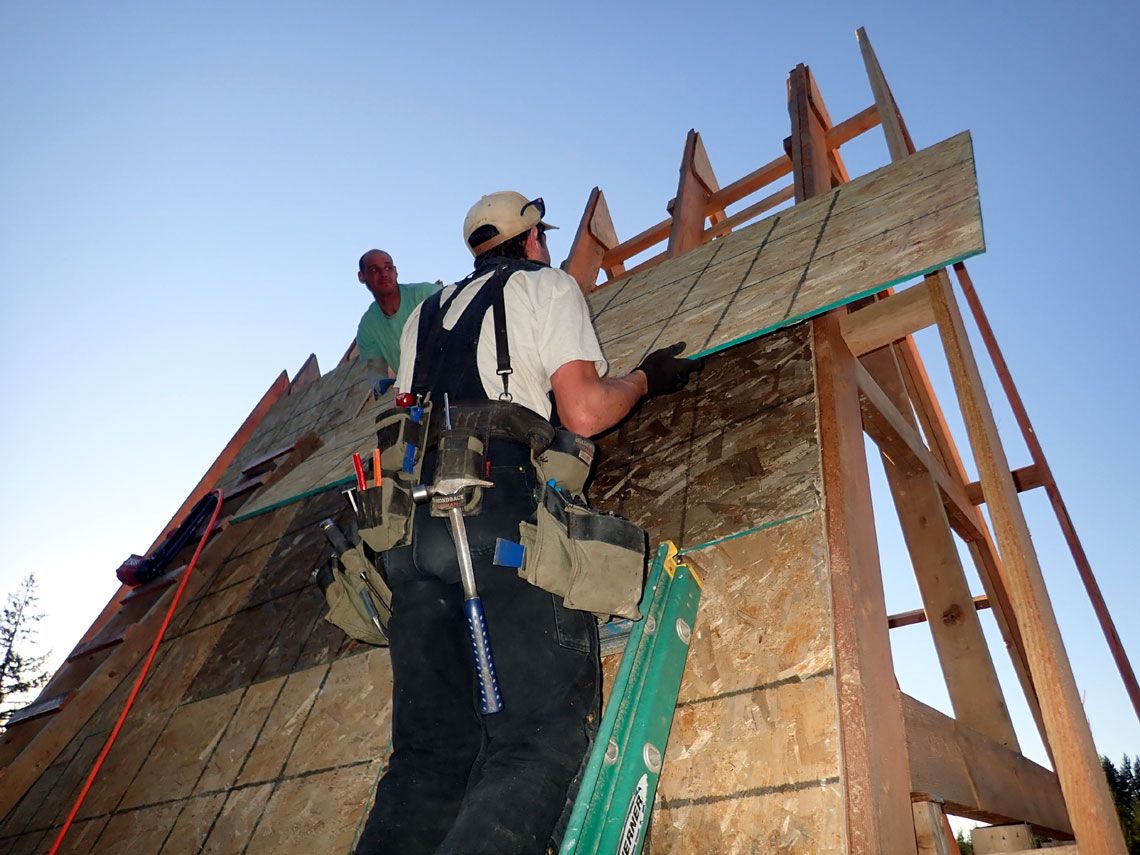
Working on the West side
All the OSB and pony wall materials salvaged from the new
ATT cell tower
leftovers.
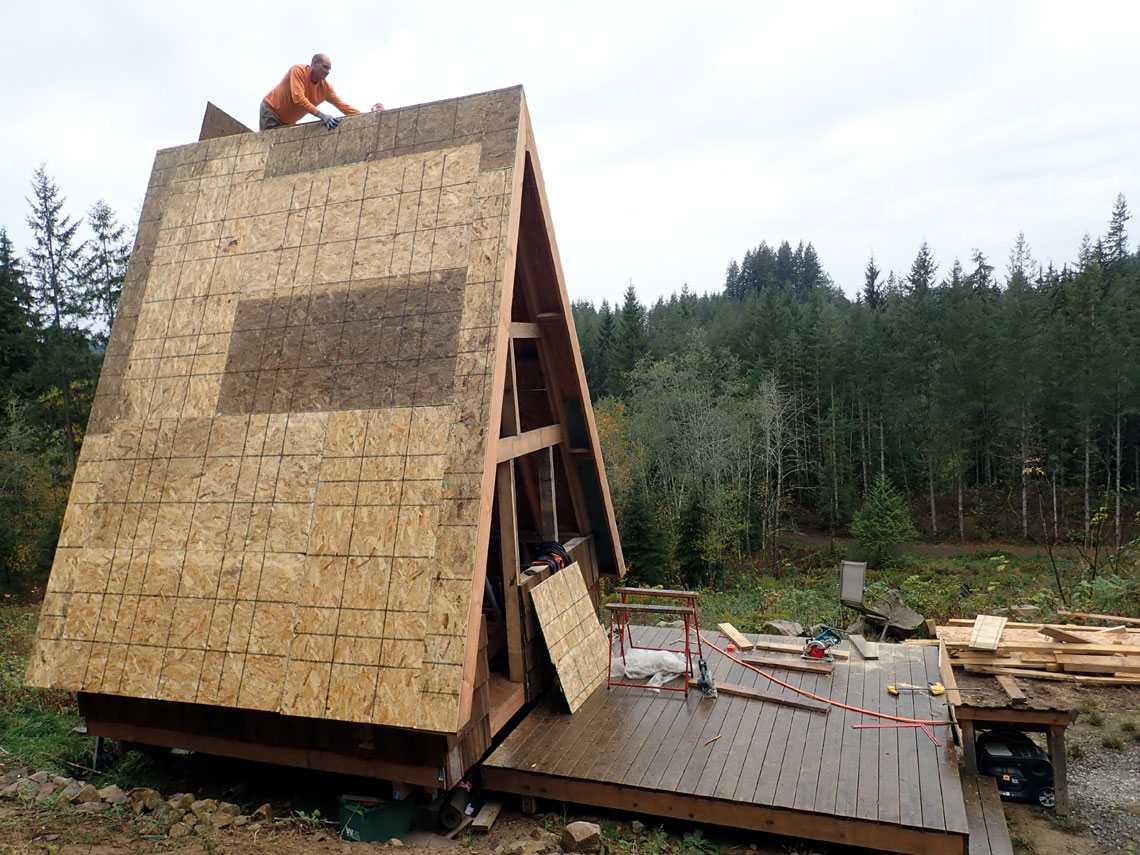
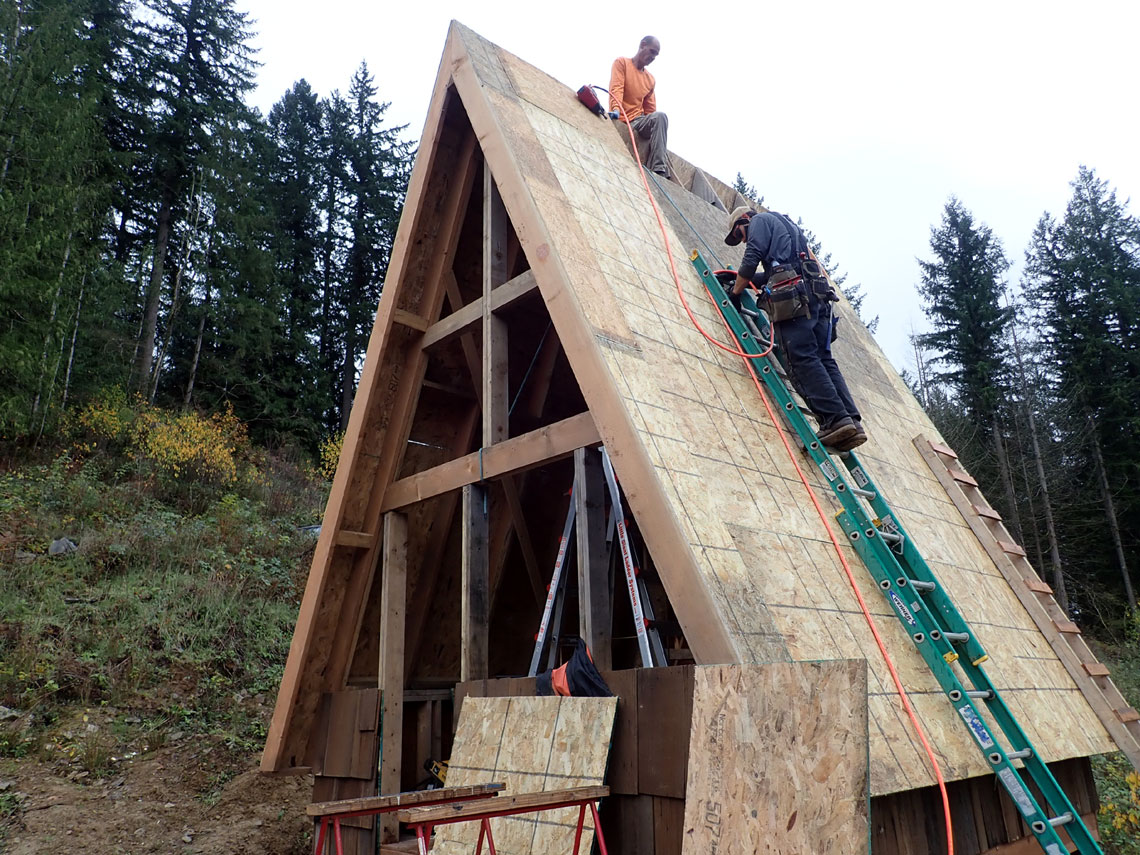
Finishing the last of the OSB
roof, 10/31/21
It is beginning to rain. Generator is under the little roof.
This was a
tough roof to cover due to the 67 degree angle
All the OSB was salvaged from the new ATT cell tower.
L-R Blaine, Grier
More about:
Oriented
Strand Board
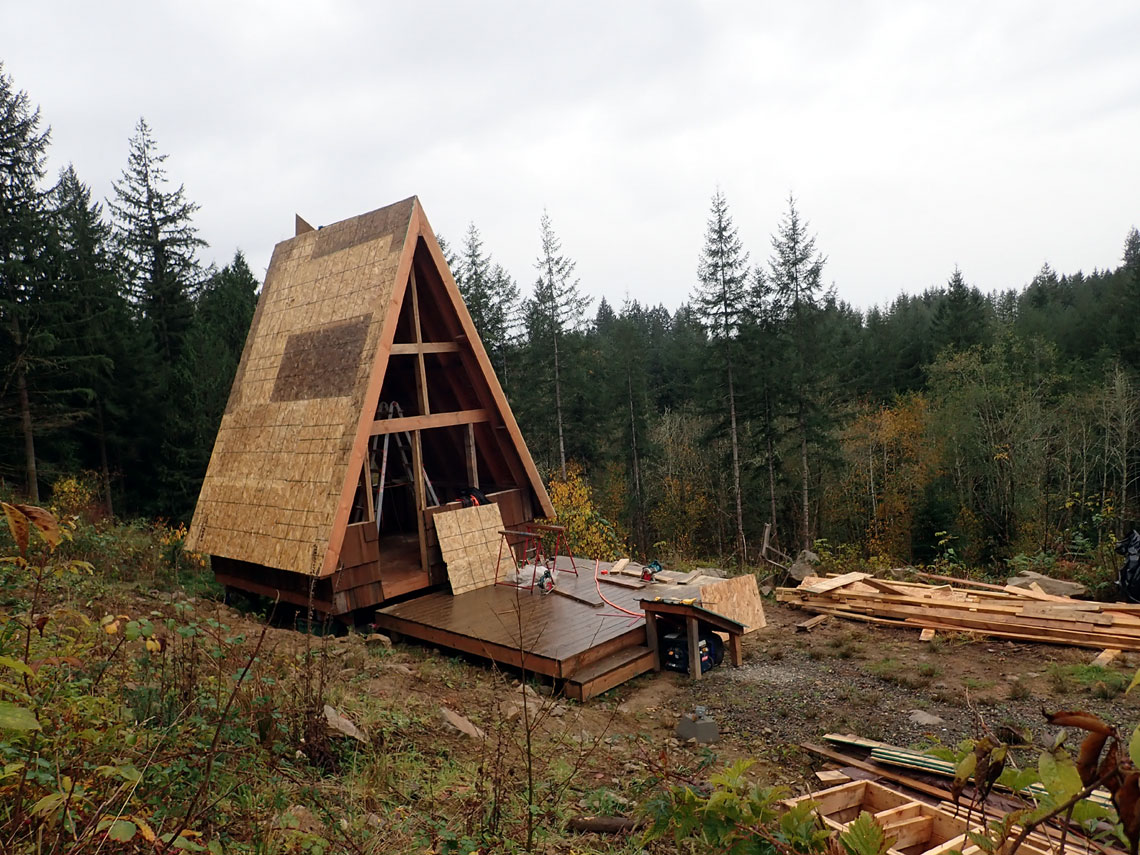
Nice late afternoon shot
Note the large 36"x 60" back window
(L-R) Blaine, Grier

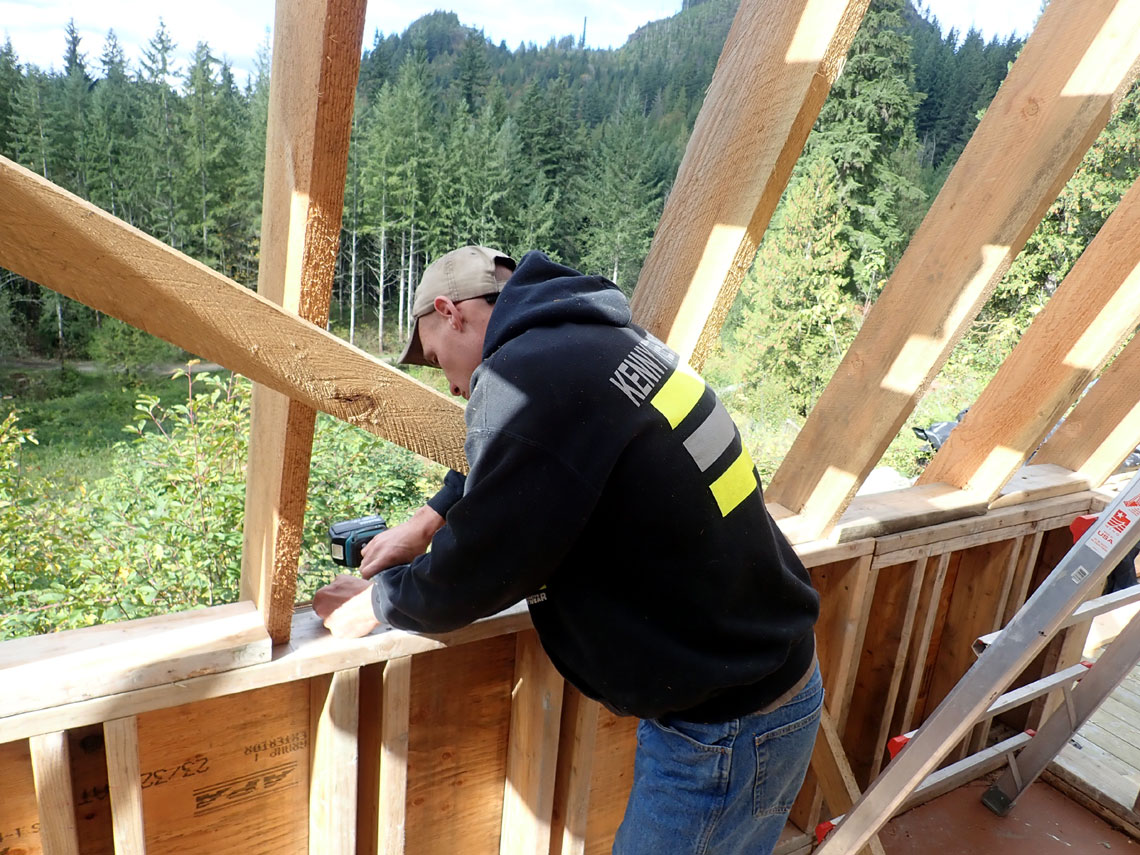
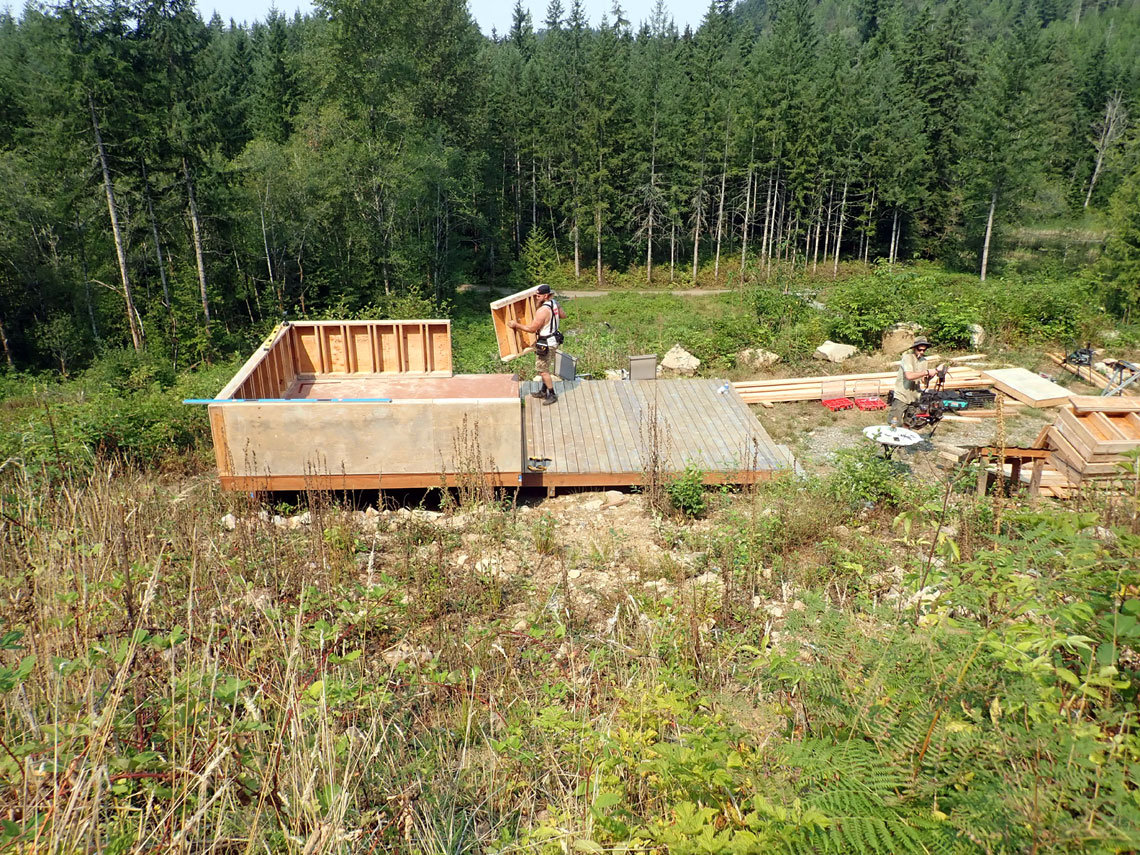
October 14th: Setting the front wall
vertical member
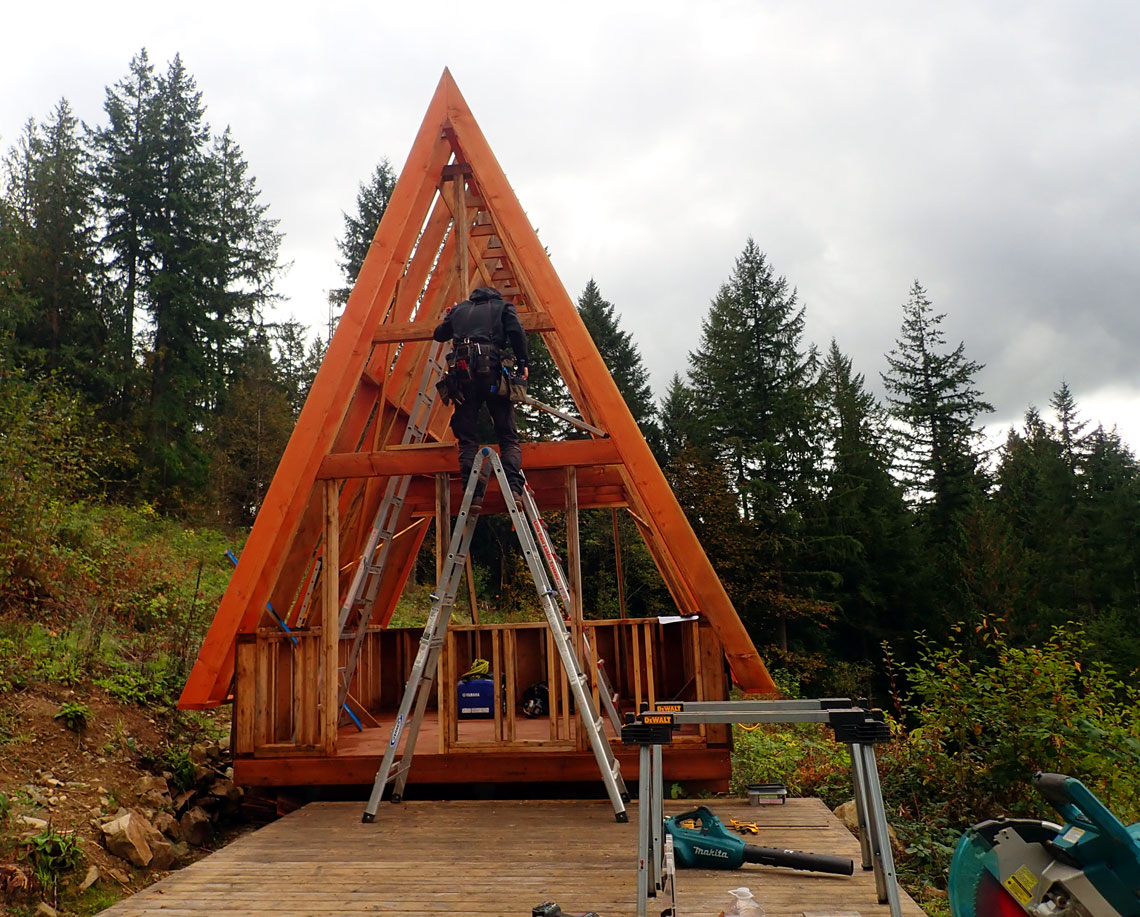
Setting the horizontal divider for the upper triangular windows
View a shot of how we determined
the optimum A-Frame window angles
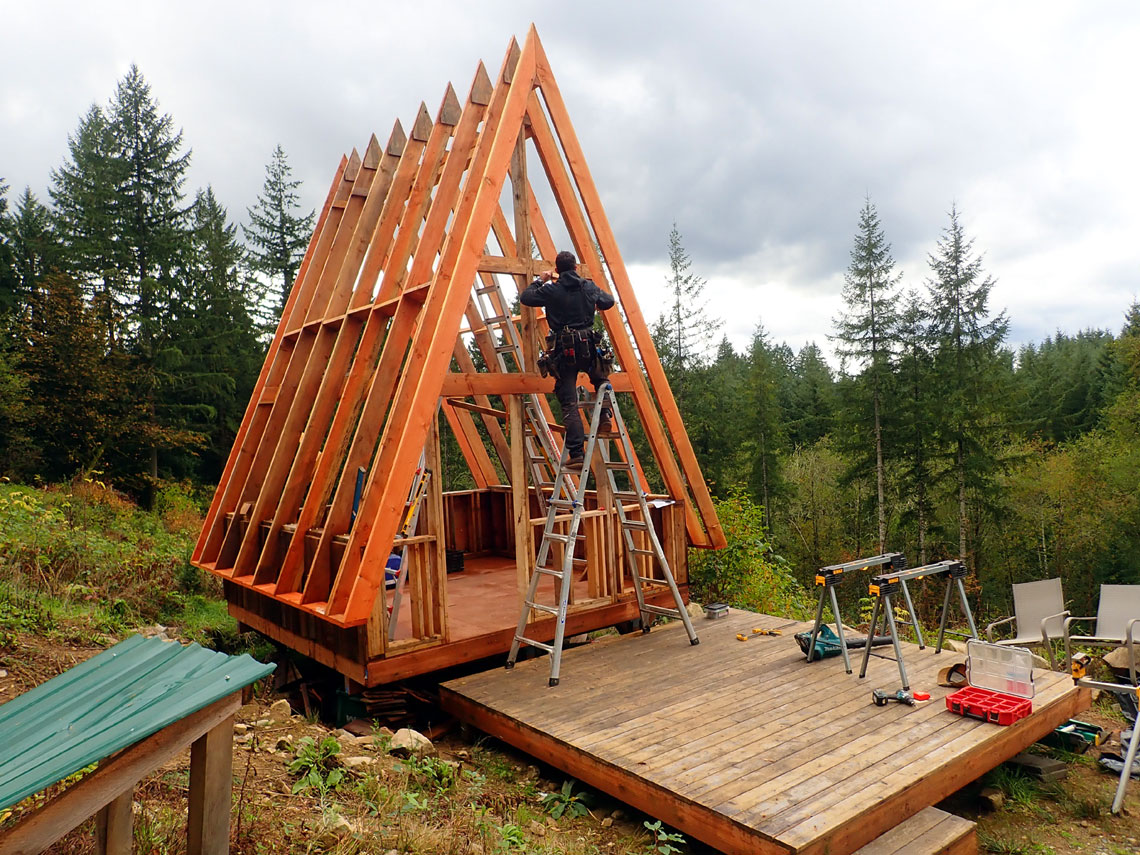
Nice shot of the rough framing
progress on the front wall.
Note the single entry door on the left and four upper triangular
windows
Rough framing of the rear loft
window
See what the sill height
looked like from the inside
Framing the bathroom wall.
Note the 36x60 back window opening
The loft only occupies the back half of the cabin.
The 3' cell tower forms
made an easy pony wall
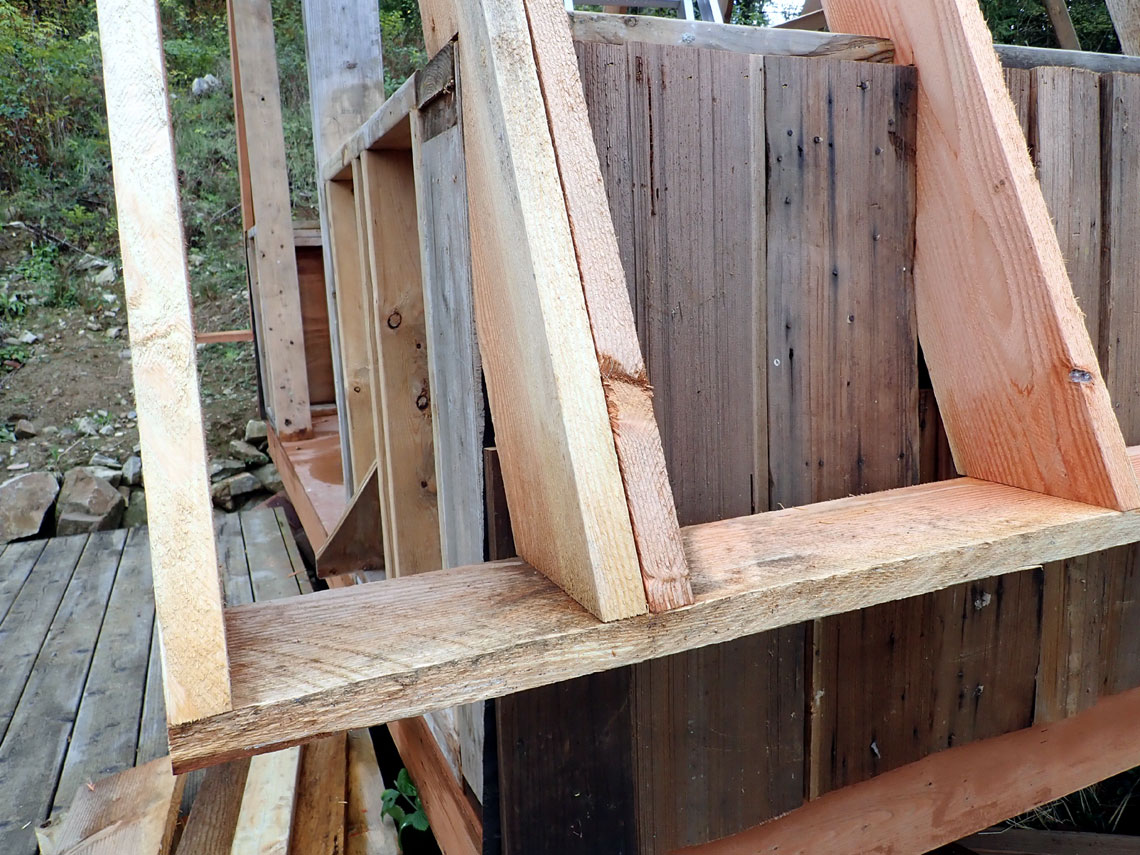
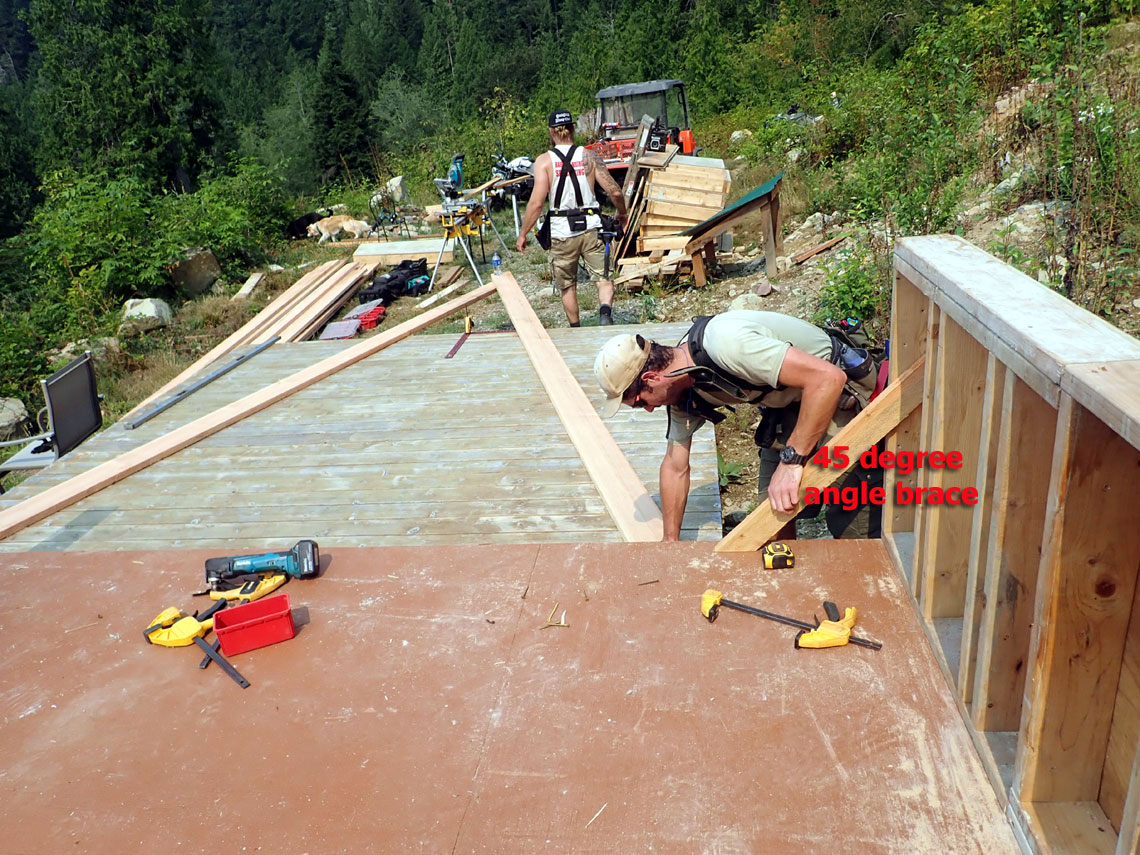
October 5th: Adding additional
blocking at bottom of each A Frame
We had a meeting to discuss how much bottom strengthening was enough.
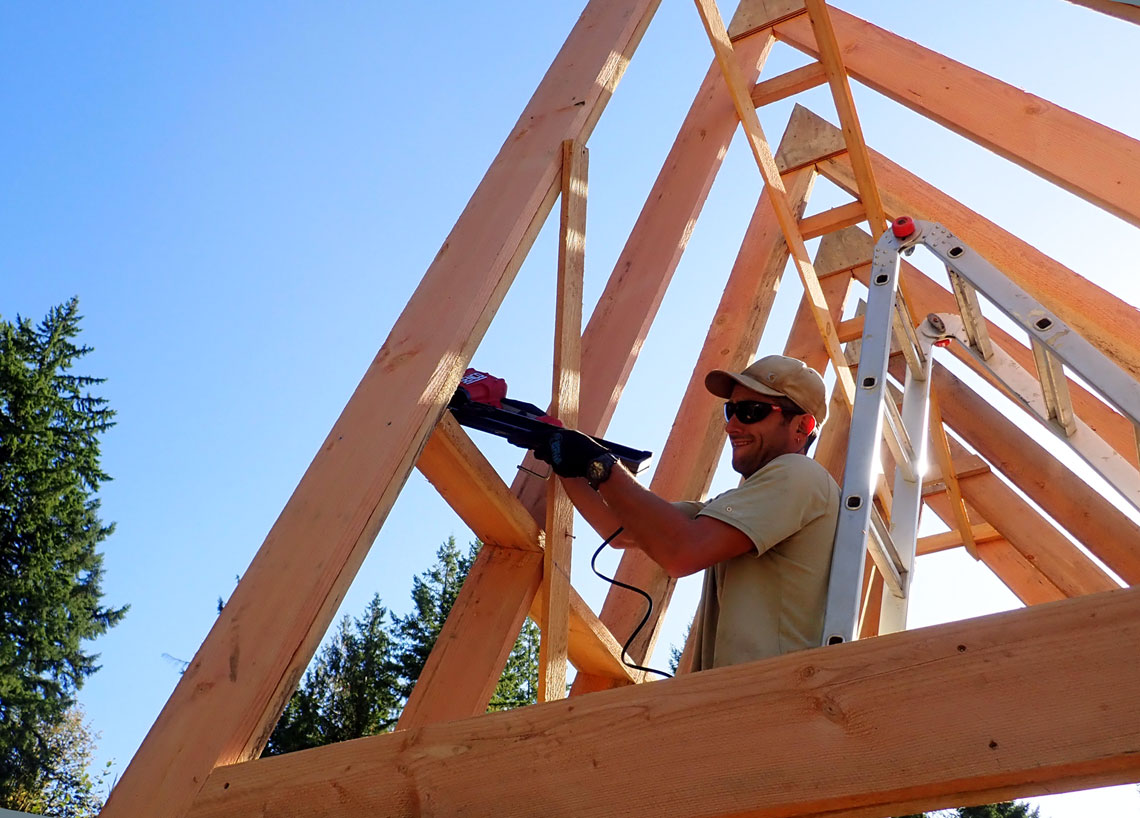
Here's Blaine firing three 6d nails
up into the bottom of each frame
Safety monitor talked to him about wearing safety glasses
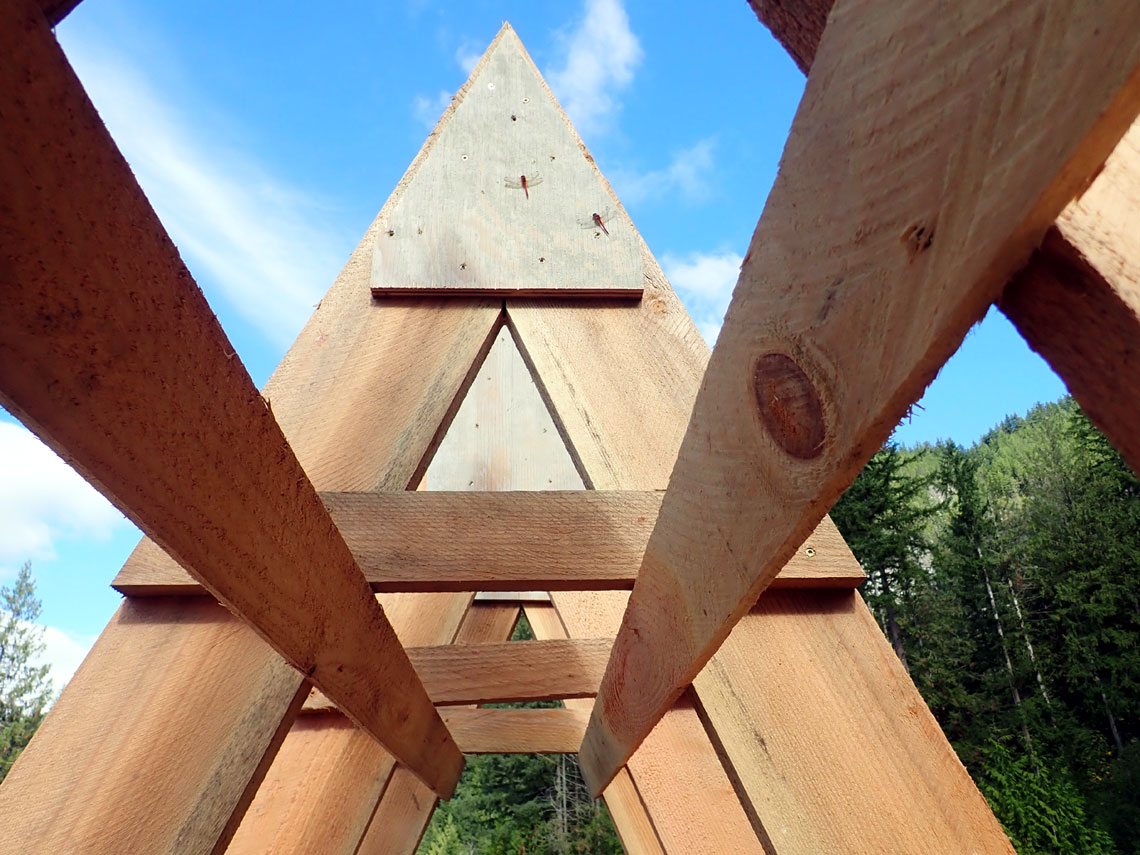
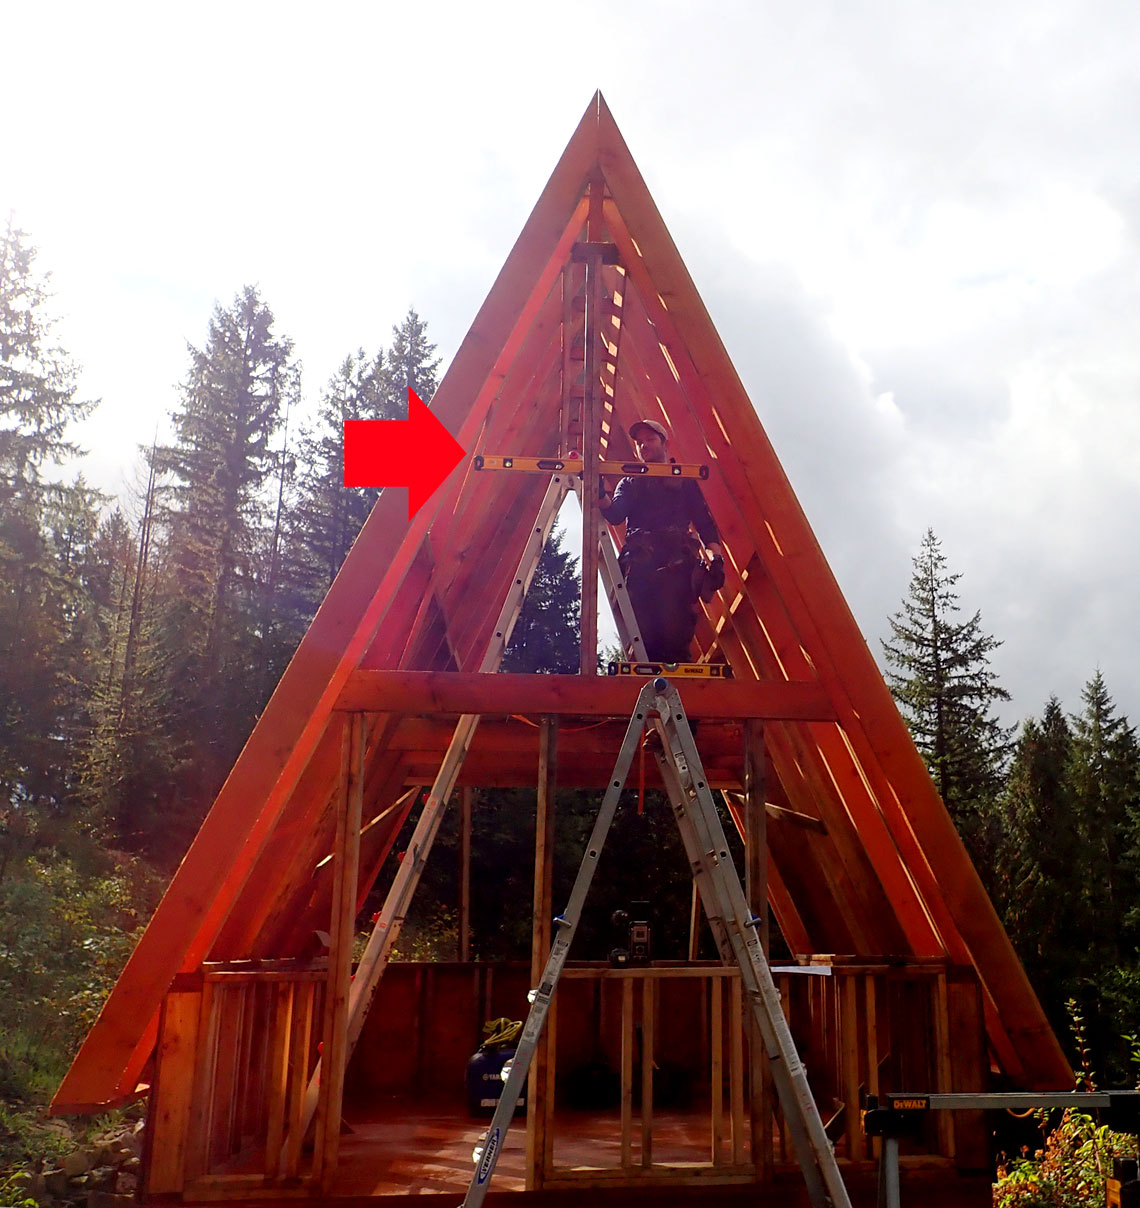
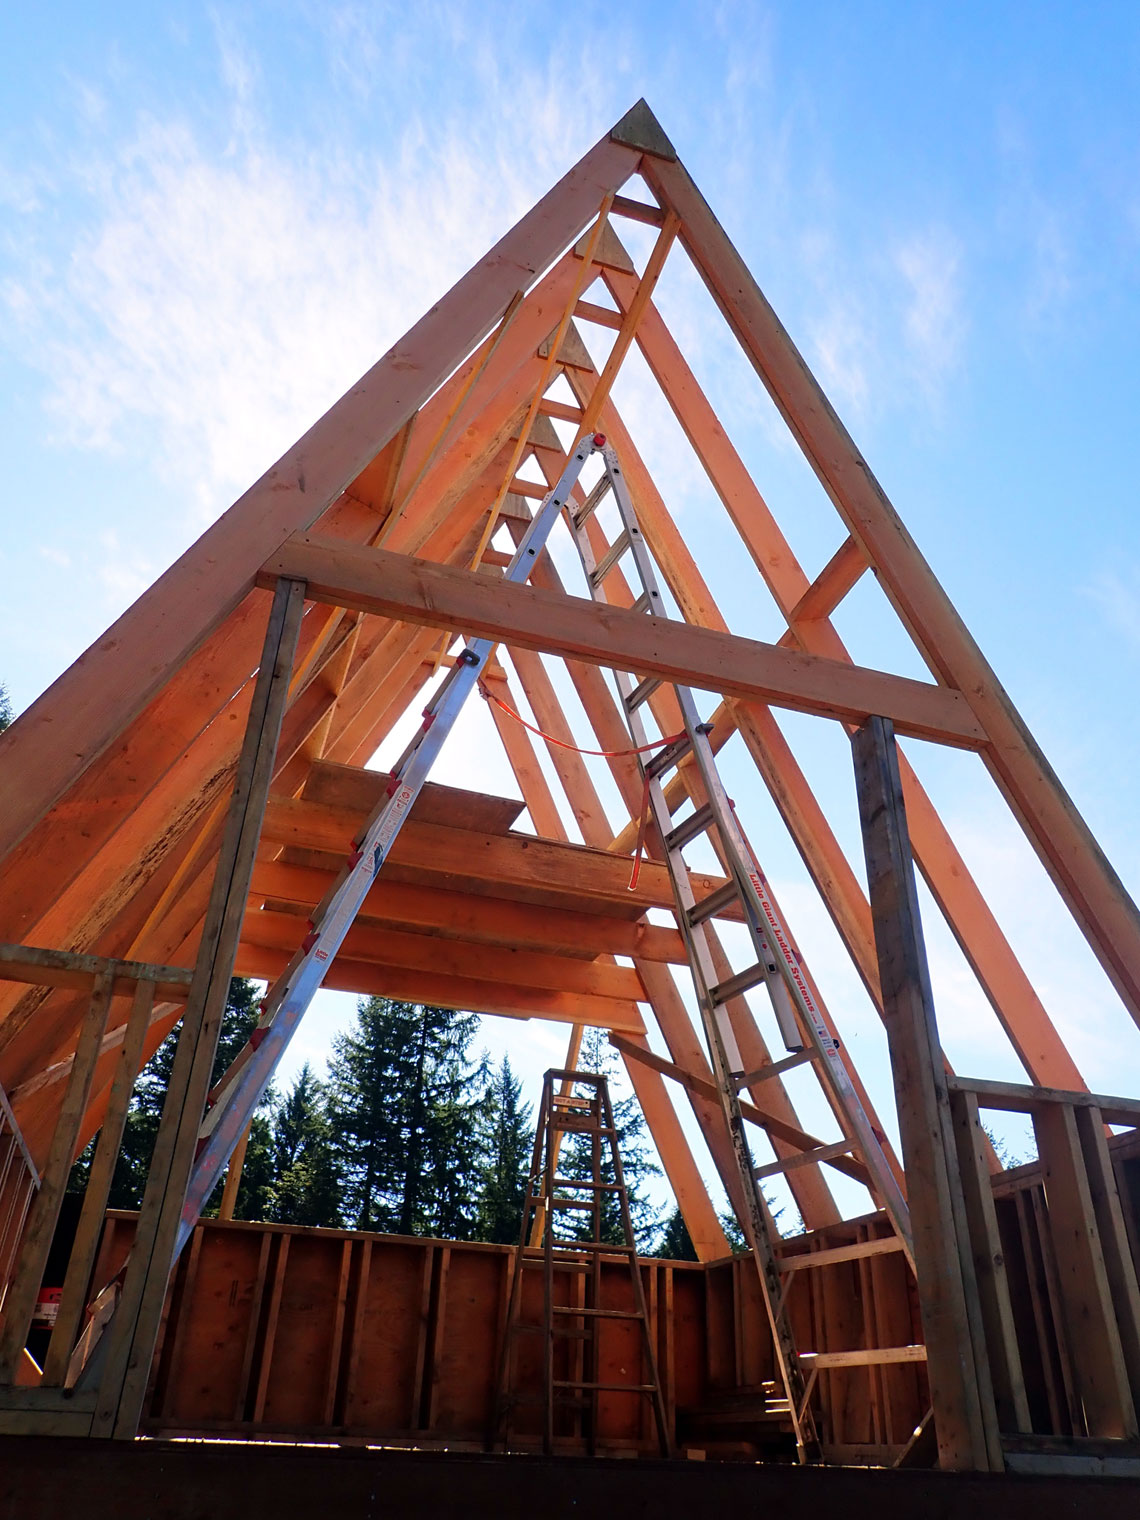
Nice shot down the upper part of the
A Frame, angle is 67 degrees
Whoops looks like that second
collar tie is crooked
Rear of cabin showing 14' 2x8 nailed
on bottom of the frames
This will securely hold the additional frame at each end. Dog Sage
checking for accuracy.
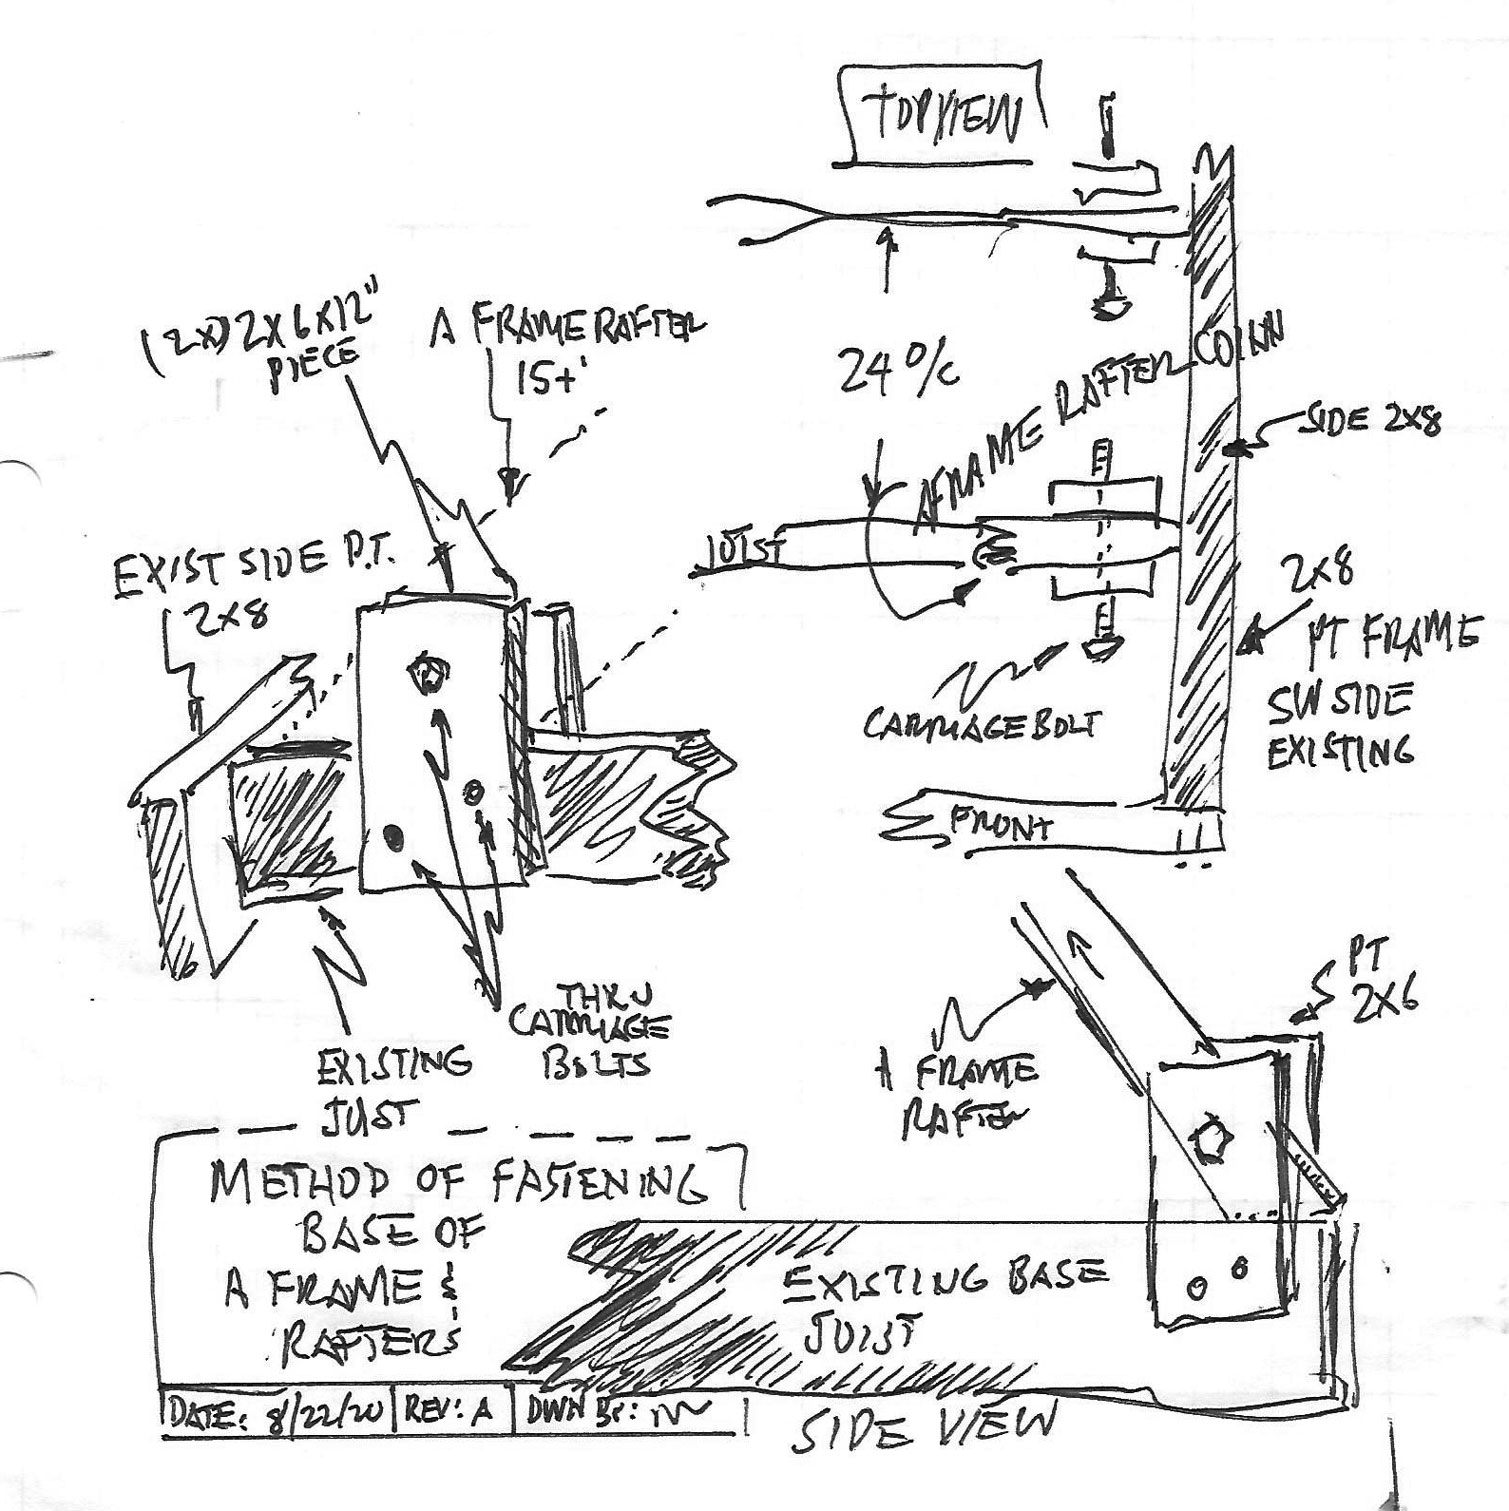
Scheme to reinforce and hold
the 12" extensions on each end
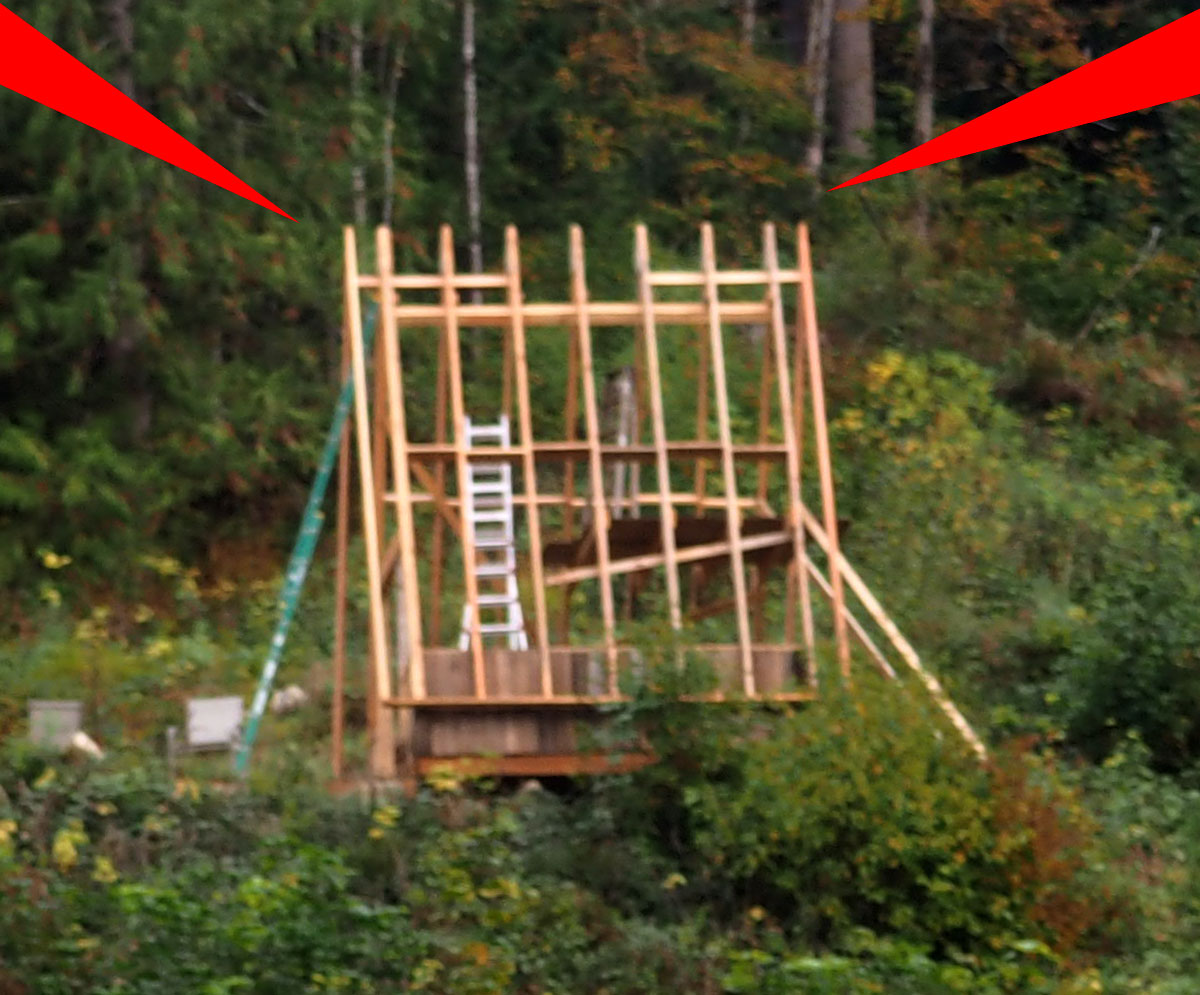
Telephoto shot from bottom of hill
showing the new 12" extensions
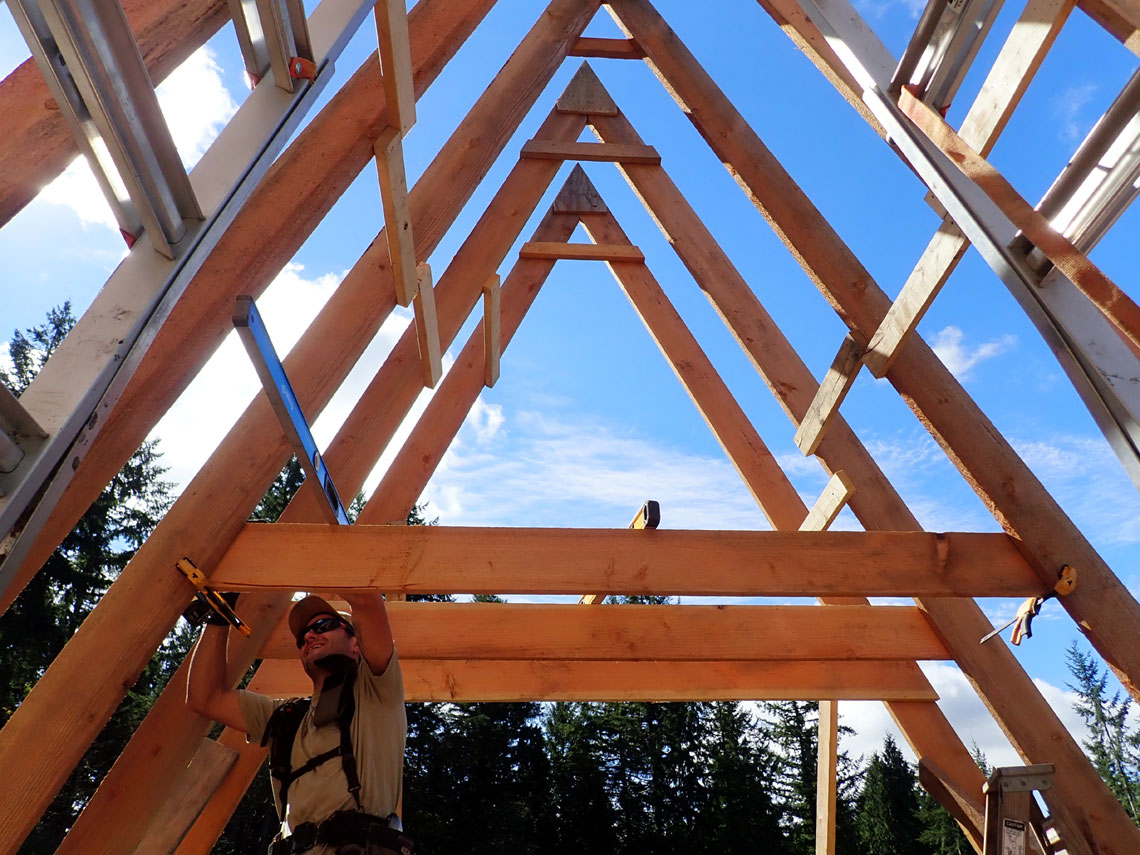
October 4 2021
Tying the all the A Frame bottoms together for the 12" extension on each end
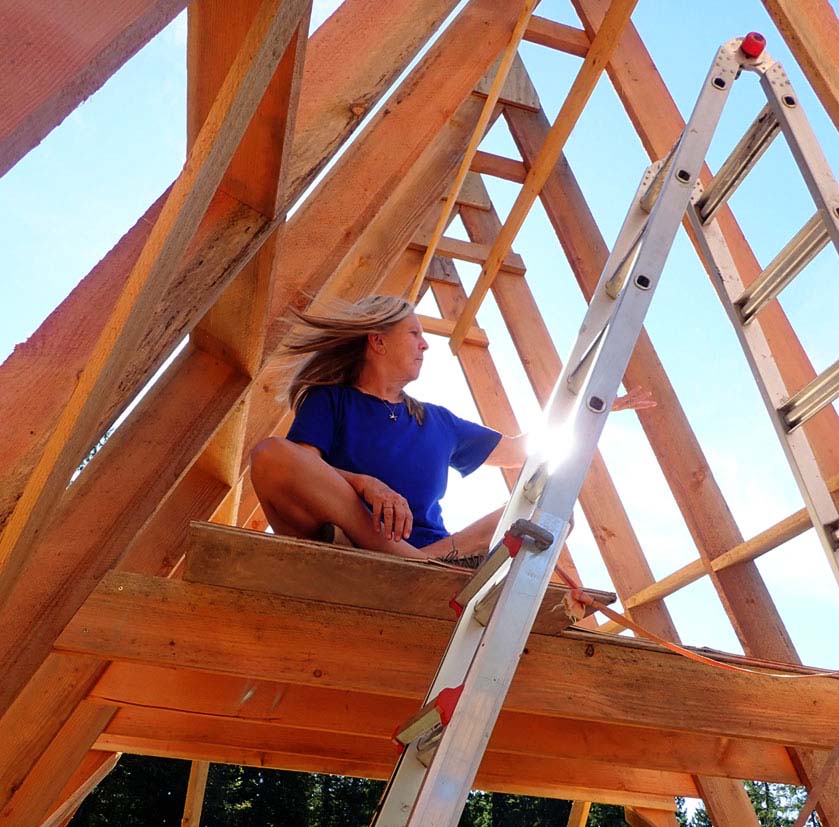
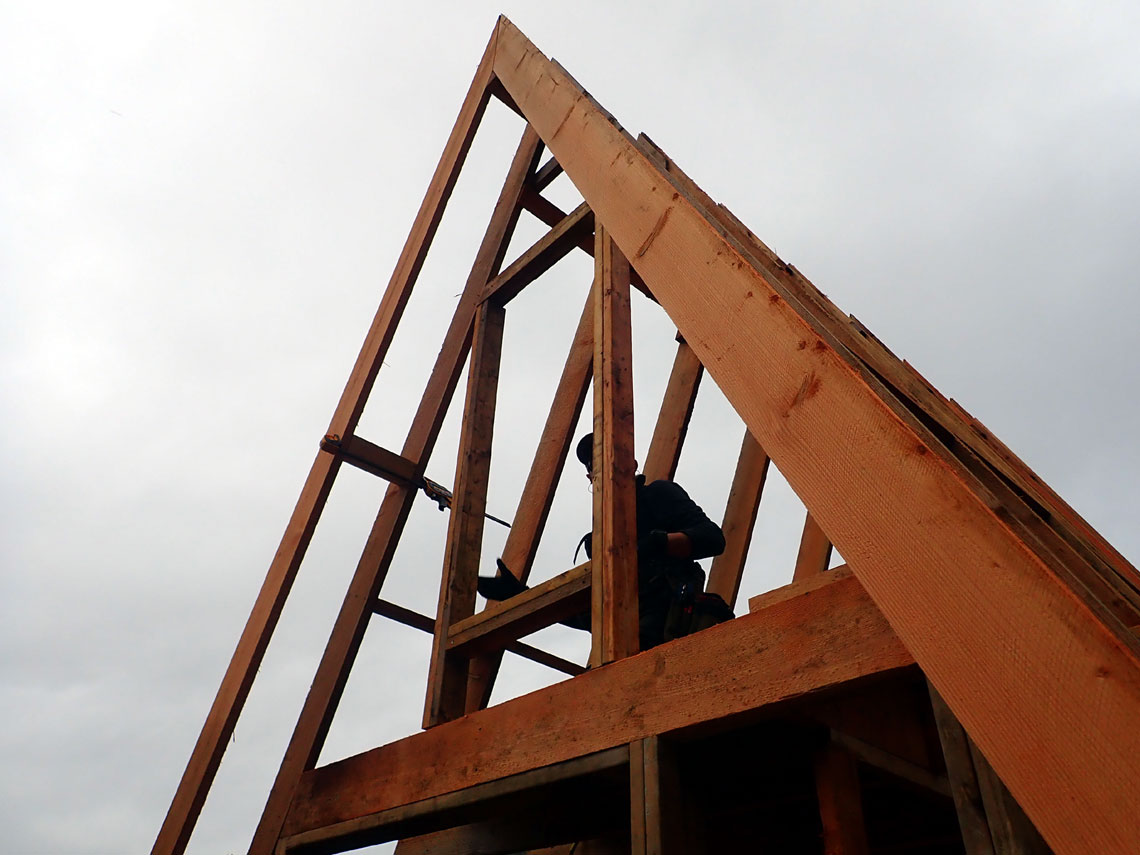
Jan checking out the temporary loft.. She's pretty impressed!
Note the upper structural pieces, collar ties, blocking and 1x6 tie
boards.
All framing from Valhalla wood.
Double door on front is framed in
[ Later changed to single door on left ]
Temporary Loft plywood in background
Wood stove destined for RH front corner
Finishing up the day on September
22nd 2021
(L-R) Grier, Roman
Here's Dave checking to see how much
room there's going to be in the loft
It feels a lot roomier without a roof!

Roman working on the front
rough-in
Adding 2x8 spacers
We finalized the loft rafter height
and Grier fastening to A Frame

Loft will encompass only the back
half of the cabin
Decided to lower the back ceiling: 7' 2" to floor
Building the third
frame on the adjacent 12x12 cedar deck
Note the pre-cut top triangles on right
Here's Jan mounting the second course
of shakes on the south side
Pony walls covered with tarpaper
On left, cut and stacked repurposed cedar shakes from the original
homestead house ready to be
installed

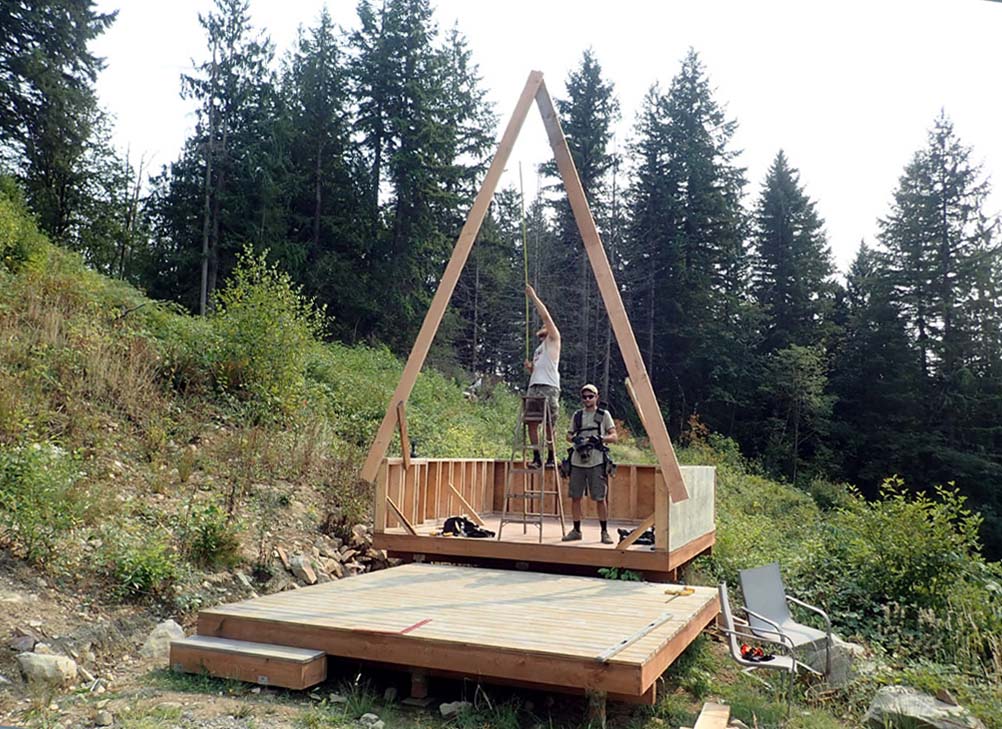
Two "A"s set and
temporarily braced
Assembling the first A
Here's Grier and Brandon making the measurement for the collar tie
location
3/4" plywood on each side of the top
All the frames cut
and stacked
Note all the OSB plywood stacked on the right
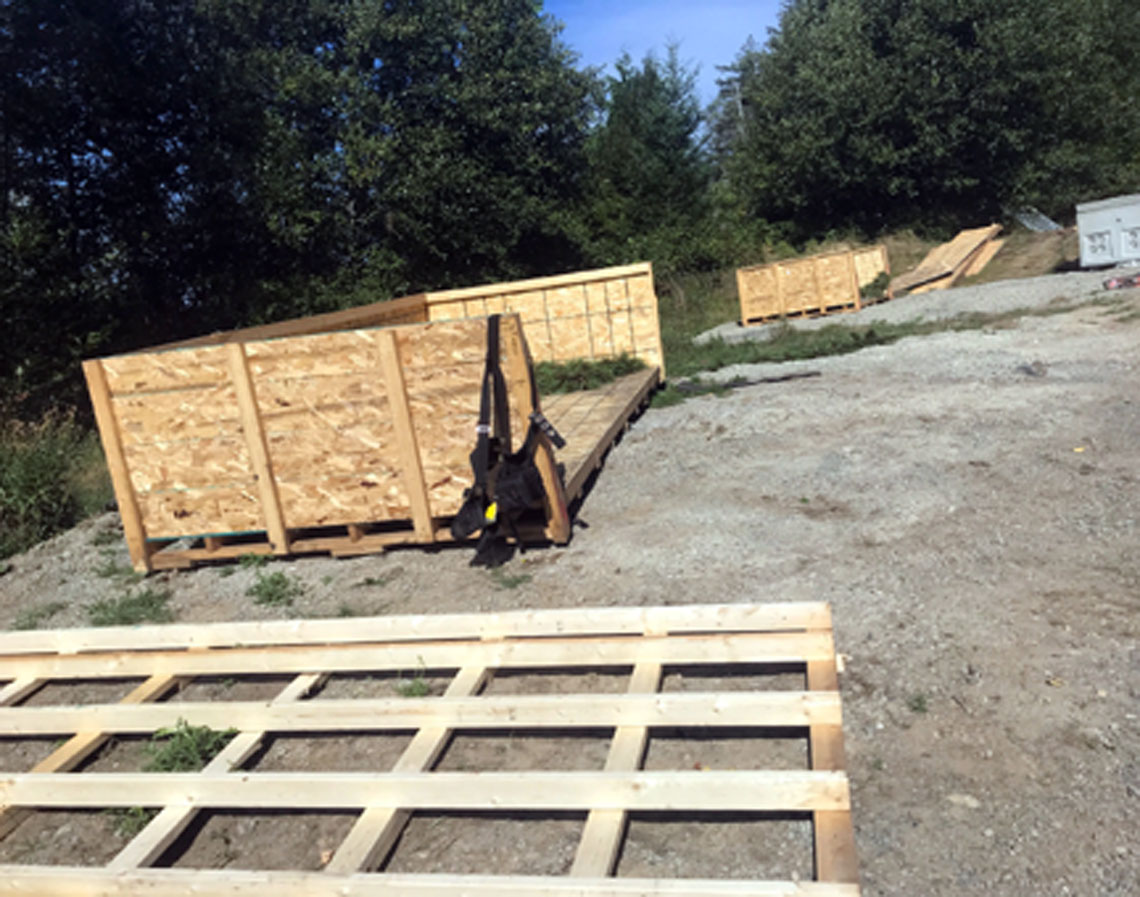
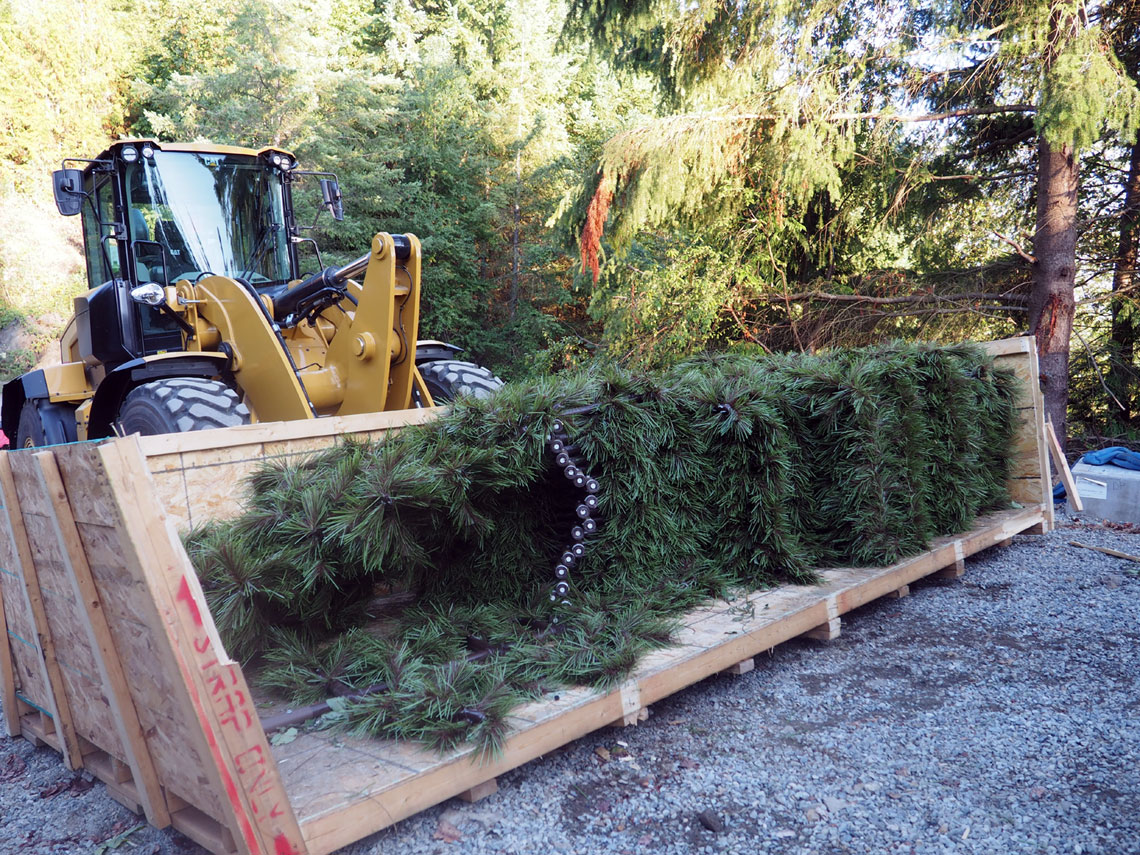
Cell tower contractor donated these
huge crates from the tower assembly materials
View photo of the crates
full of fake branches being mounted to the tower
We disassembled at the tower site and hauled directly to our
construction area.
All of the 4x8 OSB plywood will be used for the roof
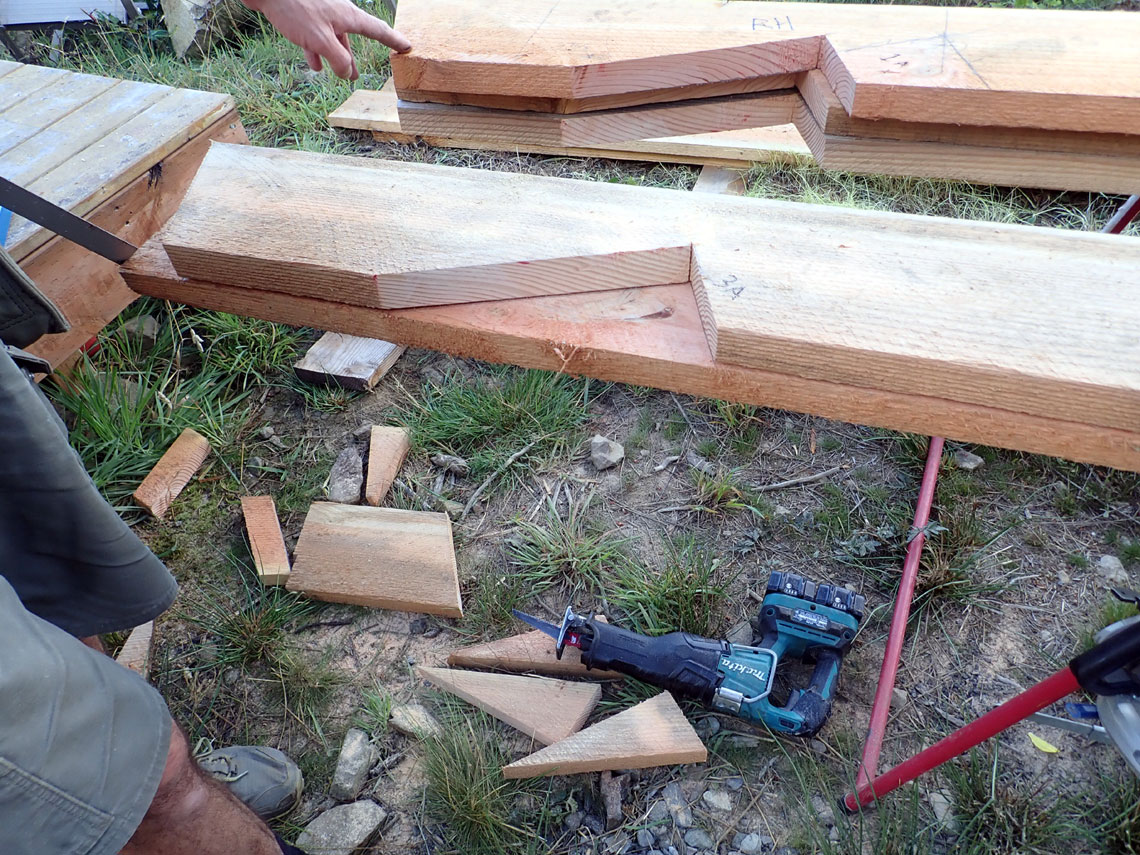
Using the first frame as a template
to cut the remaining birds beaks and end trim
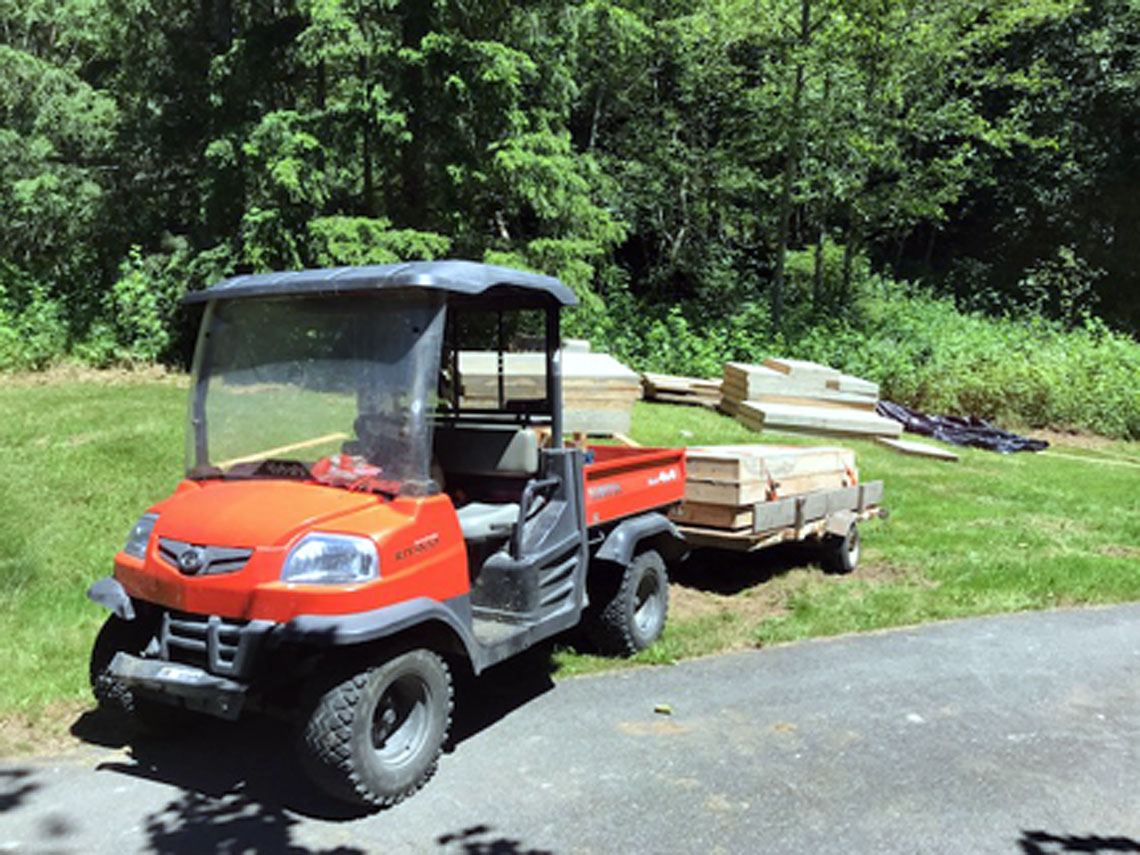
Nice rough cut beams from Paul VonSteubbe's
sawmill down the road.
View the trailer load of logs on
its way to the mill.
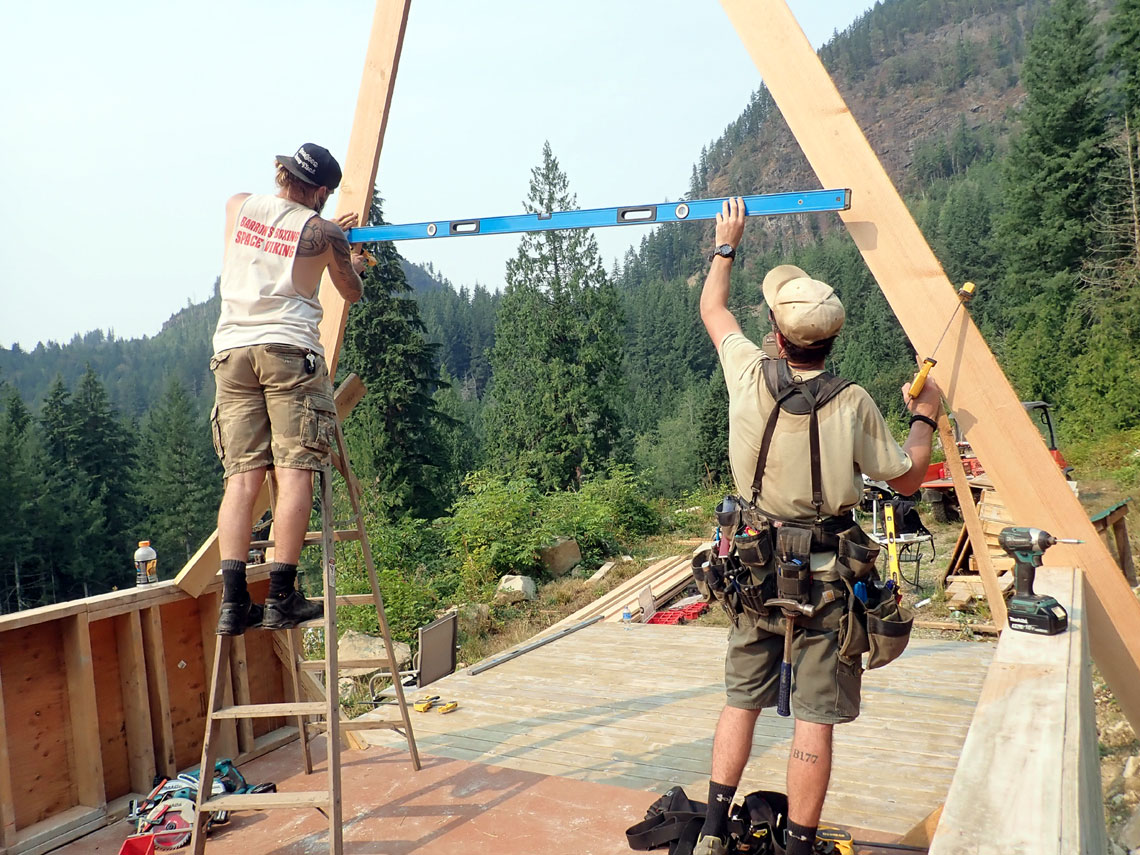
One last check to finalize our design
Note the top angles are cut and a temporary tie-piece
Loft joist set for 7' ceiling to gain as much loft-space as possible
Loft will only cover the back half of this tiny house
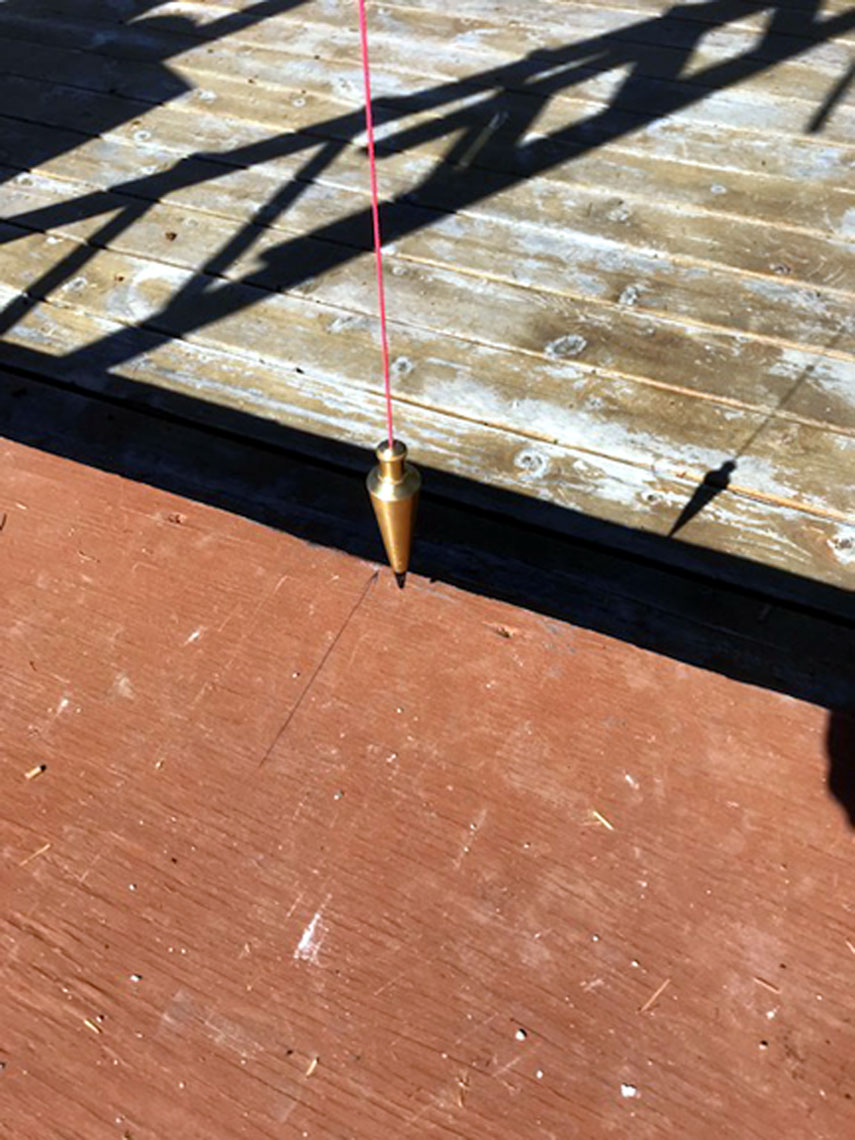
Final centering test
Plumb-bob dropped from top to center of floor pencil mark shows we are
3/4" off!
Brown floor at bottom of photo is the front edge of the A-Frame
Top of photo is the 12x12 adjacent/independent cedar deck.
Note poor choice of polyurethane/stain after two yrs of weather.
Loft joist level check for clarity
and marking of cut lines
Note bottom edges of the A-Frame rafters are set to mark the "birds
beak" cut lines. This frame will be the template for the remaining seven
frames
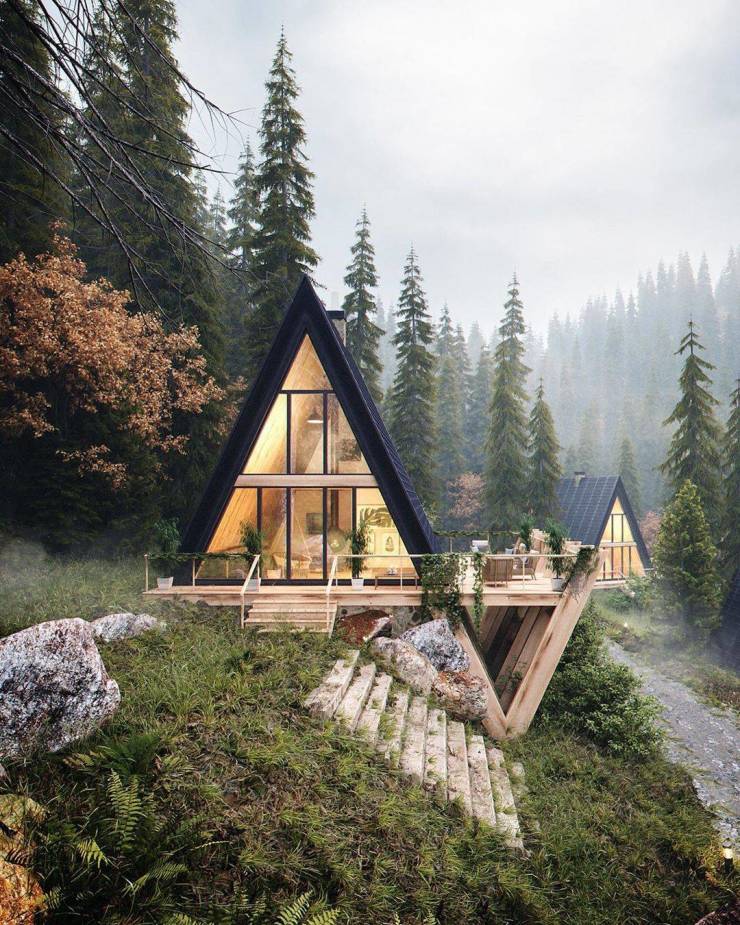
Here's the dream A Frame we found on
the internet
Final setting for the angle of the
"A"
Left it this way for a week to look
at it: 67 degrees.
Fooling around with the right angle
for the A
This is the first iteration
Second iteration
We went with this one
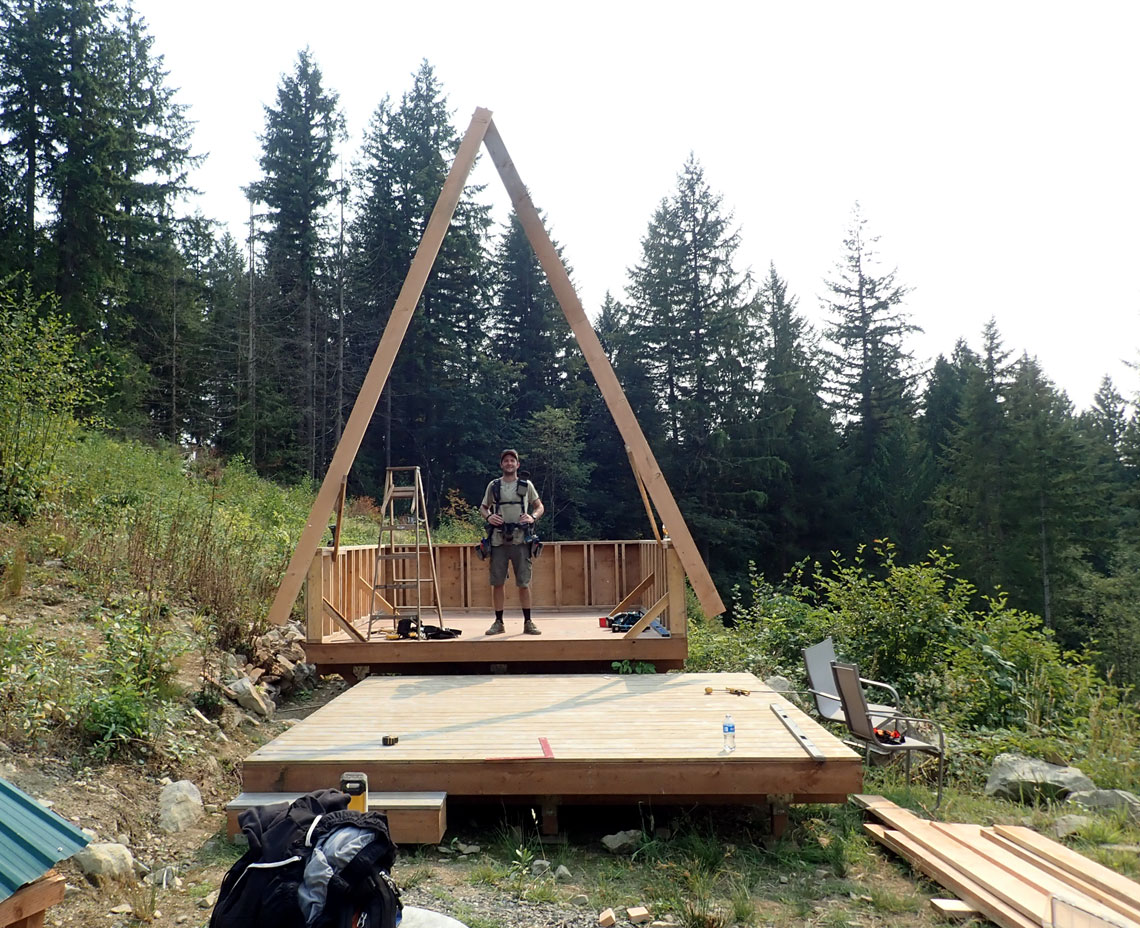
We mounted and then braced the
initial A
Next, we finalized the angles and scribed a "birds beak" for the frame
to sit on the pony wall.
The first "A" will be a template for the next six.
Estimating how much room the loft
will have with this angle.
Requirements were: you have to be able to stand up and get in and out of
bed!
View the reference sketch paper on
table
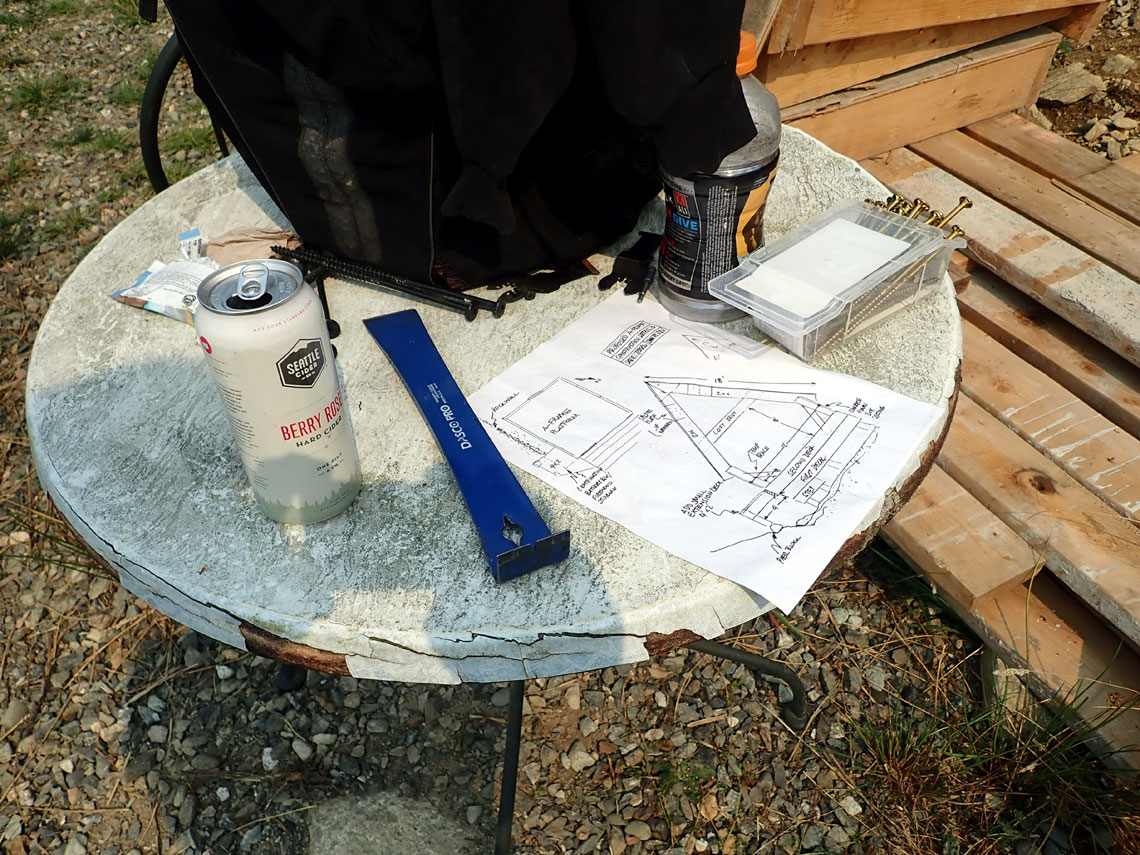
Trimming some 18'x8" rough-cut
Valhalla lumber for the main roof joists.
These are 18' 2x8 lumber rough-cut from leftover logs from the tree farm
2018/2019 logging and thinning
project
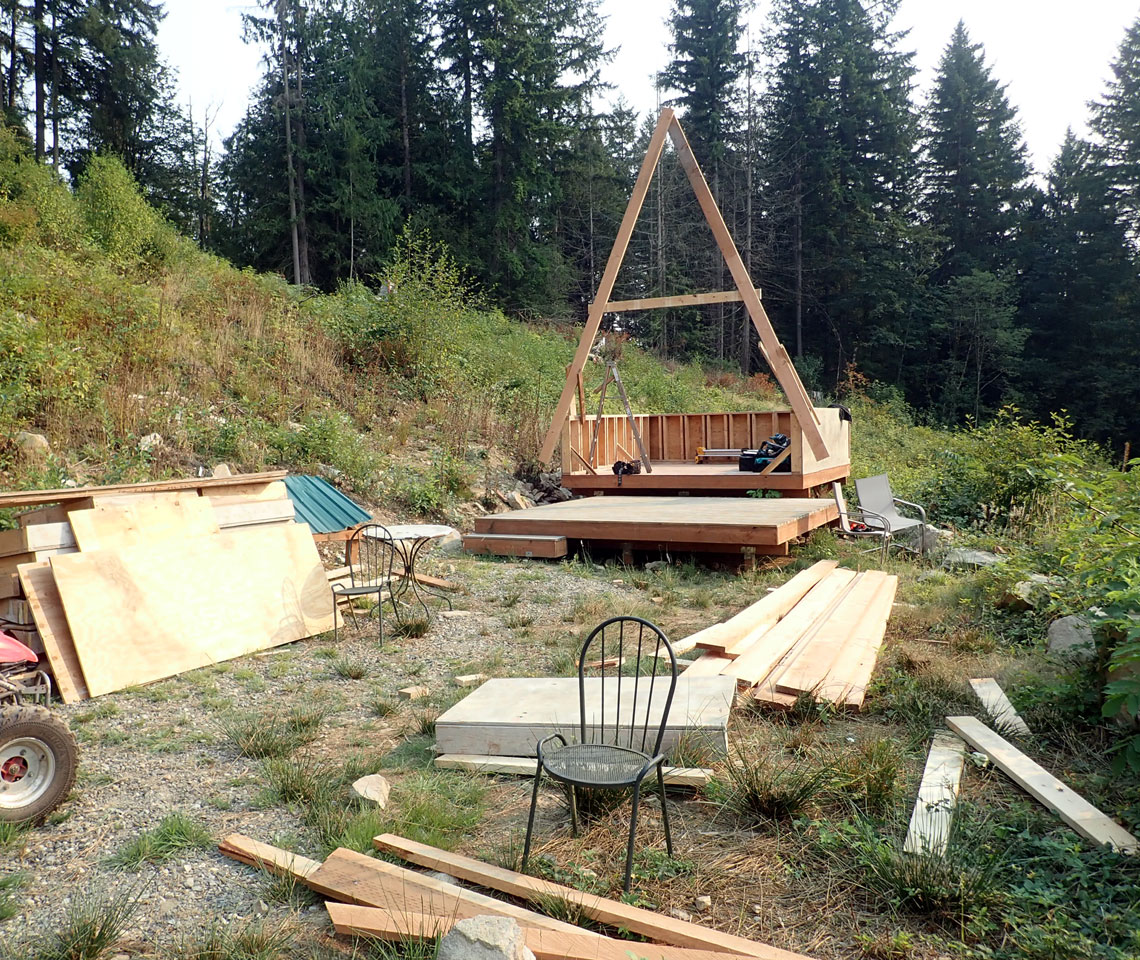
Laying out the
initial A-Frame dimensions on the adjacent 12x12 deck
We braced the open sidewalls for safety
Painted the sub floor with some
leftover Valhalla "brown"
This should keep the plywood intact until the roof is complete.
View an early sketch
developing the A-Frame idea
Chance availability of cell tower
3'x8' concrete forms.
Allowed us to build an easy pony wall for the A-Frame.
View a later sketch
developing the A-Frame structure.
We disassemble some of the the 3'x8'
ft concrete forms and retain the 2x6's and 3/4 plywood.
Here's Grier from urban
frontier making quick work of the sub floor
Picking up a few of the concrete forms from the new
ATT cell tower
Second 12x12 deck ready for an idea
Developing an idea of what we
could do with 12x12
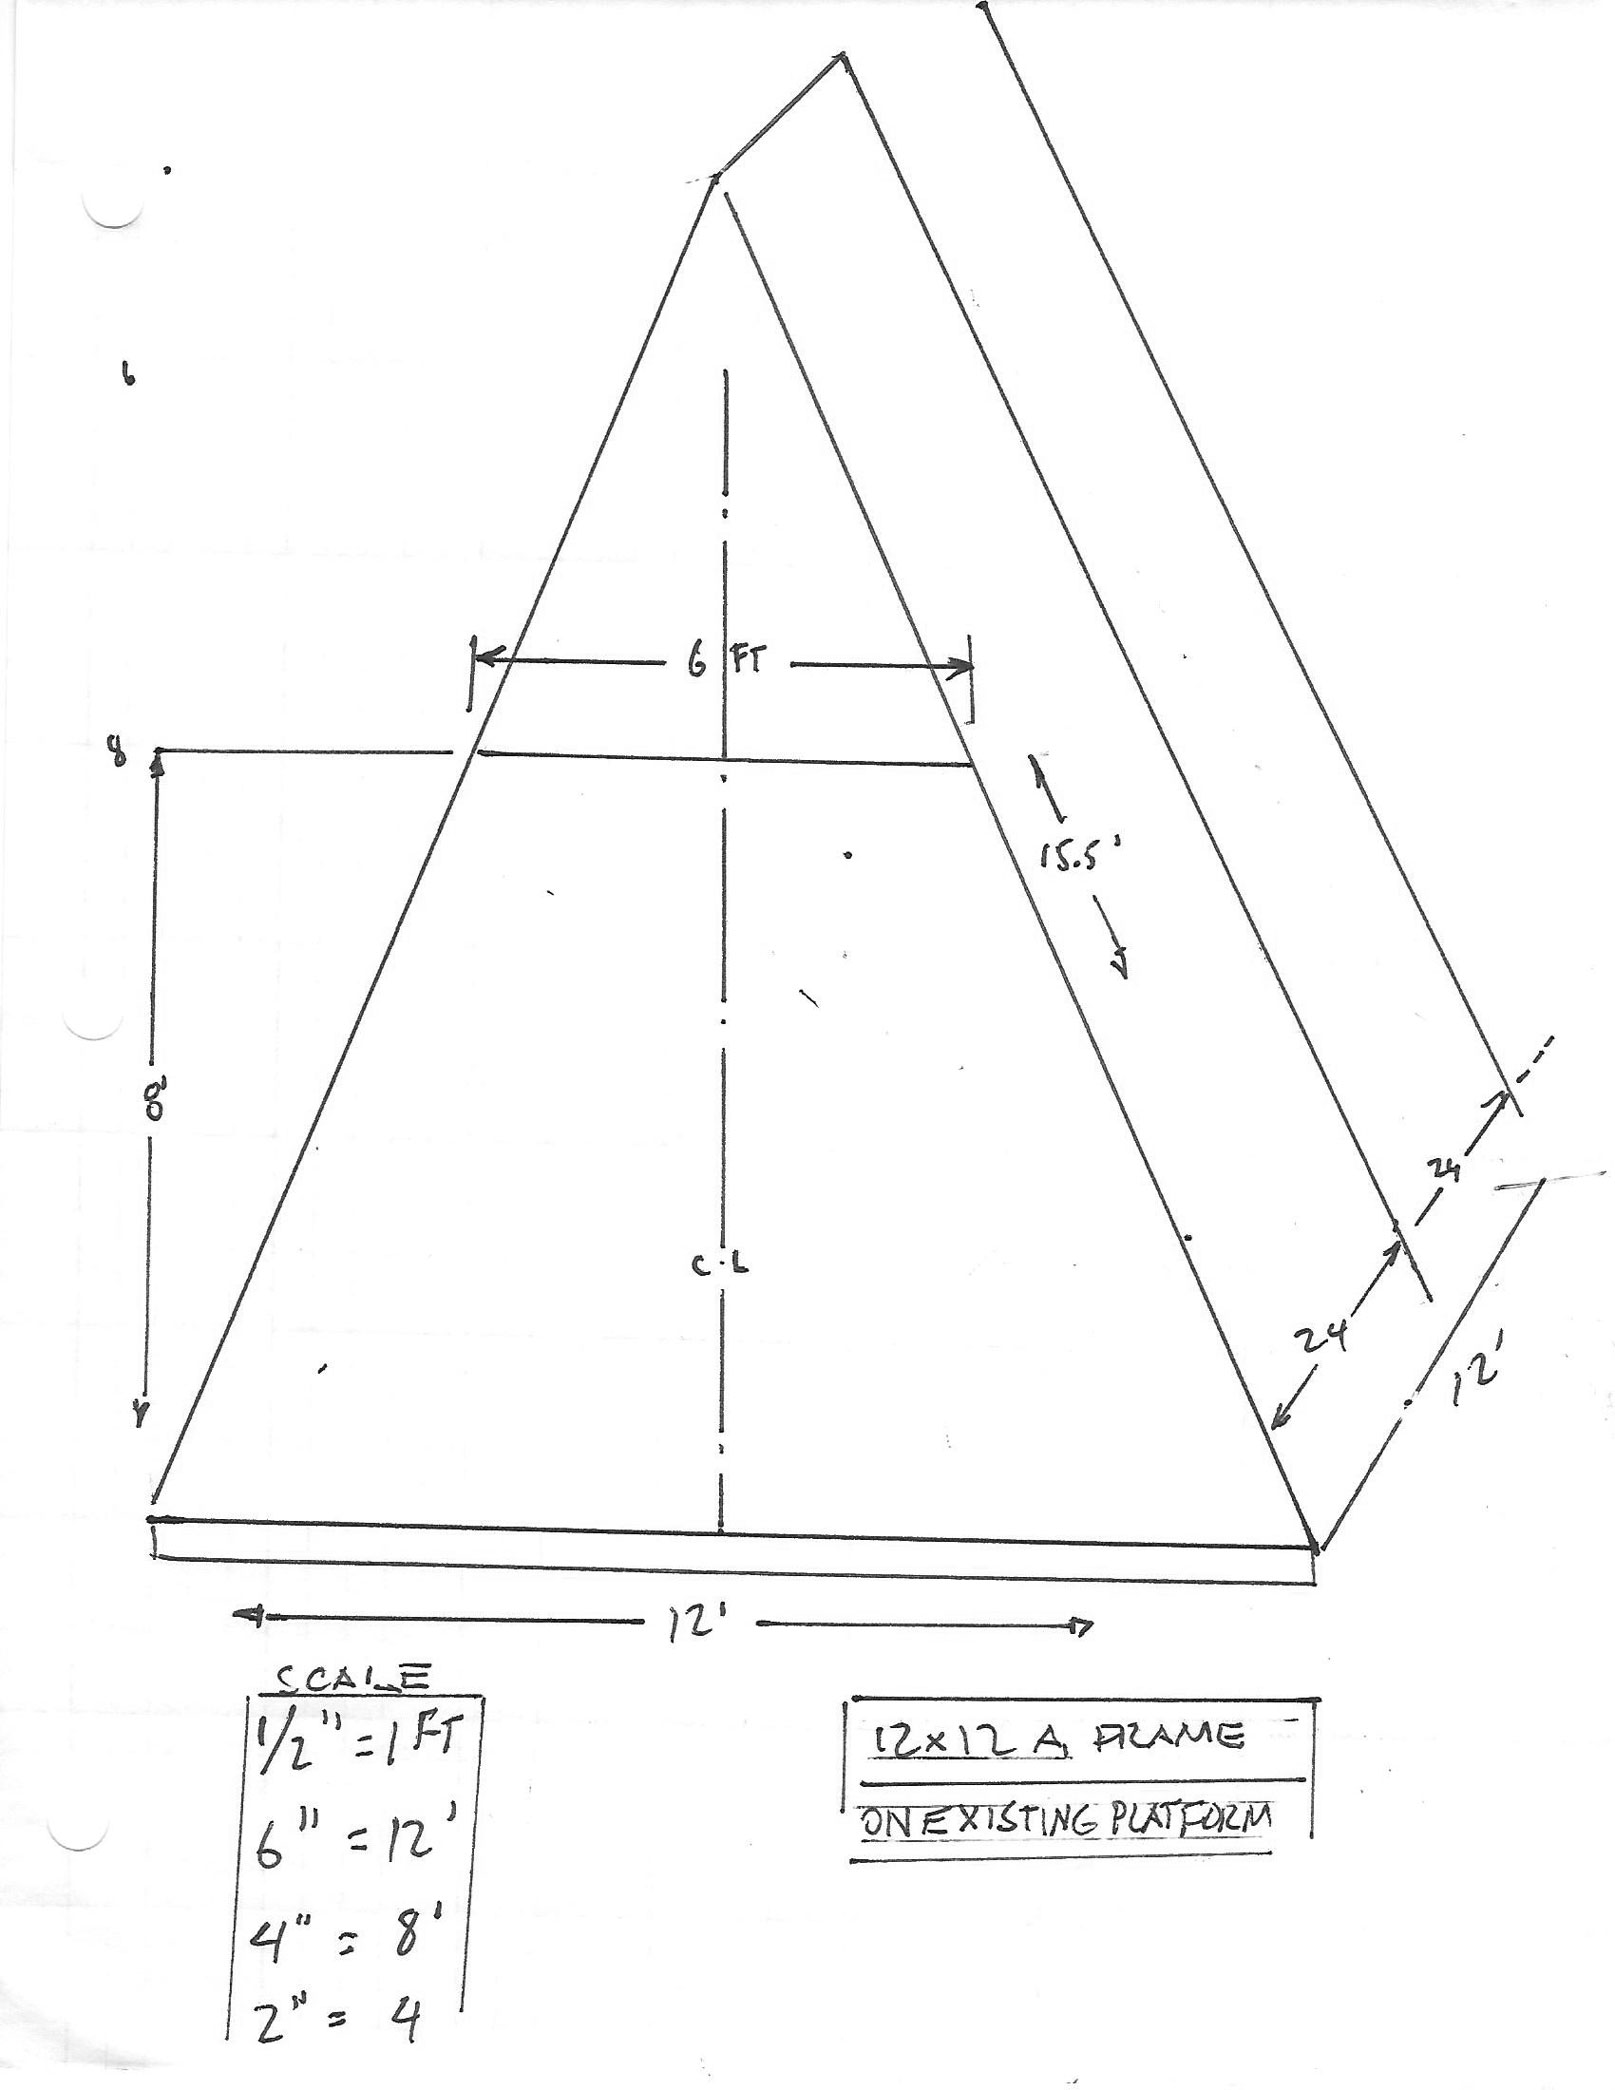
We added a second deck for a possible future
cabin/tiny house
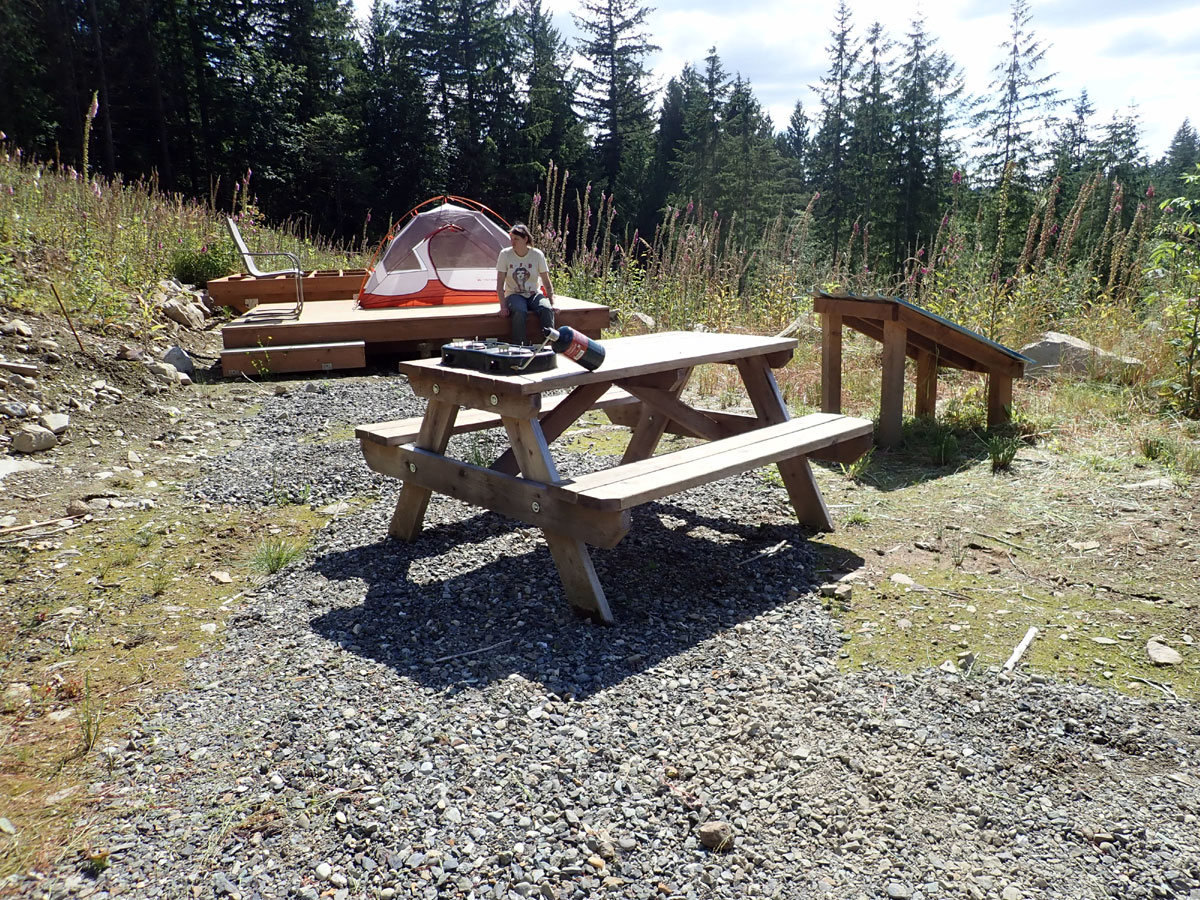
This site faces NW
Little roof on right covers your firewood or your cooler
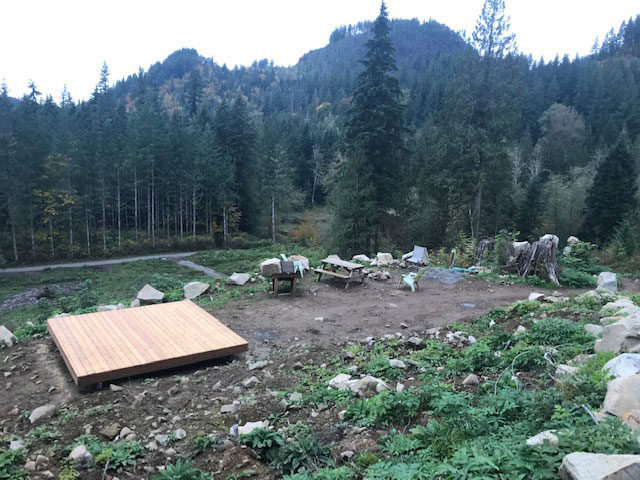
2019
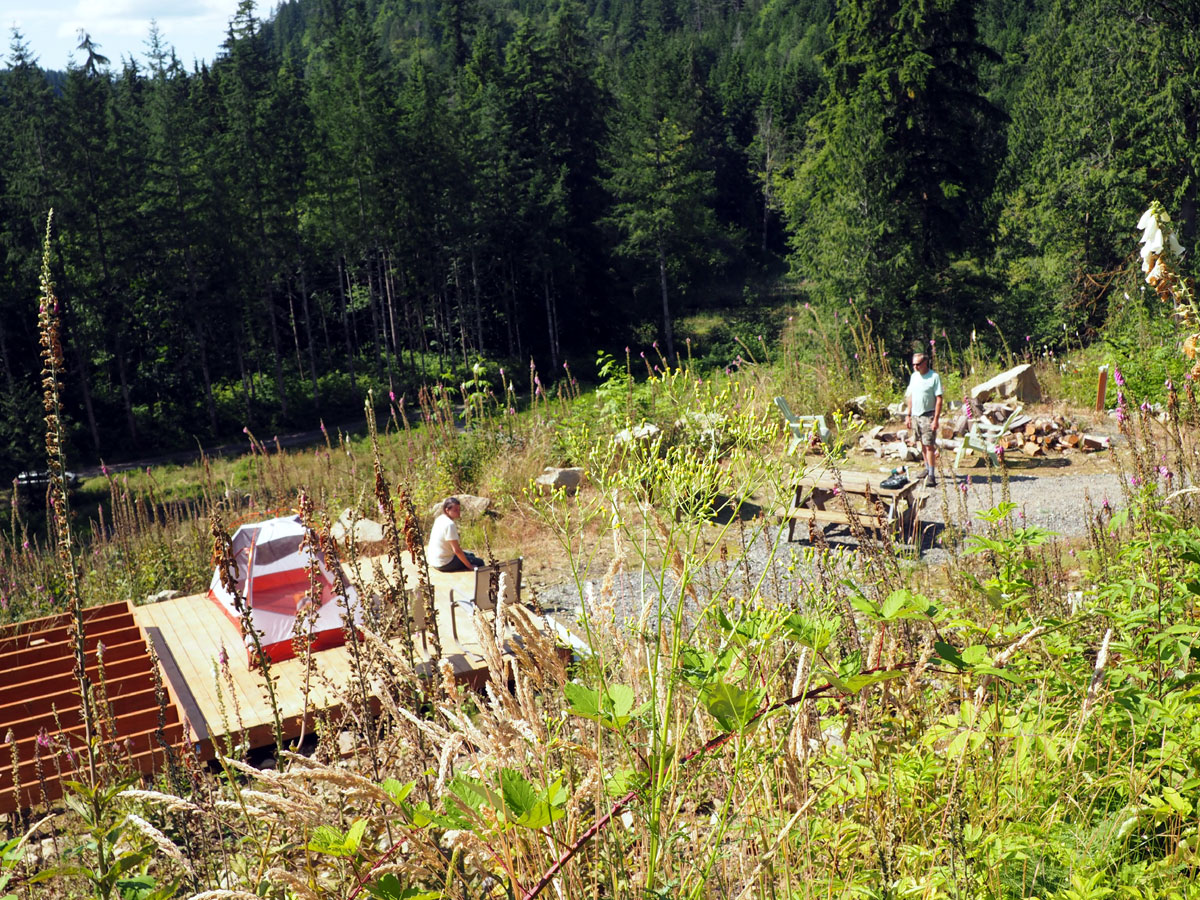
We just thought this was an excellent place for a campsite.
Here's the basics
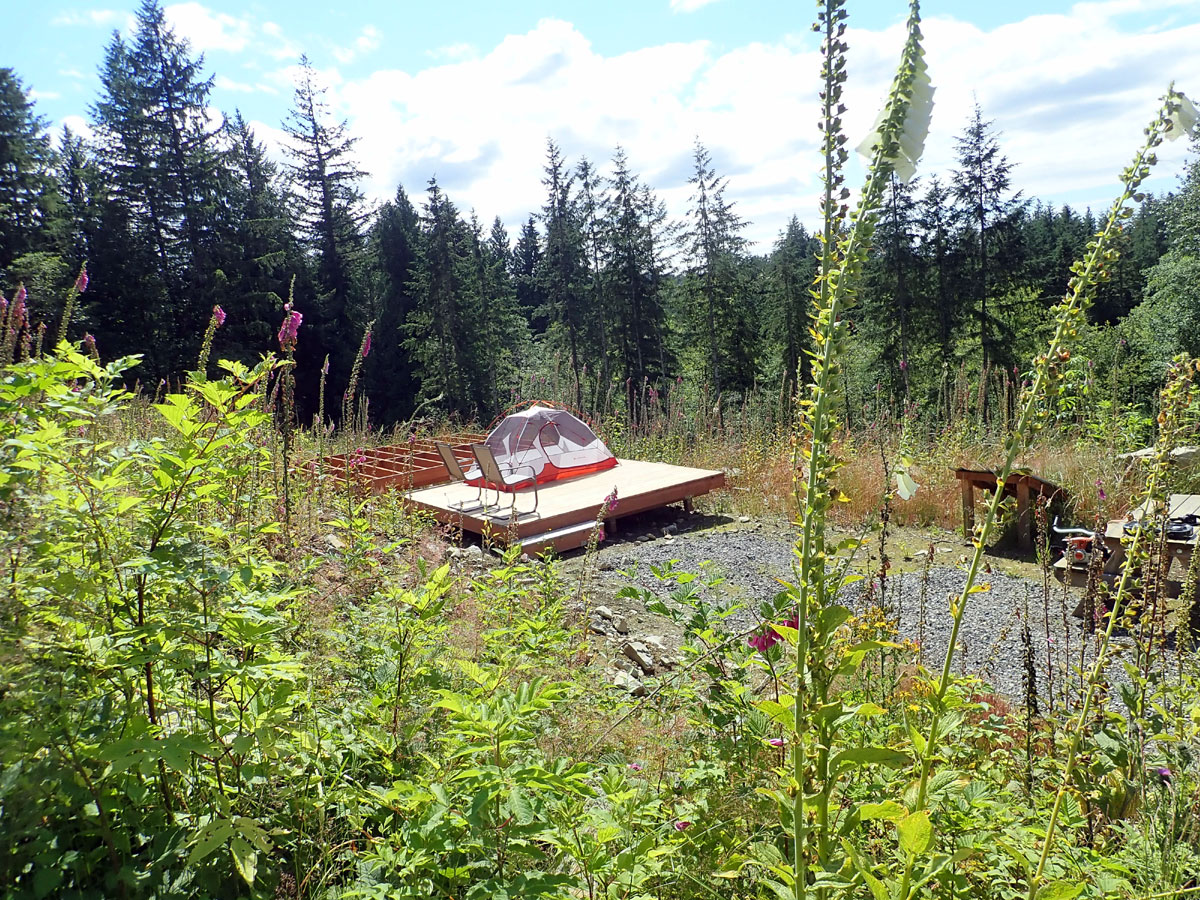
The hill and platform make a great spot to enjoy the
acres of woods, creek, ponds and trails
Cedar 5/4 decking: main platform
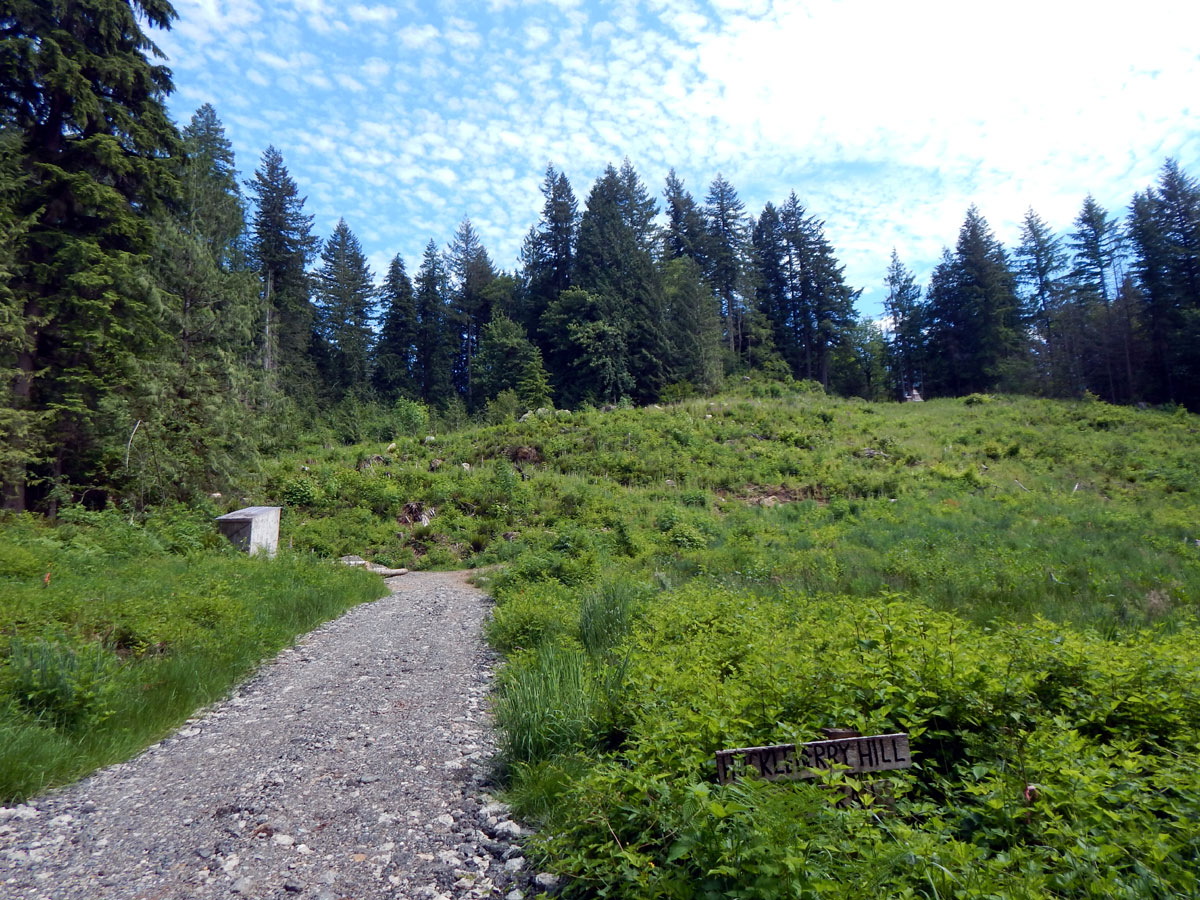
Wide shot of huckleberry hill
Stave Chapel at the top, camp is
halfway
Park at the bottom and walk up
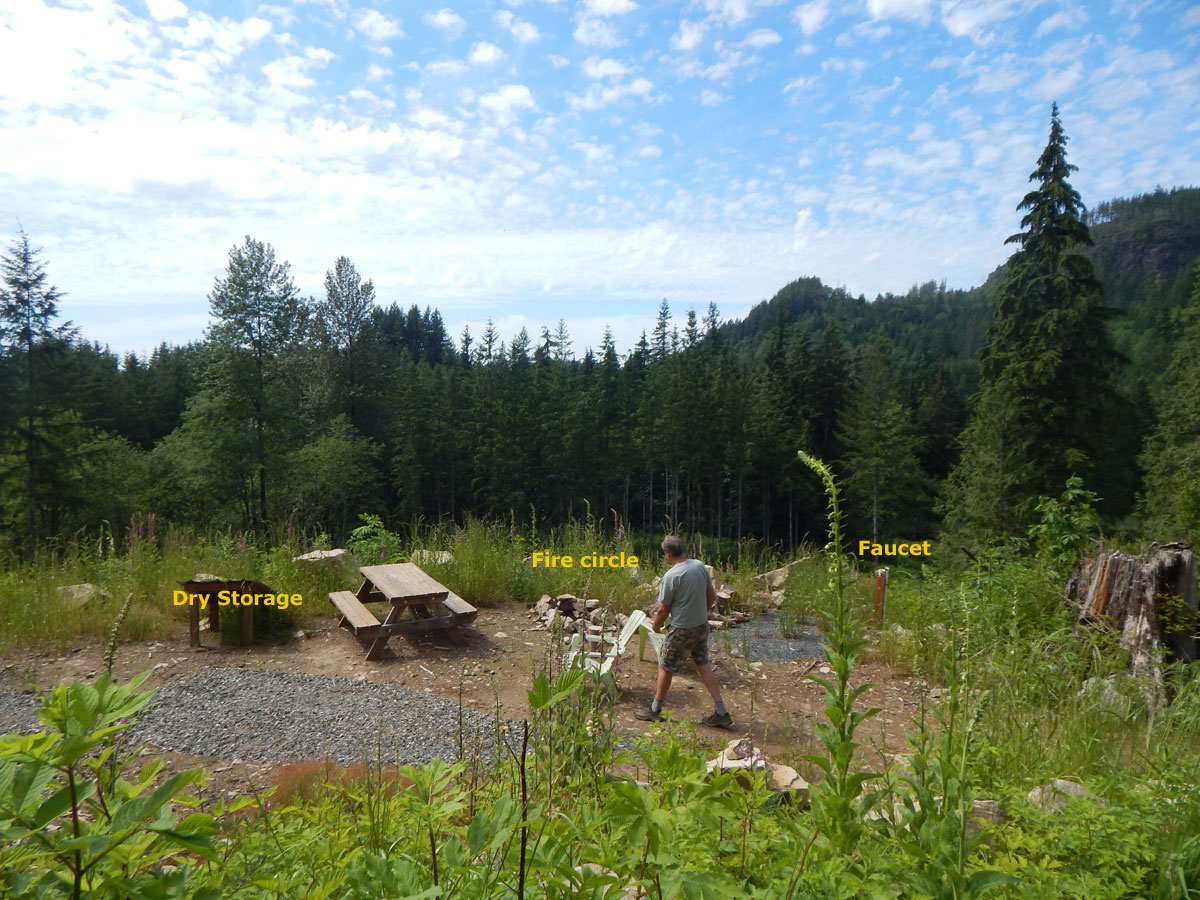
Outhouse serves the Huckleberry Hill camp on
the left
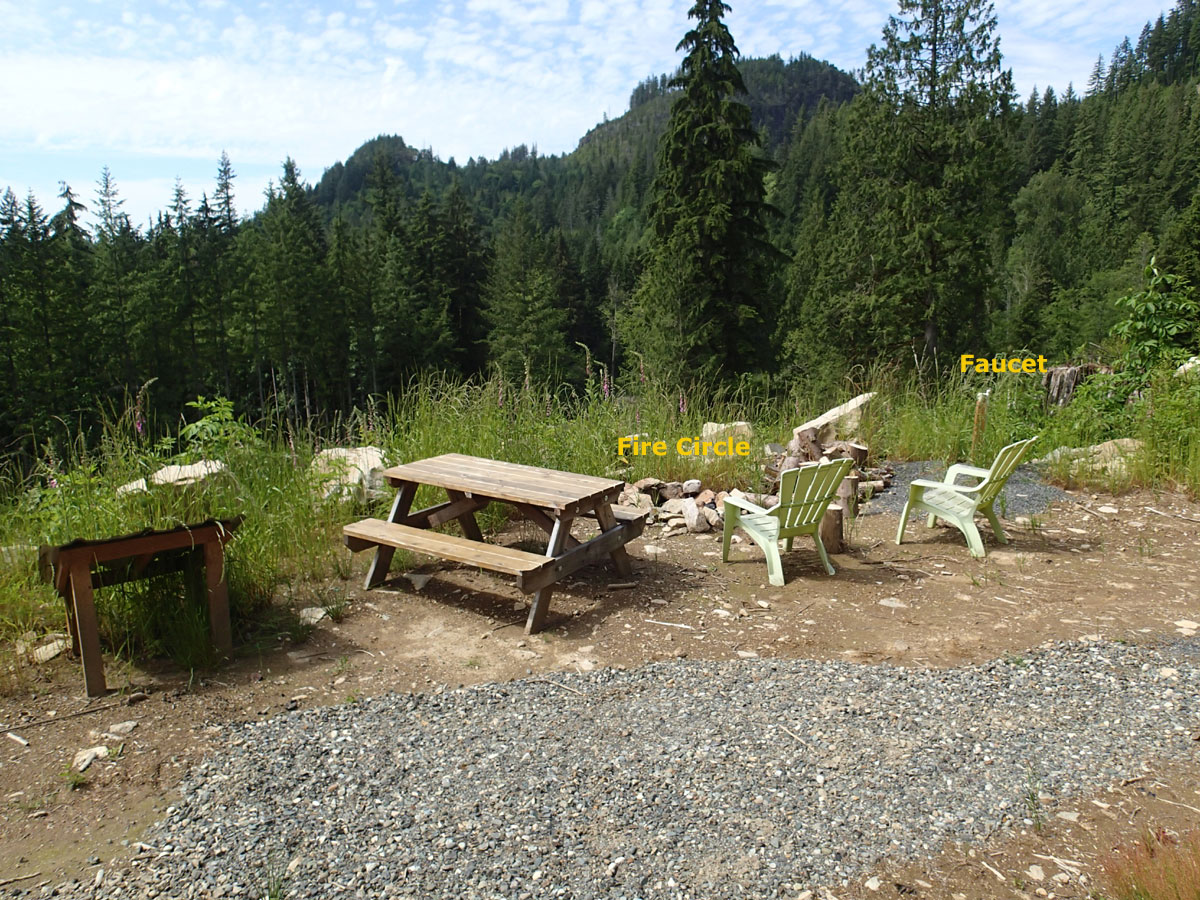
Fire Circle and spring water faucet
We need to do something more..
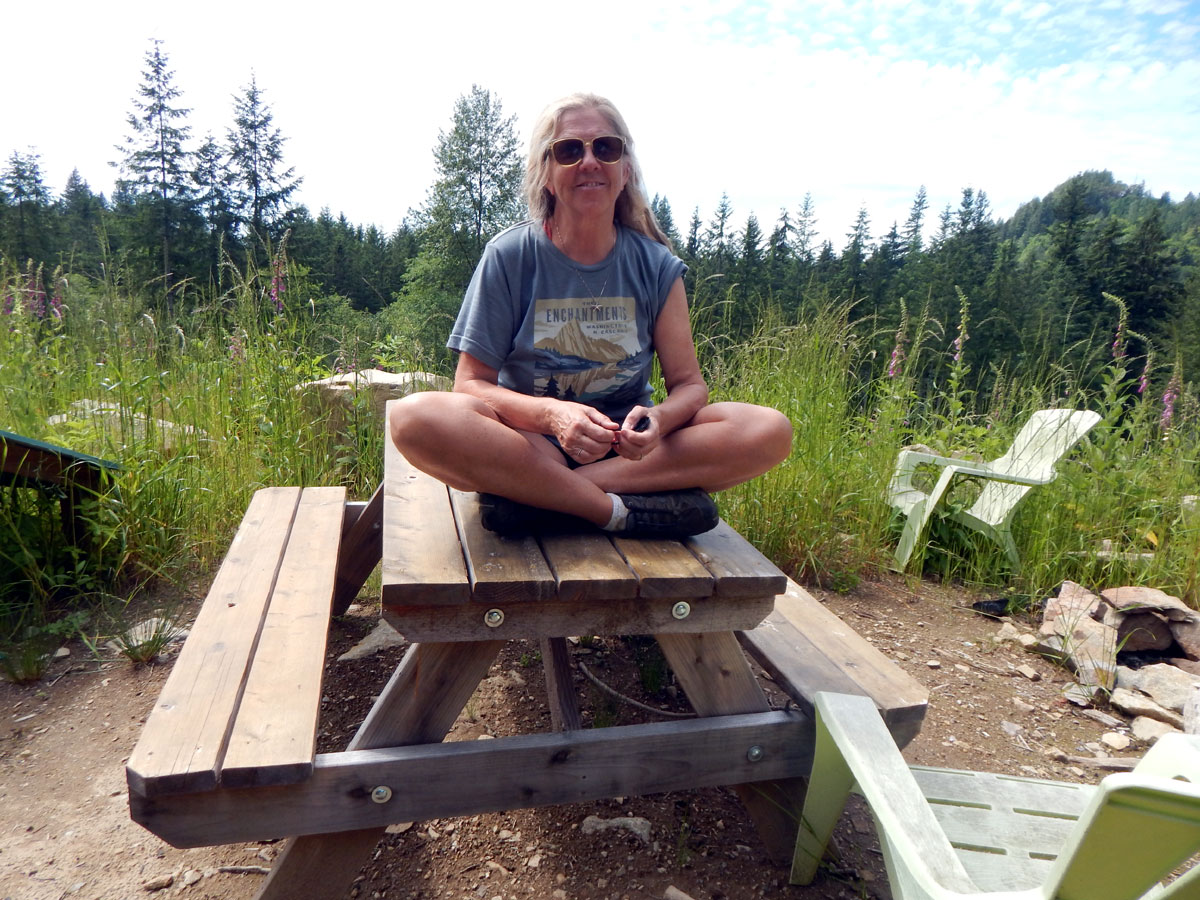
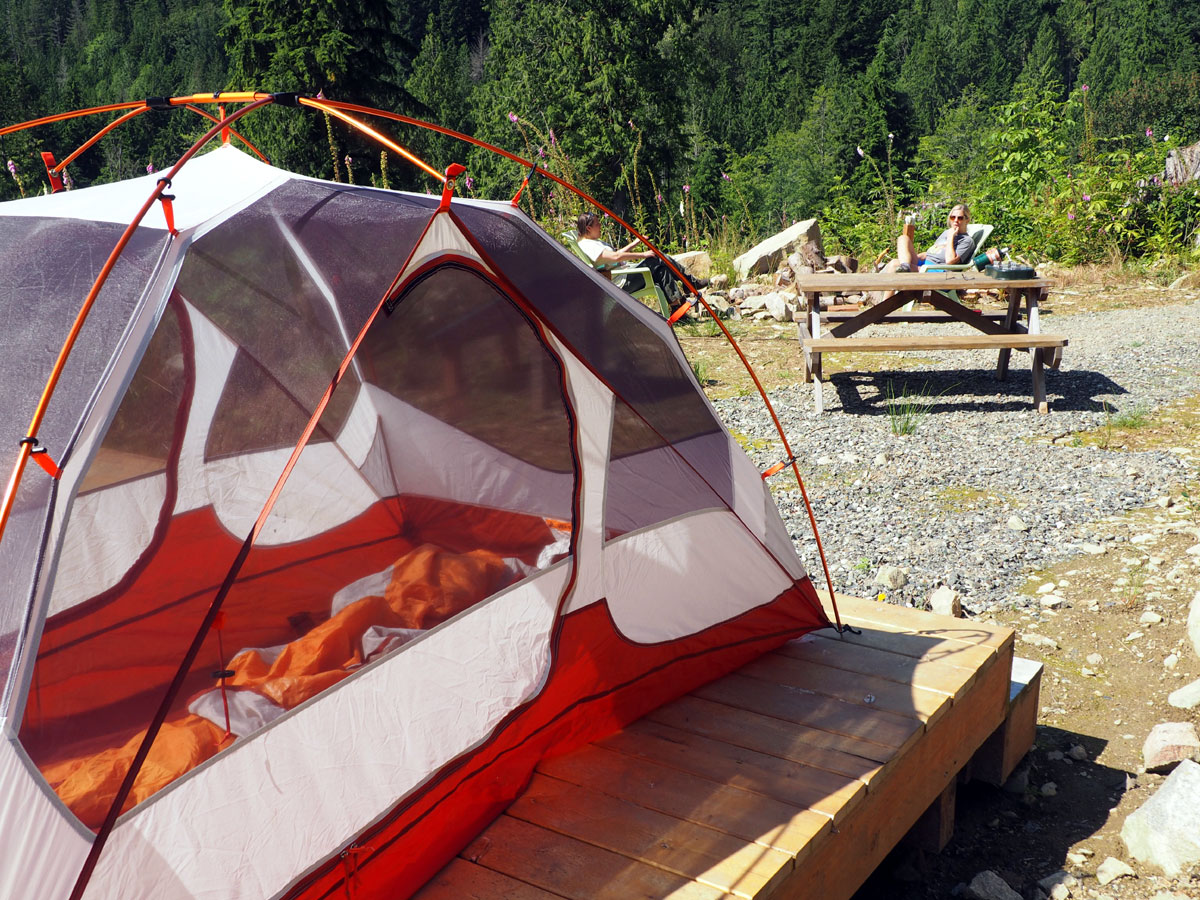
Happy Camper
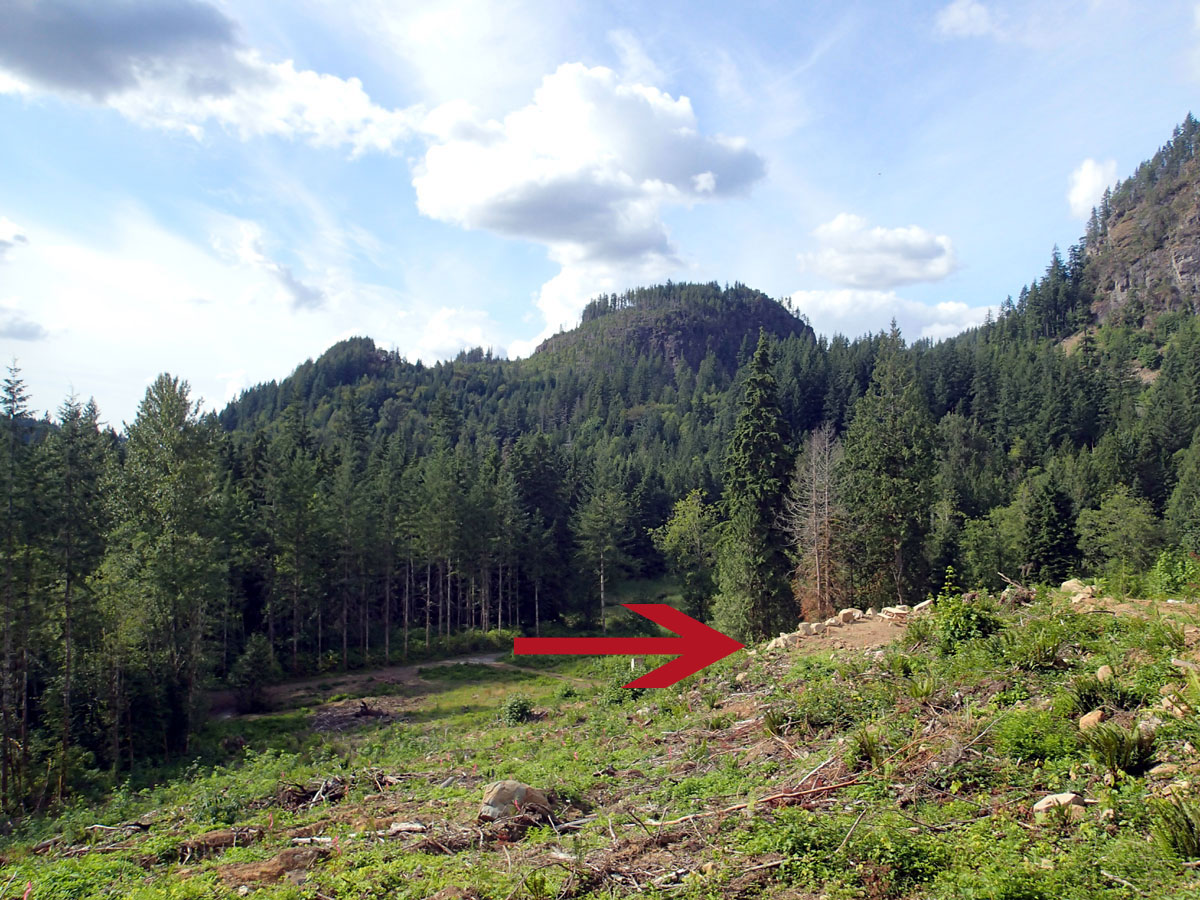
This is what we started with after the logging
project in 2018
That's Jordan Peak in the background
King Lake in the dip to the right
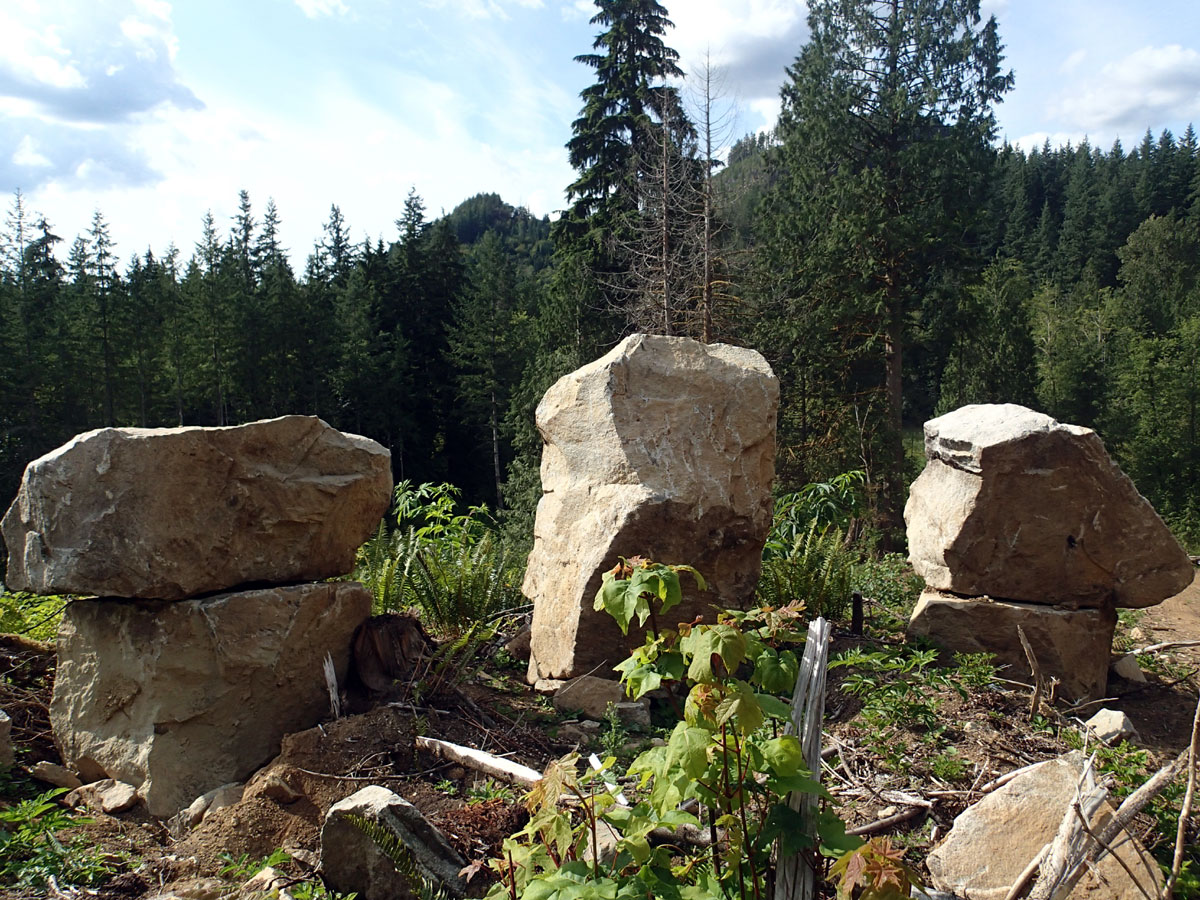
Square high quality granite blocks stacked along the
trail
Huckleberry hill is an unusual granite uplift that occurred after the
ice age.
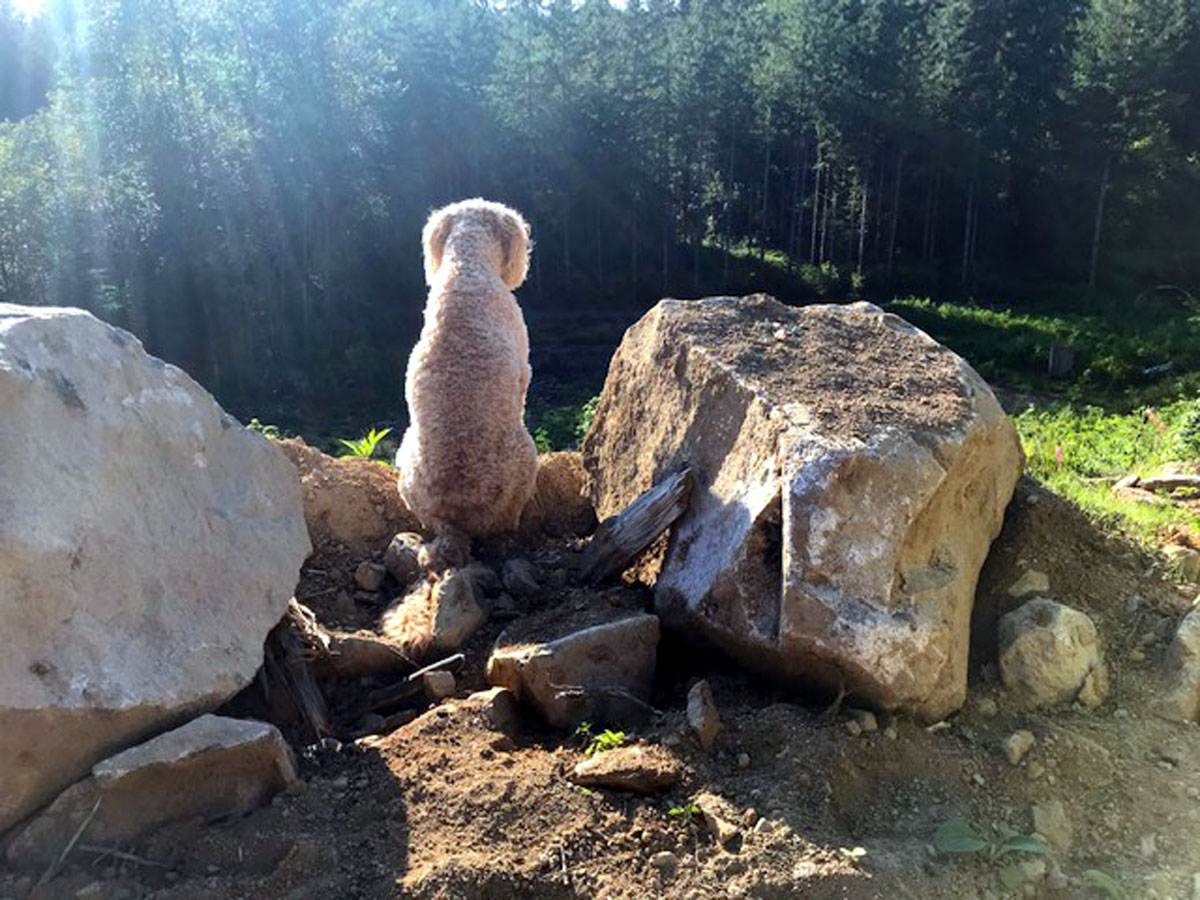
The natural high shelf gives our doodle a great view
of the surrounding area